Einleitung

Wenn dein Anki Cozmo Roboter sich ständig abschaltet oder der Bildschirm nicht aufleuchtet, folge dieser Anleitung. Diese Anleitung unterstützt Benutzer beim Austauschen des Akkus in einem Anki Cozmo Roboter, sodass dieser wieder funktioniert. Der Akku, der sich im Untergehäuse von Cozmo befindet, sorgt dafür, dass er funktioniert. Ohne einen funktionierenden Akku wird nichts anderes funktionieren. Bevor du beginnst, musst du deinen Anki Cozmo Roboter abschalten und ihn von der Anki Cozmo App trennen.

WARNHINWEIS: Achte darauf, dass du dich nicht schneidest oder dir die Fingernägel abreißt, wenn du die Hände zum Ausbauen eines Teils verwendest.

  1. BVGwjCnOliNBusPg
    BVGwjCnOliNBusPg
    5YIWpHnNPC1pIWNZ
    • Ziehe die beiden schwarzen Gummiketten vorsichtig mit den Fingern von den Rädern ab.

  2. o52DyfXwnHCTIQt5
    o52DyfXwnHCTIQt5
    WUJfX21EpOBOhIWW
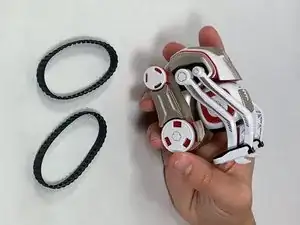
    • Entferne die weißen Radkappen von jedem der vier Räder, indem du sie mit dem Metallspudger abhebelst.

    • In diesem Schritt werden vier weiße Radkappen entfernt.

    Note: The hubcaps are the same color of your Cozmo. My Cozmo is black to gray, but the one from the creator shows a white Cozmo.

    Logan Bovan -

  3. SGNaFBANfYqlfHS4
    • Entferne die 7,5 mm lange JIS-Schraube #1 in der Mitte bei jedem der vier roten Räder.

  4. SKrRLF6hwPIqOWue
    • Ziehe die vier roten Antriebsräder über den Achsen mit den Fingern ab.

  5. xm2ZgH1AoAPHFrdC
    • Entferne die 5,5 mm lange JIS-Schraube #1 an der rechten Seite des goldfarbenen Antriebsgehäuses.

  6. VSaXHhbeInCuGANc
    VSaXHhbeInCuGANc
    IxCHyQhMmLXRjr6F
    • Entferne die 5,5 mm lange JIS-Schraube #1 an der linken Seite des goldfarbenen Antriebsgehäuses.

  7. fhfw2cYiwU2hJWxl
    fhfw2cYiwU2hJWxl
    tgb1tpPwmKZmZTgj
    • Entferne den vorderen goldenen Stoßfänger, indem du ihn mit den Fingern abziehst.

  8. yHSdvocfC4nvXnUC
    yHSdvocfC4nvXnUC
    3fMMJLTaVgISEULJ
    • Entferne mit einem JIS #0 Schraubendreher die beiden 5,5 mm Schrauben, die tief in der rechten Seite des goldfarbenen Antriebsgehäuses liegen.

    • Eine Schraube befindet sich beim Vorderrad, die andere Schraube beim Hinterrad.

  9. kIAxTNqDvi3BHiOw
    kIAxTNqDvi3BHiOw
    ZGiOhLdlZwUUbPeF
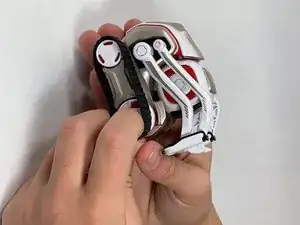
    • Nimm zwei Metallspatel und heble die beiden weißen Arme an der rechten und an der linken Seite des Gehäuses ab.

    • Setze die Spatel mit der Spitze zwischen das Gehäuse und die Arme ein und drücke sie vom Gehäuse weg.

    • Am kurzen Arm an der rechten Gehäuseseite ist eine lange weiße Feder angebracht, die entlang der Mitte des Gehäuses verläuft.

    Steps 9 and 10 contain errors that will lead to broken parts of the robot.

    The upper arms (thin) must be pry off on both sides with metal spudgers. Then remove the white axis that connects them (what is called a spring here).

    And then you need to manually rotate the lower arms to the upper position (while slightly pulling them) until the latches are aligned with the corresponding slots in the case and the arms separate from the body. No force required.

    If you remove them with metal spudgers, you will leave marks on the case and break one or more of the latches.

    Nifty -

    YES this is the good method to avoid broken arm :

    The upper arms (thin) must be pry off on both sides with metal spudgers. Then remove the white axis that connects them (what is called a spring here).

    And then you need to manually rotate the lower arms to the upper position (while slightly pulling them) until the latches are aligned with the corresponding slots in the case and the arms separate from the body. No force required.

    Madcat -

    Do note that to release the upper arms you can see the latch holding the arm in place when looking in between where the axis for the lower arm is. There you can push it in gently to release the latch using a small flathead screwdriver. This way removing the white axis is a lot easier.

    Ronald -

  10. dMu2cKPI6VTvtZKT
    dMu2cKPI6VTvtZKT
    vKTATuApSYP5AaLa
    GSCPypoMvGxuCenC
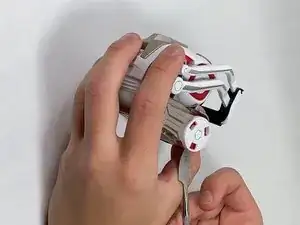
    • Ziehe die lange weiße Feder, die am kurzen Arm angebracht ist, mit den Fingern von der Mitte des Gerätes heraus und entferne sie.

    Steps 9 and 10 contain errors that will lead to broken parts of the robot.

    The upper arms (thin) must be pry off on both sides with metal spudgers. Then remove the white axis that connects them (what is called a spring here).

    And then you need to manually rotate the lower arms to the upper position (while slightly pulling them) until the latches are aligned with the corresponding slots in the case and the arms separate from the body. No force required.

    If you remove them with metal spudgers, you will leave marks on the case and break one or more of the latches.

    Nifty -

  11. muWHkXPhbSLAW5jX
    muWHkXPhbSLAW5jX
    RSFwt2t5CMf5QsjP
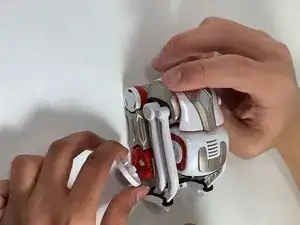
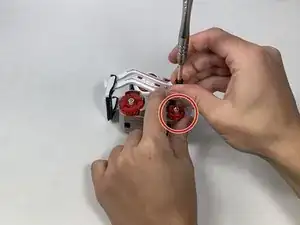
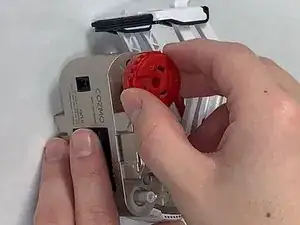
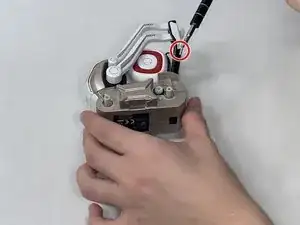
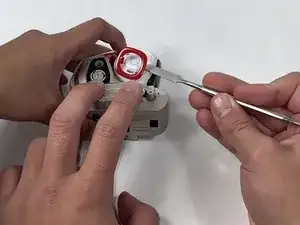
    • Löse die beiden roten quadratischen Blenden an beiden Seiten des weißen Kopfes mit einem Metallspatel ab.

  12. PpIoYaloxcwYGVFY
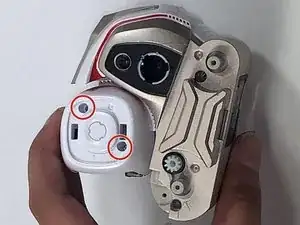
    • Entferne die beiden 5,5 mm langen JIS-#0-Schrauben auf der rechten Seite des weißen Kopfes.

  13. 6Mbu2Pmm3sXlF4Ge
    6Mbu2Pmm3sXlF4Ge
    UDVTkSuet5jFrlM3
    • Ziehe die rechte Seite des weißen Kopfes mit deinen Fingern hoch und entferne sie.

    • Entferne nicht die beiden Schrauben oder die beiden Federn an der linken Seite des weißen Kopfes.

  14. ZH4dkUQLCNTPBVgr
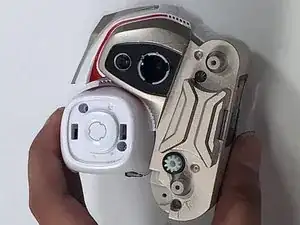
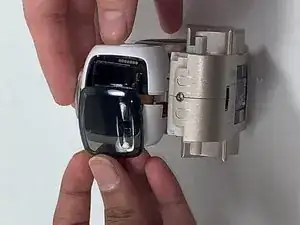
    • Ziehe die schwarze Abdeckungscheibe an der linken Seite des Kopfes mit den Fingern heraus und löse sie ab.

  15. 4umM6pecZQ3aeaDr
    • Ziehe die linke Seite des weißen Kopfes zusammen mit den beiden daran befestigten kurzen weißen Federn mit den Fingern ab und entferne sie.

  16. sHvkeB5RJdJbOYWG
    sHvkeB5RJdJbOYWG
    NJSdUWSqHOnS2AID
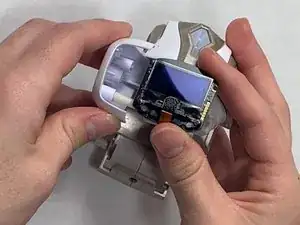
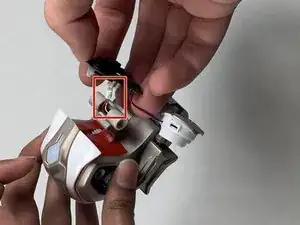
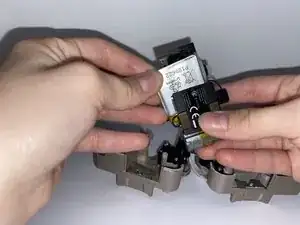
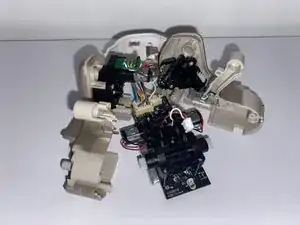
    • Löse den kleinen weißen Stecker in der Mitte des Körpers mit den Fingern ab und trenne die schwarze LED Kameraplatte zusammen mit dem weißen und goldenen Lautsprecher ab.

    • Die Kamera und der Lautsprecher sind verbunden und werden gemeinsam entfernt.

  17. VGylEHXUJH1KQvMt
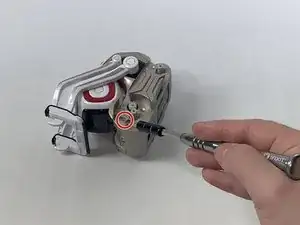
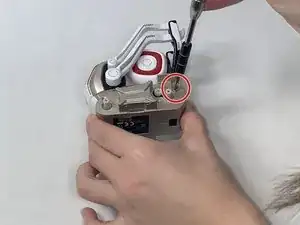
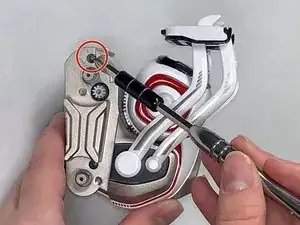
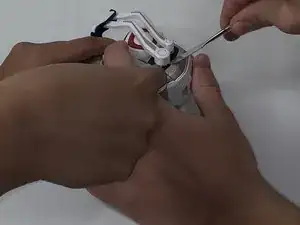
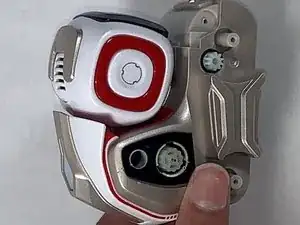
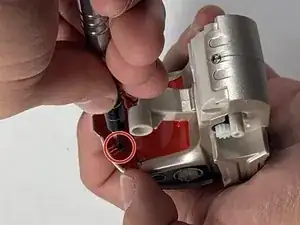
    • Entferne die zwei 5,5 mm Schrauben von dem roten Teil des Gehäuses, das hinter dem weißen Kopf war, mit einem JIS #1 Schraubendreher.

  18. URlWJjTCP4usUkBS
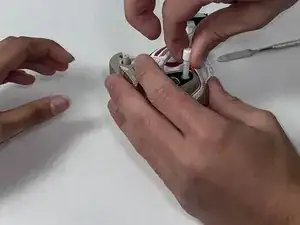
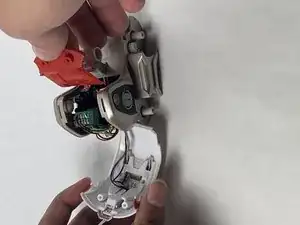
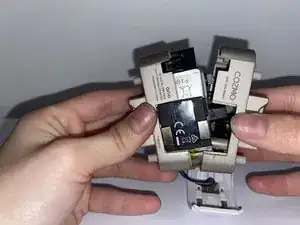
    • Ziehe den roten Teil des Gehäuses, der hinter dem weißen Kopf war, mit deinen Händen und Fingern ab.

  19. 1TgxIoIyKZKgUVBZ
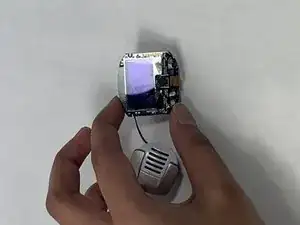
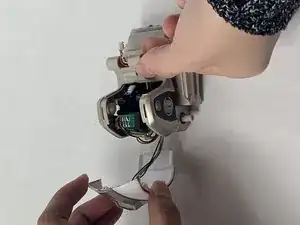
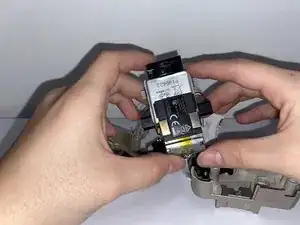
    • Ziehe die weiß-goldene Rückseitenverkleidung, die mit dem LED-Panel verbunden ist, mit deinen Händen und Fingern ab.

    • Ziehe den Stecker nicht ab und entferne die weiß-goldene Rückenverkleidung nicht. Lass die weiße und goldene Rückenverkleidung hängen.

  20. WtVLFCBLQX1lsvFv
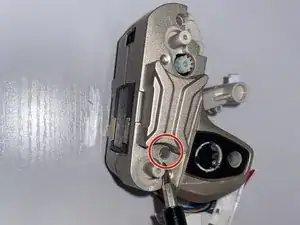
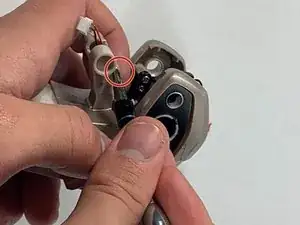
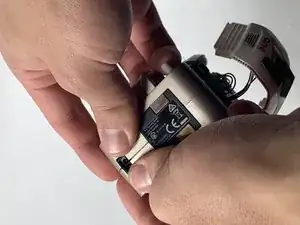
    • Entferne die 7,5 mm Schraube aus der Goldleiste in der Mitte des Gehäuses mit einem JIS #1 Schraubendreher.

  21. mSUBGbvmSxE4caSe
    mSUBGbvmSxE4caSe
    usp2cQqbstMaKCfM
    MC4WnAromfKS63QL
    • Ziehe die beiden Hälften des Goldkörpers mit deinen Händen und Fingern auseinander.

  22. O1HsrBdrxDFDRLJY
    O1HsrBdrxDFDRLJY
    AJTdRNKRbsR2TJJX
    gxFZXBEBPXYSUgGc
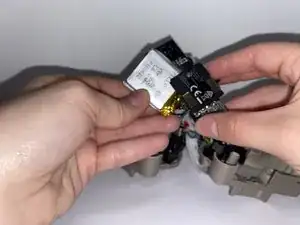
    • Entferne den silbernen Akku von der Unterseite des Ladegeräts und verwende deine Hände und Finger, um ihn herauszuziehen.

    • Behalte im Auge, wo die roten und schwarzen Drähte beim Zusammenbau eingesteckt werden.

    The battery is soldered into place, not plugged in. Perhaps this author confused this with Step 17 where they unnecessarily desoldered the speaker?

    Scott -

    Max is a 750mAh akku after soldering old and new red and black cable.

    Attention: to power on you need to put cozmo to usb basestation. All 3 green led then working.

    (Or let us know to have a startup hint without prop. base) ;)

    Marc US -

Abschluss

Um dein Gerät wieder zusammenzubauen, folge den Schritten in umgekehrter Reihenfolge.

Marisa Gay

Mitglied seit: 28/10/21

717 Reputation

15 Kommentare

To detach the battery, don’t forget to remove the solder from the two points where the battery connects. (For Cozmo Collectors edition w/ press-able backpack button)

Kaptyn -

The soldering steps are wrong. Don't desolder the speaker, but do desolder the battery.

Scott -

Step 9 should be operated while the arm is at his maximum height.

Eric Hueber -

Yes, excellent tip!

ticom3 -

Step 9 is the hardest from far ! And you'll easily get hurt by your tools. Moreover, reassembling cozmo will certainly deteriorate it. You should operate the big part of the arm (the lower) while the arm is at his maximum height. To do so, disassemble the white part of the fork by prying it down. Then remove the 2 screws of the upper arms, and remove these arms. Eventually, the big arm is easy to remove (or to reassemble).

Eric Hueber -

Is it necessary to disconnect the screen? I am having trouble getting the little white connector pulled off and am wondering if I can just leave it connected

Alina -

Its possible to carefully allow it to hang also.

Steve Hoffland -

This guide doesn't even mention soldering. Is it possible to replace the battery without soldering?

Bobo -

no its not posseboul

sorry for the bad english

Johan Schütz -

I’m pretty sure I messed mine up. It turns on and everything is good after the battery replacement. But, now when I put it on the charger, the charger and the robot continuously flash and I don’t think it is charging. I may have messed something up on the soldering. Anyone have these symptoms after replacing the battery?

By the way, these instructions for disassembling and reassembling with the notes are spot on.

Noel Baggett -

If battery is soldered on correctly should the Cozmo be able to power on before being reassembled?

Jared Katz -

Hum, the arm may take a wrong "zero" position in memory at startup, but it's not sure. This is a good question. If you make the test, give us a feedback please. Merry Christmas !

Madcat -

You do not need JIS screwdrivers. I have used Phillips head screwdrivers on Cozmo before. Also, for step 8, (at least for non button Cozmo’s) be careful. The non button’s back screws will strip more easily.

Thallium -

I cut the cables of the old battery and attached a 620mah Battery Type 503040, 3,7Volt, Bye soldering. The 503040 is almost to big to fit in. You have to compress/bend the contacts one the Battery to fit but worked well.

Anton Späth -

You do not need a JIS screwdriver, Philips works, I tried with Philips.

Ultinium -