Einleitung
Sollte dein Nvidia Shield Pro Android TV laggen, nur Klickgeräusche machen oder überhaupt nicht booten, dann verwende diese Anleitung, um die Festplatte auszubauen/zu ersetzen. Die einzigen hierfür benötigten Werkzeuge sind ein T6-Torx-Schraubendreher und ein Öffnungswerkzeug aus Plastik. Der Vorgang des Festplattentauschens ist nicht wirklich schwer. Beachte trotzdem, dass die Kabel relativ fragil sind, also sei vorsichtig, wenn du an ihnen arbeitest.
-
-
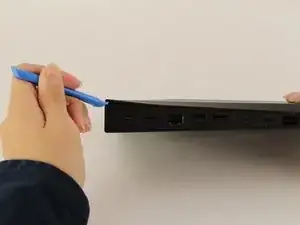
Drehe den Nvidia Shield Pro Android TV auf seine Rückseite.
-
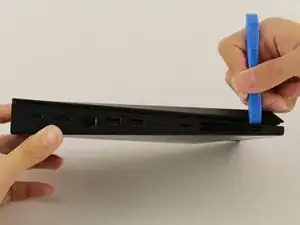
Um die untere Abdeckung des Nvidia Shields zu öffnen, schiebe dein Öffnungswerkzeug aus Plastik, in der Ecke beginnend, den Spalt entlang.
-
Falls die Verwendung eines Öffnungswerkzeug aus Plastik zum Entfernen der unteren Abdeckung zu schwierig ist, verwende einen Metallspatel.
-
-
-
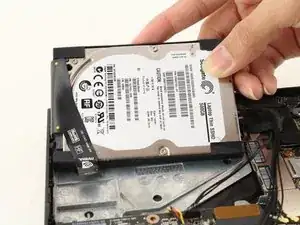
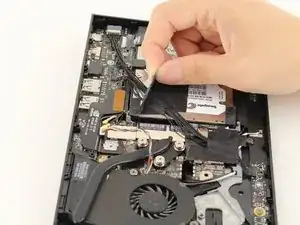
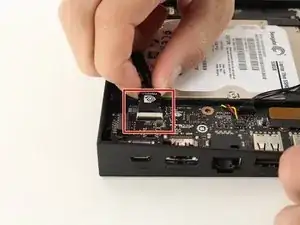
Entferne die zwei Stücke Klebeband, die auf der Ober- und Unterseite der Festplatte zu finden sind.
-
-
-
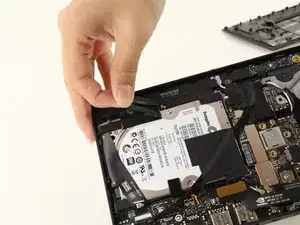
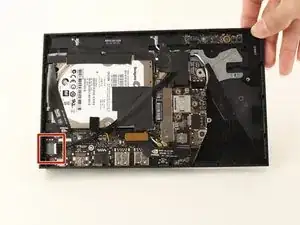
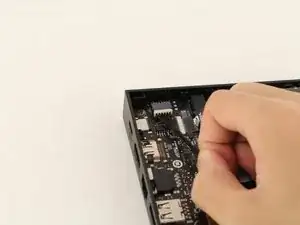
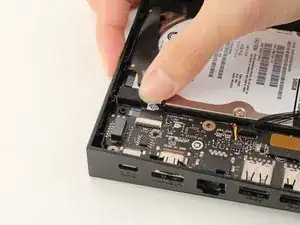
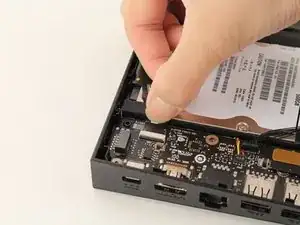
Neben dem leeren Anschluss, wo die schwarzen Kabel an der I/O-Platine (bezieht sich auf Schritt 2) eingesteckt waren, kannst du die Plastiklasche der I/O-Platine lösen, indem du die Lasche, mit deinen Fingern, vom Anschluss, wegziehst.
-
-
-
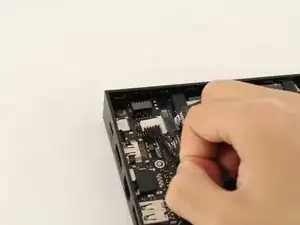
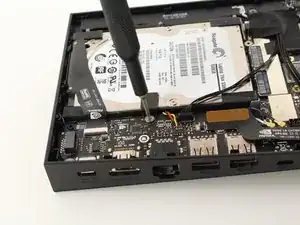
Löse die Schraube auf dem Metallteil mit einem T6-Torx-Schraubendreher und lege das Metallteil, nach dem Lösen der Schraube, weg.
-


Um dein Gerät wieder zusammenzubauen, befolge die Anleitung in umgekehrter Reihenfolge.
4 Kommentare
The problem with this, is after replacing the Malfunctioning or Corrupted drive that will not solve the problem.
The device still will not run if there’s no Software or Firmware installed onto the new drive.
Can iFixit include that procedure of getting the new drive running.
Because you cannot clone a corrupt or bad drive .
ok and now what??? nothing happens… there is no image on the new disk… how do i get it to boot? just stays on green light with no image on screen no boot
I agree with John, please describe how to flash the image on the new drive.