Einleitung

Wenn dein PS4 DualShock Controller das verbreitete Problem mit driftenden Joysticks hat - der Joystick bewegt sich automatisch ohne Berührung und bleibt bei Berührung stehen -, kannst du mit dieser Anleitung das Problem ohne Löten beheben, da viele Leute damit keine Erfahrung haben dürften.

Der Controller muss komplett zerlegt werden, damit der linke Joystick gereinigt und bearbeitet werden kann. Diese einfache Reparatur ist mit minimalen Kenntnissen leicht durchzuführen.

P.S. Die Handschuhe müssen nicht getragen werden, wenn am Controller gearbeitet wird.

  1. MQ3qGUJEBabZOfPe
    MQ3qGUJEBabZOfPe
    CR5MxSbpgWThHNdC
    G6tHW2FyPbuXJ1Or
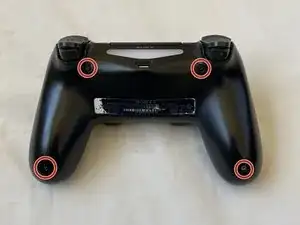
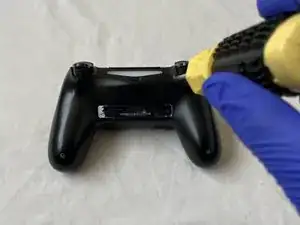
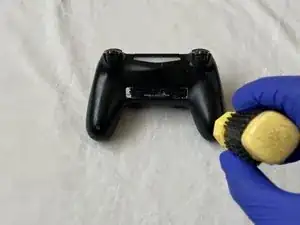
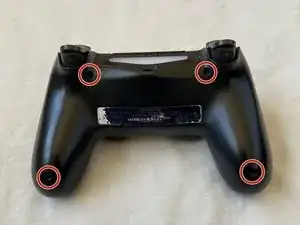
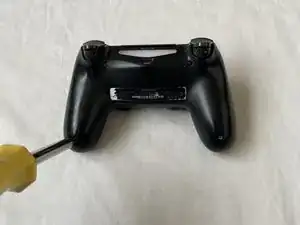
    • Entferne die vier 6 mm Schrauben auf der Rückseite deines PS4-Controllers, mithilfe eines Kreuzschlitzschraubendrehers #00.

    I found a #0 screwdriver a better fit.

    thnews -

  2. NVlWA32pXNqVJLfF
    NVlWA32pXNqVJLfF
    PSGOL5RmqDMMA6DZ
    5vBTvfTAyto2wOZr
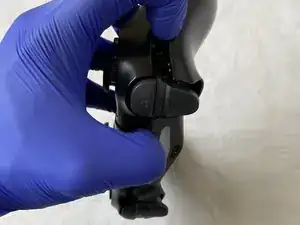
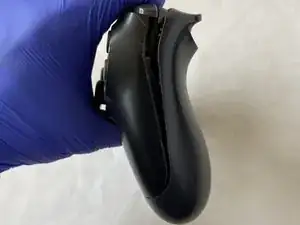
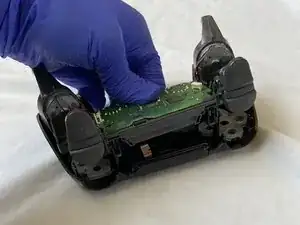
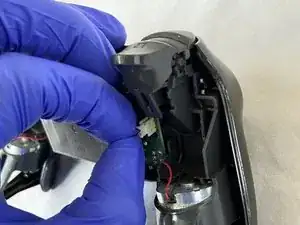
    • Nimm die Rückseite vom Rest des Controllers ab, indem du die Front und die Rückseite gleichzeitig voneinander wegziehst.

  3. rhftCg1cbH6lLsLo
    rhftCg1cbH6lLsLo
    ZKraUp6iTMOn15st
    GBgDAHBsPgaJP5tF
    • Sei vorsichtig, wenn du die Rückseite vollständig entfernst, weil das blaue Kabel kaputt gehen könnte.

    • Ziehe leicht am blauen Kabel, um die Rückseite von der Front zu trennen.

    • Die Vorderseite mit der Platine wird später auseinandergenommen.

  4. QcjerMCYKeTVboKg
    QcjerMCYKeTVboKg
    VqkkqUXFcQfXAA3v
    TatbHfc2mc2SvDGQ
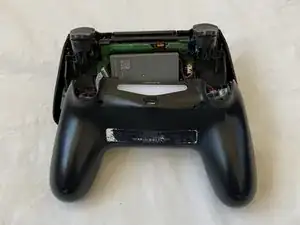
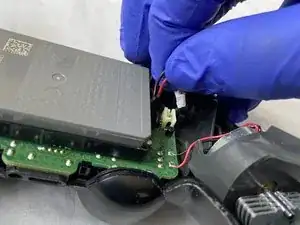
    • Drücke den Akkustecker an den Seiten zusammen, ziehe ihn nach oben und trenne ihn von der Hauptplatine ab.

    • Pass auf, dass du beim Ablösen des Akkusteckers keines der Kabel vom Anschluss abreißt.

  5. eNMTRgUm3SuMUMdq
    eNMTRgUm3SuMUMdq
    kbrhbnjES2EOI3dG
    RAeyJdCAvrvGRBCQ
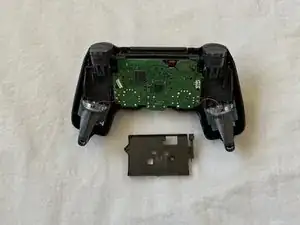
    • Nutze einen Kreuzschlitzschraubendreher #00 und entferne die einzelne 6 mm Schraube, die an der Platine angeschraubt ist.

    • Wenn die Schraube entfernt ist, ist der Batteriehalter lose, was bedeutet, dass du den Batteriehalter trennen kannst, indem du ihn nach oben ziehst.

    • Entferne das Batteriekabel.

  6. le2kZs5GrDTHYDE2
    le2kZs5GrDTHYDE2
    KjWrhErfpoiQZxid
    ndZB43RRFiVSaMJs
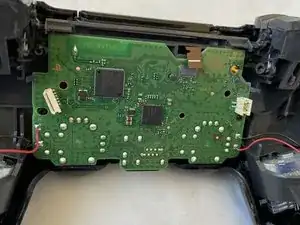
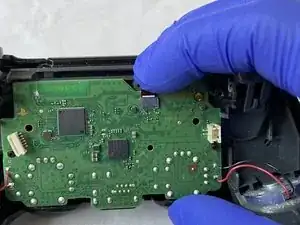
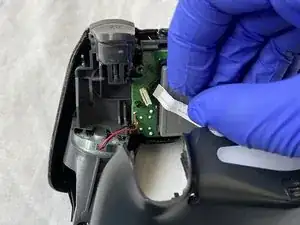
    • Löse das Kabel von der Platine, indem du es nach oben ziehst.

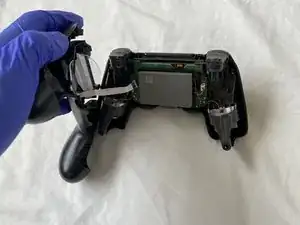
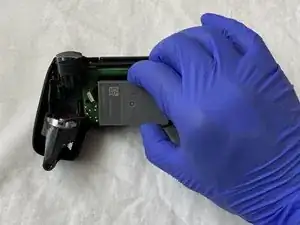
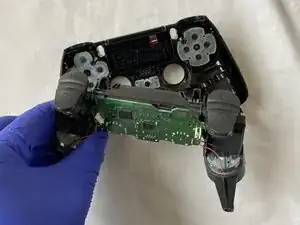
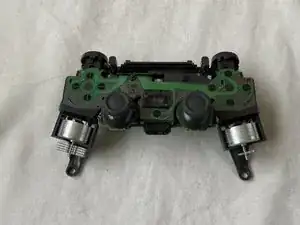
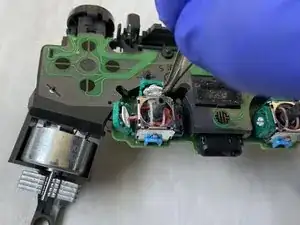
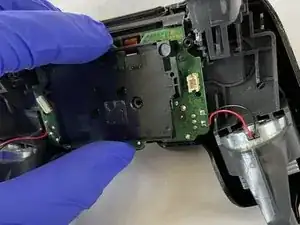
    • Ziehe die Platine von der Frontschale ab, sodass sie vollständig von allen anderen Teilen getrennt ist.

    Bis hier hin, bin ich gefolgt. Ich habe von diese Punkt an die Kontaktflächen der Druckschalter gereinigt, ( Isopropanol). Mit Wattestäbchen vorsichtig abgewischt. im abgenommenen Deckel die Silikonschablone mit den Gegenkontakten abgezogen und gereinigt (Isopropanol) und die Kunststoffknöpfe aus der Deckelhalbschale gedrückt. Danach alle Knöpfe und die Laufhülsen gereinigt ( Malzbier/Zucker entfernt) und wieder zusammengesetzt. Beim nächsten mal reinigen würde ich jetzt noch einen Stoß Teflonspray in die Hülsen geben. Nun alles rückwärts wieder zusammensetzen. Danke für die gute Beschreibung. (MaC)

    Martin Carstensen -

  7. HKWTZymHchGFTYRe
    HKWTZymHchGFTYRe
    ghTKWUNtCFyHbdri
    • Entferne den linken Joystick, indem du ihn hochziehst, bis er sich ablöst.

  8. TUMZPbNJIZRiycZQ
    TUMZPbNJIZRiycZQ
    XuwraGg1BnlNCivk
    • In jeder der grünen Kammern befindet sich ein Spalt, der das silberne Gehäuse von der grünen Kammer trennt.

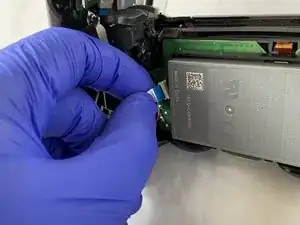
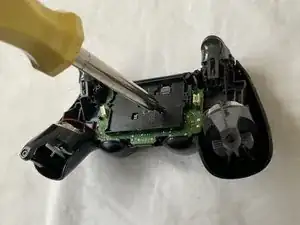
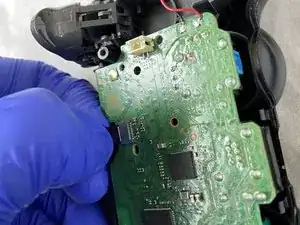
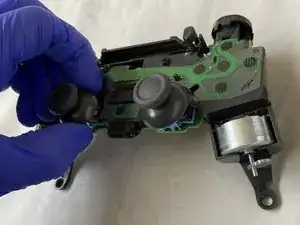
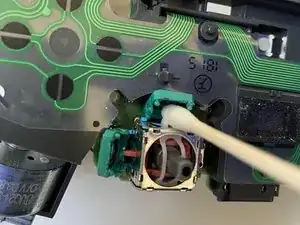
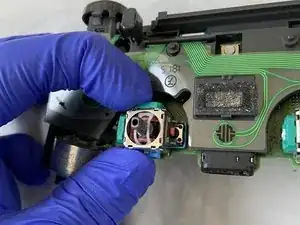
    • Nutze den Schlitzschraubendreher, um die Kammer zu öffnen, indem du die Spitze des Schraubendrehers in die Lücke steckst und nach innen drückst.

    • Öffne die grünen Kammern sehr vorsichtig, damit sie nicht kaputt gehen oder von der Platine wegbrechen.

  9. OXRaNfQ3WRZr2PDS
    OXRaNfQ3WRZr2PDS
    KOlqqGZOJZJdHFfG
    1UpBoLbcTeVCGCLM
    • Sobald die Kammern offen sind, nimm dir eine Pinzette und entferne die weißen Scheiben von jeder der Kammern.

    • Nimm ein Wattestäbchen und tränke es in 90% Isopropylalkohol bzw. Isopropanol.

    • Nutze das vollgesaugte Wattestäbchen um damit die Kammern gründlich zu reinigen.

    • Lass die grünen Kammern für 5-10 Minuten trocknen, bevor du fortfährst.

    The white disk is an intricate part. Each contains 2 semi-circular <0.5 mm thick wires which are exposed and elevated, and serve to relay proportional motion to the motherboard, Do not tug, pull, press or break any of them as that may cause that plane of motion to be permanently disabled / enabled.

    Ming L -

    I just took apart my controller to clean out the analog part because I have a bad drift in my left analog and it's making me crazy. So I have all the screws in one spot and the white disks together in another I'm organized when I do this type of stuff, but when I looked again I only had 3 disks. There are 4 chambers and I'm positive that I took 4 disks out, but now I'm trying to convince myself there were only 3 to begin with which I know is wrong. Can anyone confirm if there are 3 or 4.

    Tommy Levins -

    There are 4. One for vertical and one horizontal for each analog.

    This is why I do them one at a time. No point leaving the chambers open so that dust ir other things can collect in them while you work on the others, plus in just reduces the risk of misplacing or damaging one of the disks.

    Clean one, place disk back in, snap shut, onto the next one. And only bother doing both sticks if both have a problem, don't fix what isn't broken. You want to open these chambers as little as possible as each time you do, the solder gets weaker and weaker from bending. Do this too much and you'll end up having to replace the entire analog stick.

    darkseany223 -

    For that matter, don't even clean both chambers on one analog if it's only Drifting in one single direction.

    For example If it's drifting straight down with no diagonal tilt to it, there's no need to bother with both.

    Just remember that the chamber on the SIDE controls vertical and the chamber on the TOP controls horizontal. So in this case, clean the one on the side as it is the source of the downward drift.

    darkseany223 -

    With my Dualshock 4 controller, the drift problem was not resolved after cleaning the disks and chambers. On a second try, I switched the disks on the joystick (disk from left chamber went into top chamber and vice versa) and that resolved the drift problems for me. Or I cleaned better the second time, could also be.

    Johan -

    Always keep your busted remotes. Never know when a spare part can come in handy. Ribbon cable stop working or fried battery? Thumbstick rubber peeling off? Tried to fix a drifting mote but accidently bent the metal on one of the discs? Snag em from your old dead water damaged remote.

    Frankenstiening motes has saved me hundreds.

    darkseany223 -

    mine had black discs but everything else is the same as shown here. Each disc has delicate contacts that must be cleaned with isopropil alchohol too, but wit great care they can bend easily (happened to me, had to use magnifier and super fine tweezers to repair) Excellent guide btw!

    regislefeuvre -

  10. 6SM5lx6FQtKKsLip
    6SM5lx6FQtKKsLip
    rFWjwvRpACwWp3Ul
    JNHG6Mu3wwhqLxDo
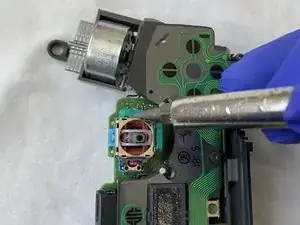
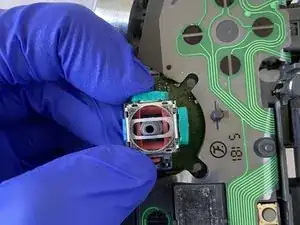
    • Platziere die zwei weißen Scheiben mit einer Pinzette wieder in die grünen Kammern.

    • Schließe beide Kammern, indem du sie fest in Richtung der silbernen Box drückst, bis sie ein Klickgeräusch von sich geben.

    When putting those discs back in place be very careful not to bend the semi circular “springs” out of shape. If they get out of shape they will need replacing. Also, make sure that both clips on the disc pass through the hole on the plasic chamber. It may appear to “click” back into place but the chamber won’t sit right and this will affect the efficacy of the repair.

    Richard Donaghue -

    Hello, my discs were black and not white, but it must depend on the version of the controller. However, the circular spring of the disc seems to me to be in bad condition, not quite flat. Is this normal? Also, where can I get some?

    Pierre Toscane -

  11. HeUk2uAjUmZl1wUM
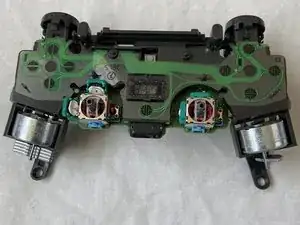
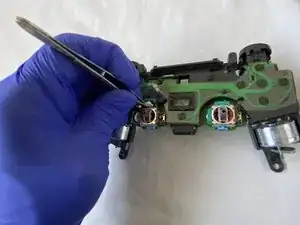
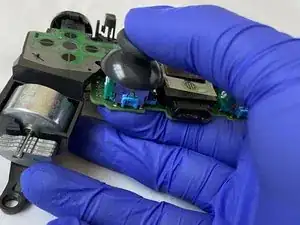
    • Nimm den linken Joystick und stecke in wieder auf den Sensor, bis du ein Klicken hörst, das bestätigt, dass der Joystick richtig sitzt.

  12. uxDWRGcUUemNdOZy
    uxDWRGcUUemNdOZy
    AigZfCAhFIElhwIJ
    tBJAK3EPXF3DFAAE
    • Führe den Kabelstecker von der Vorderseite der Hülle in das Loch auf der Platine, um beides miteinander zu verbinden.

    • Ich habe eine Pinzette genutzt , um den Kabelstecker von der Vorderseite zum Anschluss auf der Platine zu bekommen.

    • Platziere den Stecker in den Anschluss und drücke ihn herunter, um ihn wieder zu verbinden.

  13. GNUkDEVhkNMImMwU
    GNUkDEVhkNMImMwU
    SPoJArJFEfeVTevO
    16FTVy32ml3CTeO1
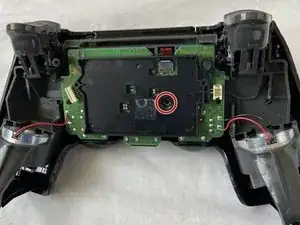
    • Nimm den Akkuhalter und platziere die Abstandshalter in die Löcher, um den Akkuhalter richtig auszurichten.

    • Platziere die 6 mm Schraube wieder in den Akkuhalter, indem du den Kreuzschlitzschraubendreher #00 nutzt, damit der Akkuhalter wieder fest auf der Platine sitzt.

  14. HZ3umUKUYYMySqtm
    HZ3umUKUYYMySqtm
    rpIBOimKkv46CSBY
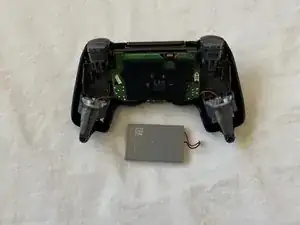
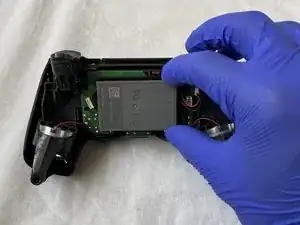
    • Platziere den Akku in den Halter.

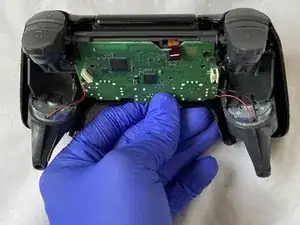
    • Verbinde das rote und schwarze Kabel des Akkus mit dem Anschluss auf der Platine, indem du ihn hineindrückst.

  15. VqegQTxAN1waLdTK
    VqegQTxAN1waLdTK
    oldOZvi1ZQBtMZRD
    • Platziere das Flachbandkabel, das sich auf der Rückseite der Hülle befindet, in dem dafür vorgesehenen Anschluss auf der Platine, damit beide Teile miteinander verbunden werden.

    I had a controller where an attempt was made to repair and they replaced this ribbon back to front. Needless to say it wouldn’t work at all. Just make sure the metal bits of the ribbon are on the side of the contacts.

    Richard Donaghue -

  16. JACxTJTm3pXeRmpP
    JACxTJTm3pXeRmpP
    P4Q5WlRYAWnRAqeb
    dT46s5JupL2WXyi4
    • Drücke die Vorderseite und Rückseite der Hülle wieder zusammen.

    • Schraube die vier 6 mm Kreuzschlitzschrauben in die dafür vorgesehenen Löcher auf der Rückseite des Controllers, indem du einen Kreuzschlitzschraubendreher #00 nutzt.

    • Jetzt sollte dein Controller wieder voll einsatzfähig sein!

Anubhab Rahman

Mitglied seit: 17/01/21

2379 Reputation

17 Kommentare

does this work with the right joystick too?

long tran -

Yes! Both sticks seems to be identical. Did my right one and it fixed the drift.

raltamimi0001 -

i fix my brothers ds4 with your tutorial. Thank you very much.

Bryan Avila -

Thank you so much for this amazingly well made guide. I just fixed my PS4 controller and it surprised me how well it works, absolutely no drift whatsoever. I should note that i’ve done the same steps on the right stick as it’s the one broken for me.

raltamimi0001 -

I just followed the guide and the drift problem is gone! A really throughout guide with all the details and warnings. Thank you for this.

Diego Costa -

This works. Thanks to the poster, bought some really cheap controllers off facebook and repaired them following this. Thank you!

Manu facturer -

dident try but man the comments look pleasing though i wont do it cuz im not ryna break it and i dont havbe 90% isopropyl alcohol but yeh look good enough

Hamza Dardar -

Would regular rubbing alcohol work instead of isopropyl?

heezkd -

Both ethanol and isopropyl are very suitable, although isopropyl will evaporate less quickly and leave less residue. Ethanol is often used to clean glass, while isopropyl is more often used in the production of electronics.

Toon Konings -

Lo hice, y me anduvo muchísimo peor, al punto que lo tuve que tirar. Algo debo haber hecho mal. La guía 10 puntos, igual. Abrazo.

Gaston Gherardi -

Thank you for this tutorial which works perfectly. I managed to make my son's Dualshocks look young again. Be careful, the part where you have to open the green covers is very complicated. Be thorough. In addition to the iso alcohol, I added a special contact product

cyril.blot -

What’s the special contact product you used does it help

Sharon Denise Keef -

What should I do if there is still a drift in my controller even after fixing it like you said

Umamah Shakeel -

Is there away to prevent this from happening to being with

Sharon Denise Keef -

Is there anything that can be gone to prevent this from happening it’s getting old having to do this so often

Sharon Denise Keef -

o meu começou a sair fumaça e cheiro de queimado, arranquei a carcaça e tirei a bateria do conector

Arthur Marques -

easier than it looks, i just fixed my ds4 thanks to this, basically the hardest part was the second step

Simone Corbelli -