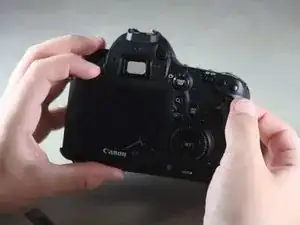
Einleitung
Nutze diese Anleitung um ein gesprungenes oder nicht mehr funktionierendes Display einer EOS 6D zu tauschen.
Werkzeuge
-
-
Entferne den Gummischutz am Sucher, indem du das Gummi leicht zusammen drückst und nach oben herausschiebst.
-
-
-
Öffne den Akkudeckel auf der Unterseite der Kamera
-
Drücke die kleine schwarze Lasche an der Innenseite des Akkudeckels mit dem Daumen hoch und ziehe den Deckel von der Kamera ab.
-
-
-
Fahre mit deinem Fingernagel oder dem flachen Ende eines Spudger unter die Gummierung und entferne sie von allen Seiten der Kamera.
-
-
-
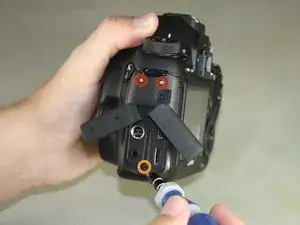
Öffne die Abdeckung des HDMI/AV/MIC Anschlusses in dem du sie vorsichtig herausziehst.
-
Drehe die Abdeckungen zur Seite um die Anschlüsse zu sehen.
-
Entferne folgende Schrauben:
-
Zwei silberne 5 mm Kreuzschlitzschrauben #00
-
Eine schwarze 6 mm Kreuzschlitzschraube #00
-
-
-
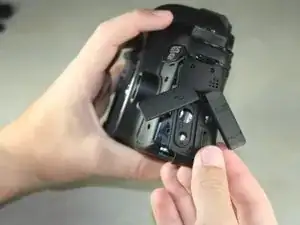
Ziehe die Lasche an der Unterkante der Kamera hoch, um die Abdeckung des HDMI/AV/MIC Anschlusses zu entfernen.
-
-
-
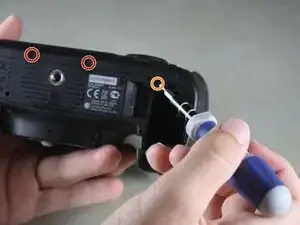
Drehe deine Kamera so, dass die Unterseite zu dir zeigt.
-
Entferne die folgenden Schrauben:
-
Eine 6 mm Kreuzschlitzschraube #00
-
Zwei 3 mm Kreuzschlitzschrauben #00
-
-
-
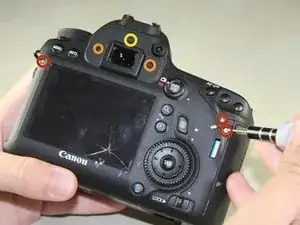
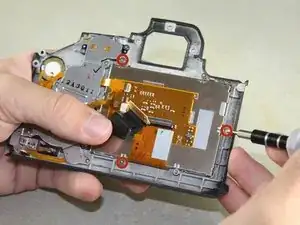
Drehe die Kamera so, dass die Rückseite zu dir zeigt.
-
Entferne die folgenden Schrauben:
-
Drei silberne 5 mm Kreuzschlitzschrauben #00
-
Zwei schwarze 6 mm Kreuzschlitzschrauben #00
-
Eine schwarze 4 mm Kreuzschlitzschraube #00
-
-
-
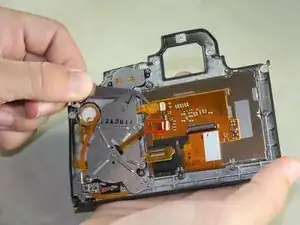
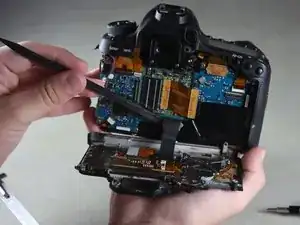
Kippe behutsam die Rückseite mit den Fingern rechtwinklig nach unten .
-
Heble das Kabel vorsichtig mit dem flachen Ende des Spudgers vom Inneren der Kamera ab.
-
-
-
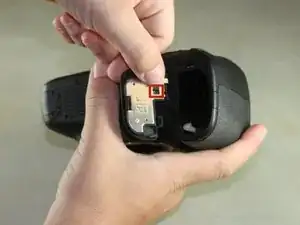
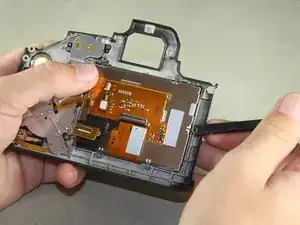
Entferne vorsichtig das schwarze Klebeband von der unterseite des Displays(hier nicht zu sehen).
-
Entferne das Display in dem du mit der flachen Seite eines Spudgers das Display anhebst und aus der Führung drückst.
-
Um dein Gerät wieder zusammen zu setzen, befolge diese Anleitung in umgekehrter Reihenfolge.
5 Kommentare
Thank you! Thank you!! I rescued my 6D. All your steps and details were very useful.
Few points to add:
1. I think the black screw (yellow circle) from step 7 is 3 mm.
2. Lift the light brown flap that holds the ribbon cable before removing the LCD panel.
3. When you remove the LCD panel from the metal housing, you will have to pry the two strips of adhesive that is there.
4. Be careful when tightening the screws back.
Please add to setp 8: The ribbon cable is connected to the camera via a plug (the gold colored PCB has a male plug on the other side of the PCB). This plug is at the end of the spudger. You need to pull that PCB boar/plug straight up from the camera (perpendicular to the camera)
Jim R -
Is there a guide for changing the protective screen on the back of the camera only? Like when it's scratched or cracked and the lcd works just fine?