
Einleitung
Nutze diese Anleitung um die Vorderseite und Abdeckung zu entfernen um mögliche defekte Komponten zu tauschen.
Werkzeuge
-
-
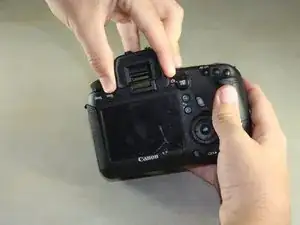
Entferne den Gummischutz am Sucher, indem du das Gummi leicht zusammen drückst und nach oben herausschiebst.
-
-
-
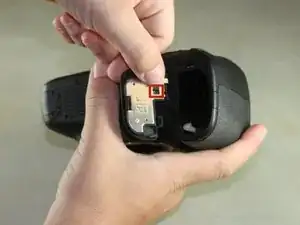
Öffne den Akkudeckel auf der Unterseite der Kamera
-
Drücke die kleine schwarze Lasche an der Innenseite des Akkudeckels mit dem Daumen hoch und ziehe den Deckel von der Kamera ab.
-
-
-
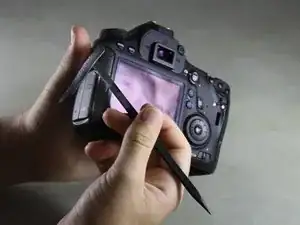
Fahre mit deinem Fingernagel oder dem flachen Ende eines Spudger unter die Gummierung und entferne sie von allen Seiten der Kamera.
-
-
-
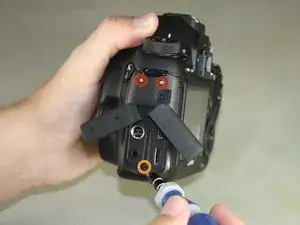
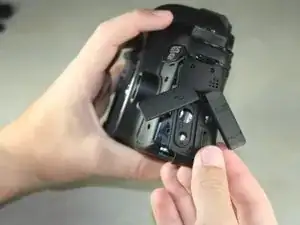
Öffne die Abdeckung des HDMI/AV/MIC Anschlusses in dem du sie vorsichtig herausziehst.
-
Drehe die Abdeckungen zur Seite um die Anschlüsse zu sehen.
-
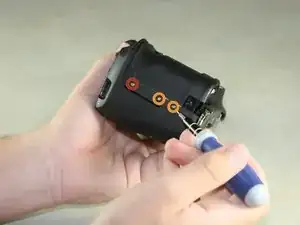
Entferne folgende Schrauben:
-
Zwei silberne 5 mm Kreuzschlitzschrauben #00
-
Eine schwarze 6 mm Kreuzschlitzschraube #00
-
-
-
Ziehe die Lasche an der Unterkante der Kamera hoch, um die Abdeckung des HDMI/AV/MIC Anschlusses zu entfernen.
-
-
-
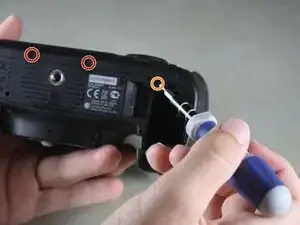
Drehe deine Kamera so, dass die Unterseite zu dir zeigt.
-
Entferne die folgenden Schrauben:
-
Eine 6 mm Kreuzschlitzschraube #00
-
Zwei 3 mm Kreuzschlitzschrauben #00
-
-
-
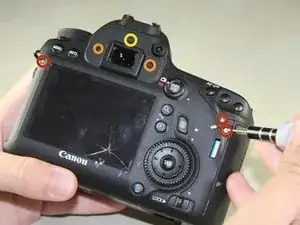
Drehe die Kamera so, dass die Rückseite zu dir zeigt.
-
Entferne die folgenden Schrauben:
-
Drei silberne 5 mm Kreuzschlitzschrauben #00
-
Zwei schwarze 6 mm Kreuzschlitzschrauben #00
-
Eine schwarze 4 mm Kreuzschlitzschraube #00
-
-
-
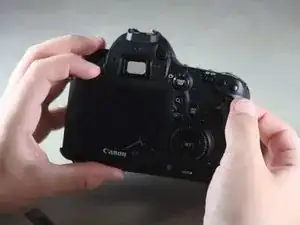
Kippe behutsam die Rückseite mit den Fingern rechtwinklig nach unten .
-
Heble das Kabel vorsichtig mit dem flachen Ende des Spudgers vom Inneren der Kamera ab.
-
-
-
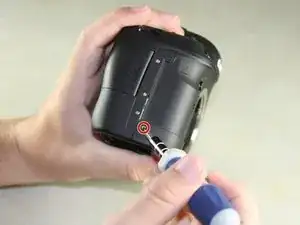
Drehe die Kamera so, dass der Einschub für die SD-Karte zu dir zeigt.
-
Entferne die untere 4 mm Kreuzschlitzschraube #00.
-
-
-
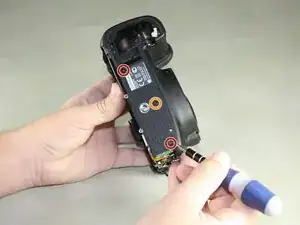
Drehe die Kamera so, dass die Unterseite zu dir zeigt.
-
Entferne die folgenden Schrauben:
-
Zwei 8mm Phillips #00
-
Eine 4mm Phillips #00
-
-
-
Entferne nun die Unterseite von der Kamera in dem du mit den Fingern das Cover aus dem Batteriefach löst und herausziehst.
-
-
-
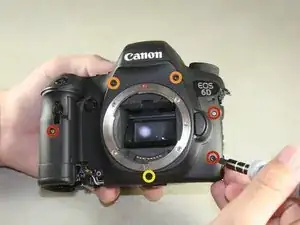
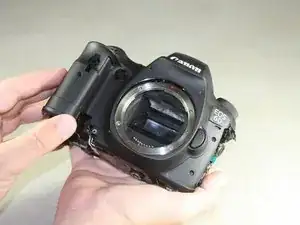
Drehe die Kamera so, dass die Vorderseite zu dir zeigt.
-
Entferne die folgenden Schrauben:
-
Drei 5mm Phillips #00
-
Zwei 6mm Phillips #00
-
Eine 4mm Phillips #00
-
-
-
Drehe die Kamera so, dass der Einschub mit der SD-Karte zu dir zeigt.
-
Entferne die folgenden Schrauben:
-
Eine 4 mm Kreuzschlitzschraube #00 mit Feingewinde
-
Zwei 4 mm Kreuzschlitzschraube #00 mit Grobgewinde
-
-
-
Entferne die 4 mm Kreuzschlitzschraube #00 auf der Innenseite um die Einheit vom Lautsprecherkabel abzutrennen.
-
-
-
Entferne die 4 mm Kreuzschlitzschraube innen an der oberen Abdeckung - unter dem Auslöser
-
-
-
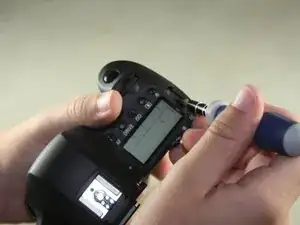
Drehe die Kamera so, dass die Oberseite zu dir zeigt.
-
Entferne die 6 mm Kreuzschlitzschraube #00 neben dem Analog-Display
-
-
-
Drehe die Kamera so, dass die Rückseite zu dir zeigt.
-
Entferne die Kreuzschlitzschraube #00 vom Sucher.
-
-
-
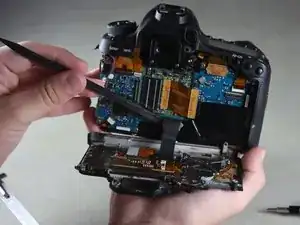
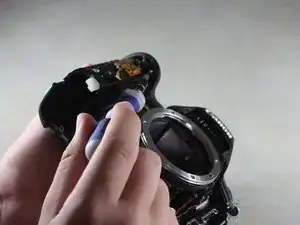
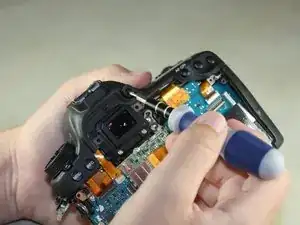
Entferne vorsichtig die beiden hellbraunen Flexkabel an der Oberseite.
-
Das rechte Flex kannst du mit dem flachen Ende eine Spudgers entfernen.
-
Für das linke Flex nutze eine Pinzette um es vorsichtig wackelnd nach oben zu lösen.
-
-
-
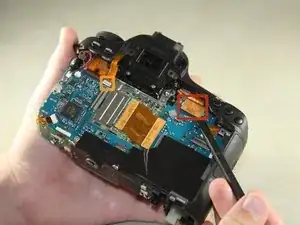
Hebe die obere Abdeckung vorsichtig an, so dass du etwa 2 cm Platz hast.
-
Nutze auch hier wieder einen Spudger, um das obere Flexkabel zu lösen.
-
-
-
Fasse die verbleibende Seitenabdeckung mit den Fingern und ziehe sie vorsichtig von der Kamera ab.
-


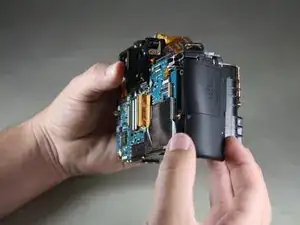
Um dein Gerät wieder zusammen zu setzen, befolge diese Anleitung in umgekehrter Reihenfolge.
7 Kommentare
Actually, it would be perfect to note the color of the screws throughout the manual. This would help to get it right!
But thanks anyway, you saved me!!
mrbakin -
In step 11 one of the red circles marks incorrect screw - should point the one near plate not the one in battery compartment (compare to step 6)
Agreed.
But thanks, apart from this minor error it was a great help and really clear. Cleaned the gunge out of the menu button and it now releases perfectly.
I found getting the ribbon cable back in (step 21) a bit difficult, combo wiggled and pushed it back in. Might recommend doing that one before the right one, and maybe before finally mounting the top cover.
Blakey -
My DSLR don't want to start after remount :(
dlirsoon -