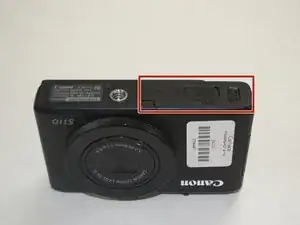
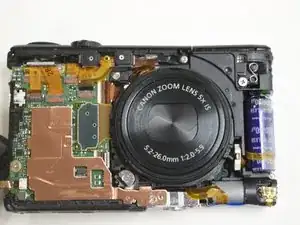
Einleitung

Entferne zur Vorsicht alle mit der Kamera verbundenen Accessoires.

  1. DjRSKiaVgoURJIy1
    DjRSKiaVgoURJIy1
    earnxUJPRcNMc4Lv
    • Entferne den Akku, indem du die Abdeckung am Kameraboden zur Seite schiebst.

    • Dieser Schritt ist dazu da, Kurzschlüsse bei der Reparatur zu verhindern. Fahre nach Entfernen des Akkus mit dem nächsten Schritt fort.

  2. WpSG4CASFye6Am3v
    WpSG4CASFye6Am3v
    eEJsKGUaeMIV1nHR
    OnNwTbu4Z1w1sBk2
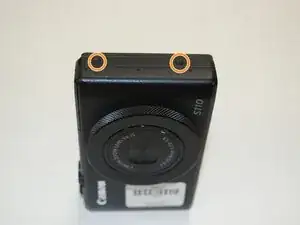
    • Durch das Entfernen der markierten Kreuzschlitzschrauben wird Zugriff auf das Innere der Kamera ermöglicht.

    • Entferne die beiden Schrauben auf der rechten Seite der Kamera in der Nähe des HDMI Anschlusses.

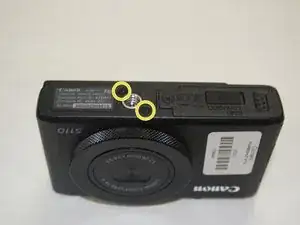
    • Entferne die beiden Schrauben auf der gegenüberliegenden Seite der Kamera.

    • Entferne die letzten beiden Schrauben, die auf der Unterseite der Kamera in der Nähe der Stativhalterung sind.

  3. EStSYkjhJsRjhkZY
    • Löse alle Clips rund um die äußere Kunststoffschale und hebe sie ab.

  4. 1oBcJOroUNg5gprH
    • Entferne die Kreuzschlitzschraube in der Nähe des Displays, mit der die Halterung befestigt ist.

    • Entferne die zweite Kreuzschlitzschraube in der unteren Ecke. Dadurch lässt sich die Halterung leichter entfernen.

  5. RM6XrAN1RiaGBqws
    • Hebe die Displaybefestigung heraus und lege sie beiseite.

  6. 6gAl1VSgpkwXlvmU
    6gAl1VSgpkwXlvmU
    oMY1RXjGieLUf5VP
    2P3MTNJpB5sOUpow
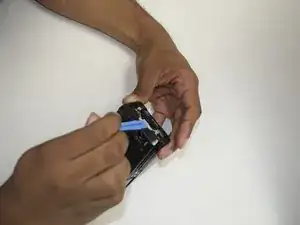
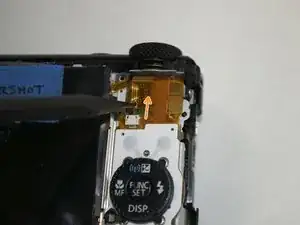
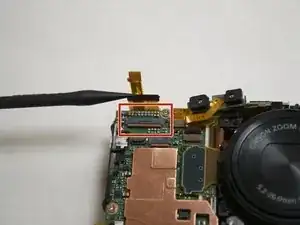
    • Ziehe das Flachbandkabel mit einem Spudger langsam durch die im Bild gezeigte Öffnung heraus. Die erste von drei Flachbandkabelverbindungendes Displays zur Kamera ist gelöst.

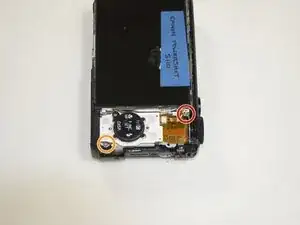
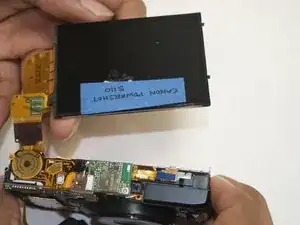
    • Das Display ist nun teilweise von der Kamerarückseite abgetrennt.

  7. ZWLqEnkwXgiqJmBF
    ZWLqEnkwXgiqJmBF
    hud5VYLPETjWVZQt
    GHiw5xv6giEYHIkZ
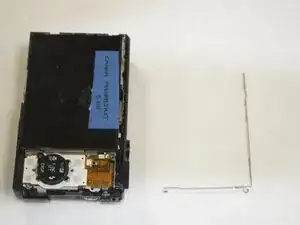
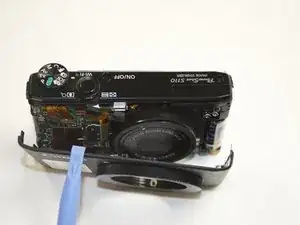
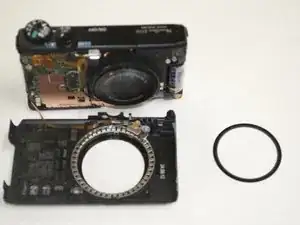
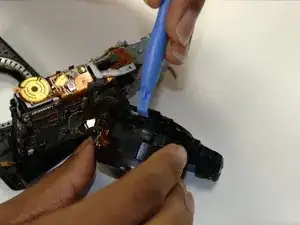
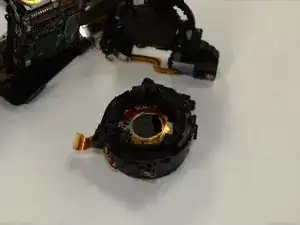
    • Um die anderen beiden Stecker zu lösen muss das Vorderteil des Gehäuses entfernt werden. Heble das Gehäuse langsam mit einem Hebelwerkzeug aus Kunststoff entlang der Kanten frei. Ein Ring um das Objektiv wird aus dem Inneren herausfallen, lege ihn zur Seite.

    • Entferne die beiden Schrauben, mit denen das obere Kunststoffteil des Gehäuses befestigt ist. Eine der Schrauben ist lang, die andere kurz.

    • Entferne die beiden Gummiauflagen oben von der Kamera, um nicht versehentlich am Flachbandkabel zu ziehen.

  8. ahNjSpmQZansLP5S
    ahNjSpmQZansLP5S
    QTyDXClQu2WmBQFW
    Gi21ghCdVgEdCJAM
    • Klappe die Lasche hoch, die das Flachbandkabel festhält.

    • Klappe die Lasche am zweiten Flachbandkabel hoch. Nun sollten beide Kabel leicht zu entfernen sein.

  9. pUyK2GLur1fJ3ogl
    pUyK2GLur1fJ3ogl
    ijGFWDBi4tTnI1pZ
    CJRpZkpVbXT2TvsE
    • Klappe die Lasche hoch und entferne das letzte Flachbandkabel.

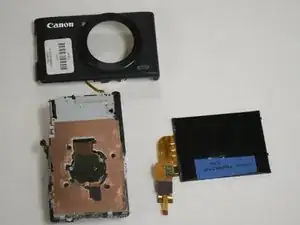
    • Nun kannst du das Display nach oben aus der Kamera heben und die an der Vorderseite befestigten Flachbandkabel können herausgleiten.

  10. OPExVOudlsgIUQAO
    OPExVOudlsgIUQAO
    WSKsGoS6Uf4gLPbR
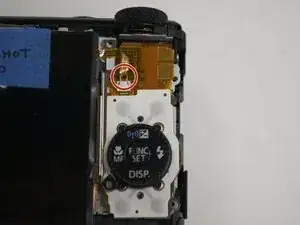
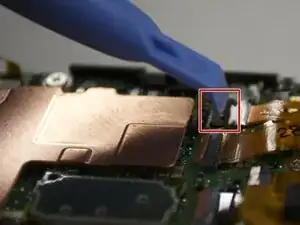
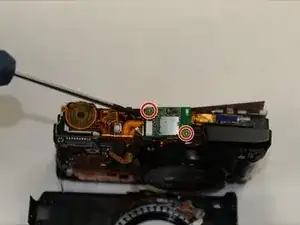
    • Nimm einen Kreuzschlitzschraubenzieher, um die beiden Schrauben auf der kleinen Platine an der Kameraoberseite zu entfernen.

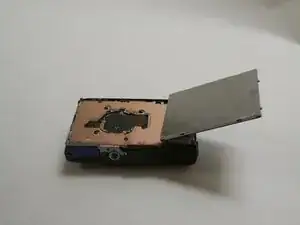
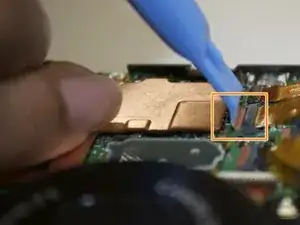
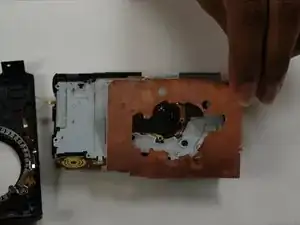
    • Danach kannst du die Kupferplatte mit der Hand oder einem Hebelwerkzeug endgültig entfernen.

  11. ADoC4RsGYTG5ieBA
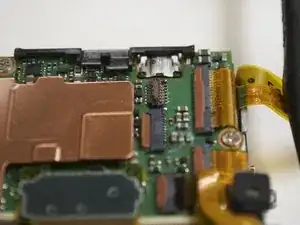
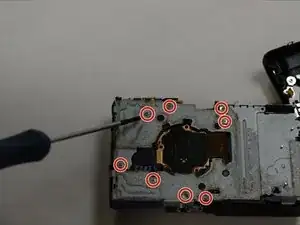
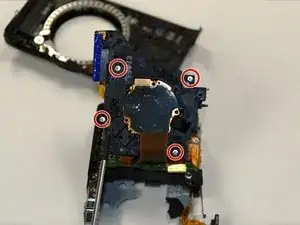
    • Entferne die acht Kreuzschlitzschrauben, mit denen die Metallplatte an der Kamera befestigt ist.

    • Um Schäden an der Kamera zu vermeiden, musst du beim Zusammenbau darauf achten, dass diese Schrauben wieder an ihren alten Platz zurückkommen.

    • Trenne das Flachbandkabel ab und schiebe die Blitzeinheit aus dem Weg.

    • Sei bei der Arbeit an der Blitzeinheit besonders vorsichtig, sie ist nur mit dünner Kunststoffisolierung gegen Stromschlag geschützt.

  12. lMnSfsJTBRN4ZfDB
    • Entferne die Kreuzschlitzschraube an der Vorderseite des Objektivs.

  13. 4XYgoegxPFfrIkWH
    4XYgoegxPFfrIkWH
    h4GXTEONNuVsQTdQ
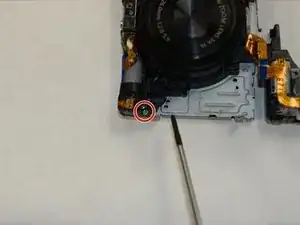
    • Entferne die Kreuzschlitzschraube, mit der die Kupferplatte befestigt ist.

    • Heble die Kupferplatte mit einem geeigneten Werkzeug nach oben.

  14. oiQsMEmJ2ryjNrsT
    oiQsMEmJ2ryjNrsT
    pur4g3cdcKSKBq5I
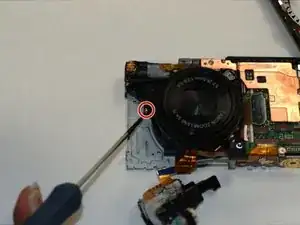
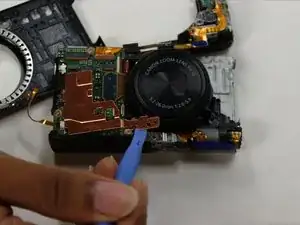
    • Entferne die markierte Kreuzschlitzschraube auf der Vorderseite des Objektivs.

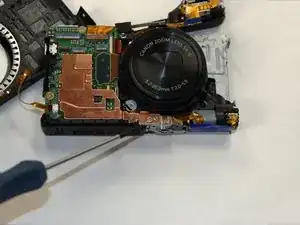
    • Hebe die Verriegelung am Anschluss des kleinen Flachbandkabels hoch und hole das Kabel behutsam heraus.

  15. fGPoA15mjqRlSZIM
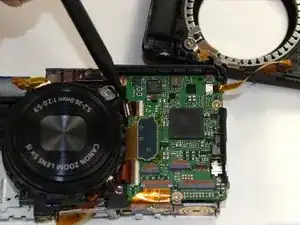
    • Hebe das Objektiv hoch, darunter werden vier Schrauben sichtbar.

    • Entferne die vier Kreuzschlitzschrauben, mit denen das Objektiv an der Halterung befestigt ist.

    Took me a really long time to remove it. It appears to be stuck at the bottom. I think I pushed it towards the top and wiggled it around until it came out. Still took me 10 minutes. I didn't have the ribbon cable on the side disconnected, didn't see that in the guide, but maybe I just missed it. You have to pull the ribbon cable off the lens bracket, otherwise you might tear the cable.

    mars -

  16. 3k6jTBOVFhxlJlEJ
    3k6jTBOVFhxlJlEJ
    REM1OTPGkllomqNg
    • Nimm ein Hebelwerkzeug und entferne die Objektivhalterung.

    • Behandle das neue Objektiv beim Zusammenbau sehr sorgfältig, es ist sehr empfindlich.

    This is separating the lens from the sensor so be careful with both. You can disassemble the lens itself but is a Real Puzzle to reassemble. With five rings that have to mesh correctly, not to mention the position of the aperture and the Image Stabilized middle lens, and two flexes that have to be put in their correct locations.

    Mrten -

Abschluss

Um die Kamera wieder zusammenzubauen, folge dieser Anleitung in umgekehrter Reihenfolge.

Pierre

Mitglied seit: 18/07/15

419 Reputation

9 Kommentare

Great guide. My camera broke, couple of weeks back. The lens was extended and it won't retract. It just gives the lens error message. Orders a replacement lens from eBay fro $35 and used this guide to replace it.

dhanu802 -

There is a step missing, on removing the flash, one side screw and one front, above the lens, otherwise perfect. thank you so much, just as above I had a lens error and ordered a replacement for 14£ from ebay. all works now. thanks.

Adrian Salariu -

Is there no other 'fix' without replacing the lens assembly on this particular "Lens error "issue?

profeduards -

@profeduards: try to reseat the flexes from the aperture and IS. You can disassemble the lens to reset the position and/or remove sand but make lots of pictures of the process, and mark (with pencil) a line over the rings (from the front) to know what ring goes where when reassembling. It's possible to reassemble without (as I did, lens was extended so i couldnt) but the process is long, arduous and takes a lot of patience.

Mrten -

Thanks, my Lens was bricked, and with a new Lens kit @15$ from china, it was fixed.

jeromemathey -

Bought a new lens from ebay, replaced it and it worked for two days. But now, when I hit the ON-button, lens go out, the titlescreen pops up but then all is black. And when I try to turn it off, the lens won´t go back in. There is no message of lens error. I can push the playbutton to get the lens to go back in. And I can also see old pictures so nothing wrong with the LCD. Could the new lens be damaged? Also tried to reset the flexcables several times but the problem remains. Any ideas out there?

holger eriksson -

Holger, look at Step 7. The 2nd flex cable from the left at the top of the camera—be sure that cable is seated well. I just had my camera apart and the screen was not lighting so I reset a couple of cables and that was the one that brought the screen back. I did a complete tear down following these instructions and put it back together. The lens came out and the lens message came back on. I’m wondering if this might have something to do with the motor. I was thinking that the wheel/gear that is attached to the motor drive should be secured on the spindle. Mine was not. It did manage to drive the lens out once. I’m not sure what kind of motor that is and how it works but I’m thinking the next time I take it apart I might just epoxy that gear onto the end of the spindle (unless someone here tells me not to because it is supposed to be that way). Thanks.

jbaobab -

Hello,

I am about to buy a lens to replace on my camera. The last step you removed the lens from the CCD, right? Is the sensor exposed when doing this step?

Afonso -

Step 17 - are these Screens to adjust the Lens? My fotos are not sharp when I work without zoom.

wolfi.f -