Einleitung
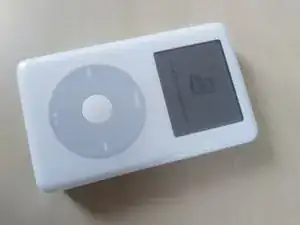
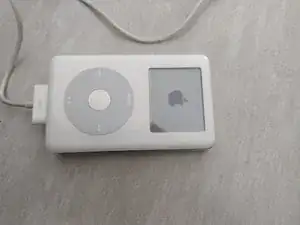
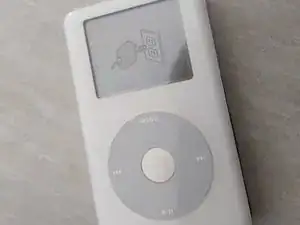
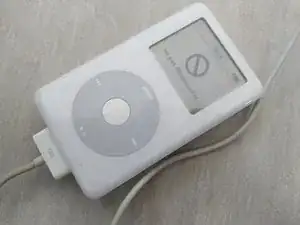
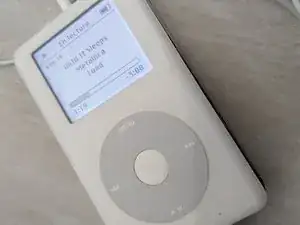
Im Laufe der Zeit können bei alten iPods mit Festplatten häufige Fehler wie ein leerer Akku oder eine nicht reagierende Festplatte auftreten. In dieser Anleitung werden wir eine alte Festplatte eines iPod 4G durch eine Micro-SD-Karte mit potenziell größerer Kapazität ersetzen. (Der in diesem Tutorial gezeigte Bildschirm ist ein Zeichen für eine fehlerhafte Festplatte)
Werkzeuge
Ersatzteile
-
-
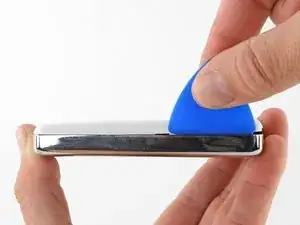
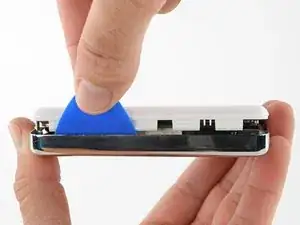
Setze ein Plektrum so tief wie möglich an der rechten Kante des iPods in die Naht zwischen der Kunststoff-Vorderseite und der Metallrückseite ein.
-
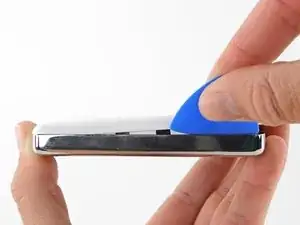
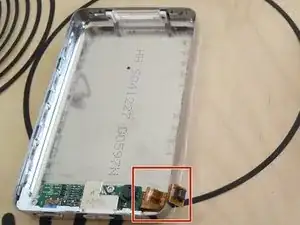
Heble mit dem Plektrum gegen die Kunststoff-Vorderseite, so dass sich die fünf Haltelaschen lösen (im dritten Bild zu sehen).
-
Heble weiter mit dem Plektrum um die Kanten des iPods herum und löse die restlichen Haltelaschen.
-
Wenn die fünf Haltelaschen an der rechten Seite gelöst sind, sollte sich das Gehäuse leicht öffnen lassen.
-
-
-
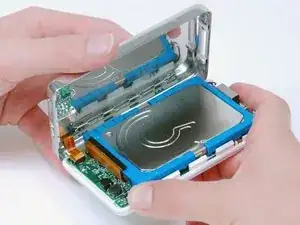
Öffne das Gehäuse wie ein Buch mit der Kante des Dockanschlusses nach oben und lege die Rückseite neben die vordere Hälfte des iPod.
-
-
-
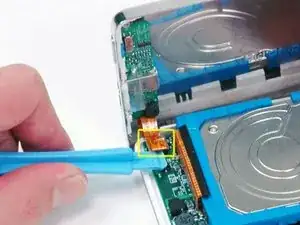
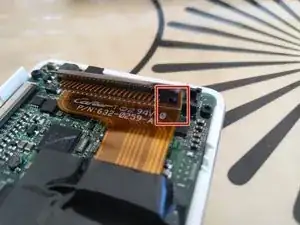
Benutze ein Plastikwerkzeug oder deine Fingernägel, um das orange Kopfhörerbuchsenkabel vorsichtig zu lösen. Achte darauf, am Stecker gerade nach oben zu ziehen, nicht am Kabel selbst.
-
-
-
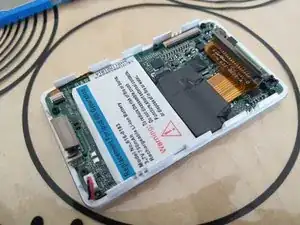
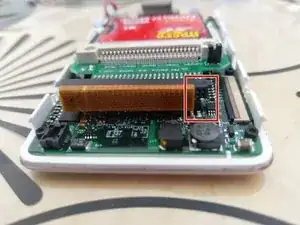
Ziehe den Stecker der Festplatte ab und achte darauf, dass er nicht kaputt geht. Halte den iPod mit einer Hand fest und hebe die Festplatte heraus.
-
-
-
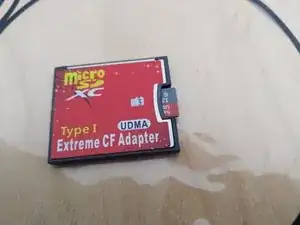
Schiebe die MicroSD-Kartein in den CF-Express-Adapter ein.
-
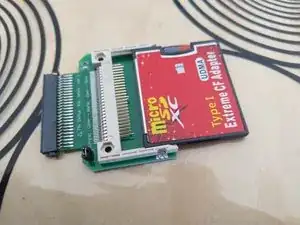
Setze den CF-Adapter in den CE-Adapter ein.
-
-
-
Je nach verwendetem CE-Adapter kann es sein, dass ein Stopper am Festplattenanschluss entfernt werden muss. Nimm dazu eine Pinzette.
-
-
-
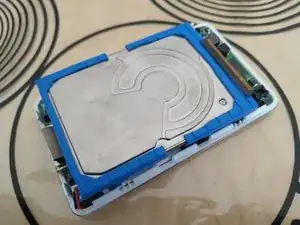
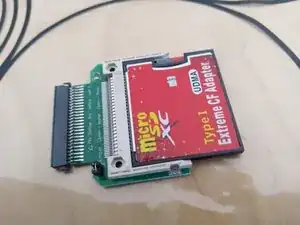
Stecke die Speichereinheit anstelle der alten Festplatte ein.
-
Es ist normal, wenn im Anschluss vier Kontakte frei bleiben.
-
-
-
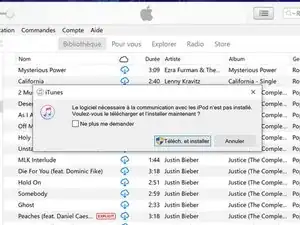
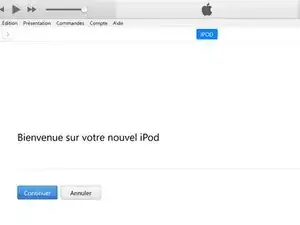
Wenn du es bisher noch nicht gemacht hast, musst du die Software für den iPod auf deinem Computer installieren. Folge der Anleitung von iTunes, starte deinen iPod neu und schließe ihn am Computer an.
-
-
-
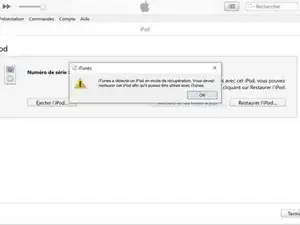
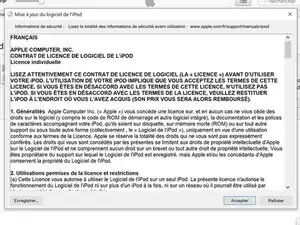
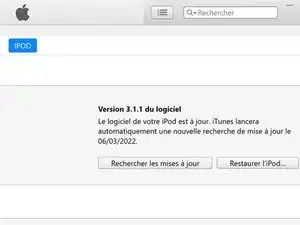
Wenn dein iPod mit dem Computer verbunden ist wird iTunes dich auffordern, den iPod wiederherzustellen. Folge den Anweisungen von iTunes.
-
-
-
Wenn der iPod wiederhergestellt ist, wird er dich auffordern ihn ans Netzteil anzuschließen. Solange dieses Symbol auf dem Display erscheint, kannst du nicht weiterarbeiten.
-
Wenn das Menü zur Sprachauswahl erscheint, kannst du weitermachen.
-
-
-
Es ist wichtig, den iPod vor dem Zusammenbau ausgiebig zu testen. Wie hört sich der Ton an, wie ist die saubere Funktion des Klickrades, die Synchronisation der Musik und die Ladefunktion.
-
Wenn etwas nicht richtig funktioniert, dann überprüfe nochmals jeden einzelnen Schritt.
-

Um deinen iPod wieder zusammenzubauen, folge den Schritten in umgekehrter Reihenfolge.
2 Kommentare
J ai essayer tous ces etapes mais l ipod reste bloquer sur la pomme j ai meme changer une nouvelles batterie
Vielen Dank für die Anleitung! Mien Problem ist ein anderes! Der Akku wurde 2 Mal ausgewechselt. Hierbei wurde die Möglichkeit des Aufladens beschädigt. Wer kann diesen Fehler beheben, oder wie kann ich die Funktion des Aufladens wieder herstelen?
How necessary is it to have the HOLD switch in the locked position? On my iPod the switch is stuck in the unlocked position and I can't force it into locked.
Is locking the iPod for a mechanical reason or an electrical/software reason?
gabeshaikh -
It is for an electrical reason. If the iPod hold switch is kept on, the device will not turn on, thus ensuring the device stays powered off while performing service.
trusty -
I have a 60 GB iPod photo that needs a new Logic Board. I bought a 30 GB used iPod on eBay and replaced the Logic Board. Now the iPod thinks the hard drive is only 30 GB, when it is really 60 GB. It works, but the hard drive is not recognized for its full size. Sites like this offer a 20 GB and 40 GB logic board...I apparently need 60 GB. Can I bypass this somehow, or do I really need a logic board that is specifically made for 60 GB???
Mark -
My 30gig drive shows up as a 16.4gig. I can not for the life of me, figure out why this is doing this. Can anyone help? Thanks!
Stephan -
Hello,
First thank you for this tuto and help.
I did follow your instructions and every step was ok but when I closed my i'Pod, it kept staying on the lock position even with moving the lock button.
Now it has charged but I could not make it run.
So I did a complete reboot by connecting it to my Mac with i'Tunes to restore.
It's still locked.
What can I do?
Than You for your answer
Thomas
Voisin -
Much quicker and far easier opening from the right side instead of from the top using the blue plastic spudger. Opened in under 10sec. Do not know why this guide asks you to start from the top and work it to the left corner. Perhaps it was meant as a challenge.
Edwin Seah -
Well, I did it! I am pretty mechanically inclined, but I don't work well with small stuff. Anyway, as others mentioned, this step was the hardest for me, the included tools, worthless (to start to separate the case) As another person mentioned, I used a razor blade on the side on the upper left corner pushing down toward the metal clips, 'pop' once the first came off, then I used the blue tools to release the remaining clips. I didn't want to remove the connector in step 8, but had literally no room to work, the connector is a square push in type that is attached to the ribbon cable, I pryed with the blue tool carefully at the connector base, it popped right off! (getting is back on was more challenging, but managed with a small pair of needle nose pliers.) Had to pry the old battery out carefully - it was really in there. Got it all back together, works like a champ! Thanks ifixit!
mikesnyder -
Promptly broke both blue plastic tools. I used a putty knife to pop the case. Opening was the only hard part. I didn't disconnect the headphone cable. No problems and the battery has enough charge that I listening to Bare Naked Ladies now. Last week I installed a new hard drive in my Mac mini. IFixit is the greatest!
heldon -
If you are lucky, your battery may swell up like mind did, short of blowing up it opened the case for me. That being done really made it easy and encouraged me to do the repair myself. I still needed the proper screw driver (T6 Torx Screwdriver) to remove the two black torx screws that are found at step 10 of this repair guide. I purchased the iFixit 64bit driver kit, simply because I intend to work on several other iPods and phones, the kit is of good quality, well worth the purchase. If you have some mechanical ability, and follow the instructions, I was done in about 20 minutes, placed it back on my Bose player. I couldn't wait for it to charge, just wanted it to start playing, and after a minute or so my iPod 4th gen 20 gb was playing the music which I hadn't heard in about 3 to 4 years, as a result of a enlarged battery. As I write these comments down, I'm listening to my sweet tunes with a big smile on my mug, the sign of a satisfied customer. Thanks to iFIXIT.!!!
Alex DeLeon -