Einleitung

Wenn du Schwierigkeiten beim Aufladen oder Abspielen von Musik über Audiokabel hast, musst du möglicherweise den Audio- und Micro USB-Anschluss austauschen.

  1. kPXxUEDCM1nHjdNZ
    kPXxUEDCM1nHjdNZ
    mKVBgQJ15mMm5yZu
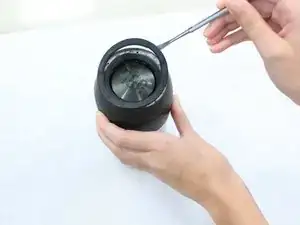
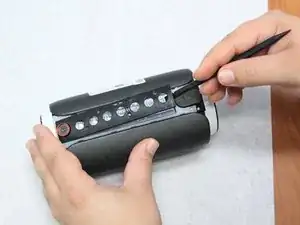
    • Entferne die Gummiringe an beiden Enden des Gerätes.

    • Wenn sie sich nicht leicht ablösen lassen, dann versuche es mit einem geeigneten Werkzeug.

  2. NT6Ui5AM2DGvyOql
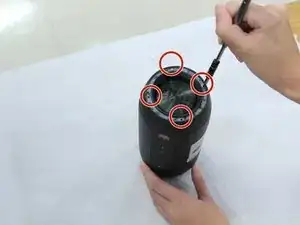
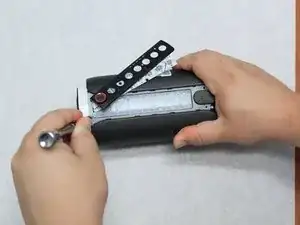
    • Entferne die vier 4,8 mm Kreuzschlitzschrauben #1 an beiden Enden des Gerätes.

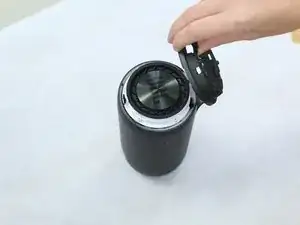
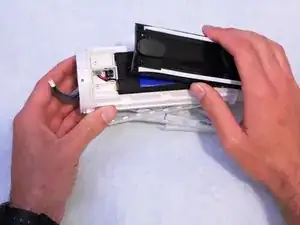
    • Hebe die beiden Endstücke ab.

  3. qUKe22uV2fvdMxGH
    • Entferne die vier 9,5 mm Kreuzschlitzschrauben #1 an beiden Enden des Gerätes.

  4. miHCQmLudPZerGF4
    miHCQmLudPZerGF4
    sM5JcuuIqn3PMQeO
    • Löse ein Ende ab und ziehe es am Gerät entlang bis auf die andere Seite hinüber.

  5. utCHTZrV2AbwYxfE
    utCHTZrV2AbwYxfE
    bPkxlDbVmHZ6Sscc
    BcnCFplThSjbSc1X
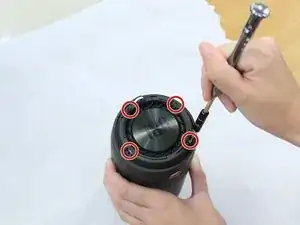
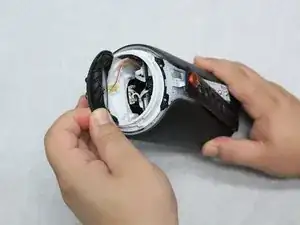
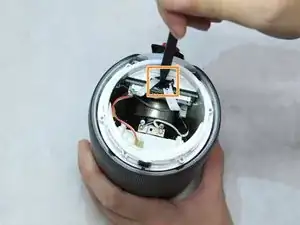
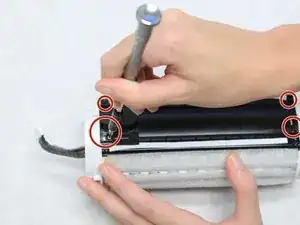
    • Entferne die vier 7,9 mm Kreuzschlitzschrauben #1 am Mittelstück des Gerätes zwischen der Kamera und dem AUX-Anschluss.

    • Hebe die Verkleidung und die Platine hoch. Entferne sie aber noch nicht, sie sind noch mit Flachbandkabeln verbunden.

  6. DtYTVJddje6wanLr
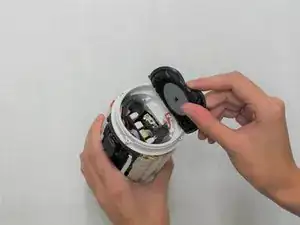
    • Entferne die Abdeckung an dem Ende, wohin die Flachbandkabel führen. Sie sollte sich leicht ablösen lassen.

  7. Aaj4sEPcpO2P4jfO
    Aaj4sEPcpO2P4jfO
    VjDMpwZlEPSfYj3E
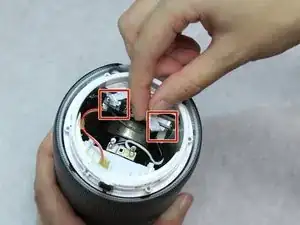
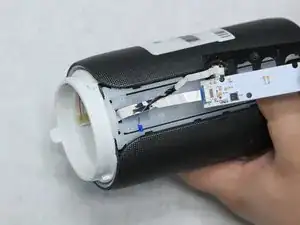
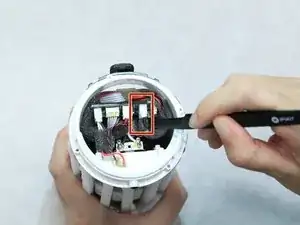
    • Löse die Sicherungen, mit denen die Flachbandkabel befestigt sind und trenne die Kabel von der Hauptplatine ab.

    • Um an die Kabel heranzukommen, musst du mit einem Spudger den schwarzen Kleber entfernen, mit dem sie befestigt sind.

  8. UChyIV3EqJ1fqwXF
    UChyIV3EqJ1fqwXF
    BomSNqVFKNUdsIw4
    • Ziehe die Flachbandkabel behutsam von außen heraus.

    • Wenn sie nicht leicht herauskommen, dann kontrolliere, ob sie noch festgeklebt sind.

  9. DaSHwRDgF4LhyZDQ
    DaSHwRDgF4LhyZDQ
    cSkVFLEEAmHPjEIg
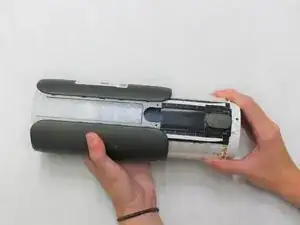
    • Entferne die vier 7,9 mm Kreuzschlitzschrauben #1 am Rand des Mittelstücks.

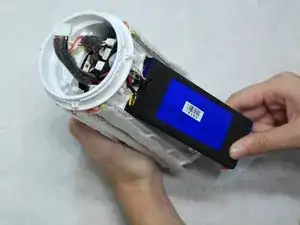
    • Schiebe das äußere Gehäuseteil vom AUX-Anschluss und micro-USB-Anschluss weg.

  10. E6NcQdMQGsCHOtwN
    • Entferne die andere Endabdeckung, um an die Kabel darunter heranzukommen.

  11. rIs2UAuhVbTXc2RV
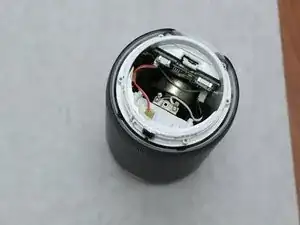
    • Trenne den Akku mit einer product|IF145-020-5|gewinkelten Pinzette] von der Hauptplatine ab. Das ist etwas knifflig und du brauchst viel Geduld.

  12. XcOfIxXT4SIXZ3D1
    • Entferne vier 7,9 mm Kreuzschlitzschrauben #1 vom schwarzen Mittelstück des Gerätes.

  13. Wt2KHcsyCdYmFQuR
    Wt2KHcsyCdYmFQuR
    tDhxWbRosYZOQZSF
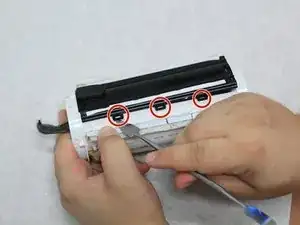
    • An jeder Seite des schwarzen Mittelstücks befinden sich drei Laschen. Hebe sie mit einem Spudger an.

  14. SMbFxTTp6QIQaQGT
    SMbFxTTp6QIQaQGT
    csXJeQGvAOorjTWl
    • Hebe das schwarze Mittelstück mit einem Spudger hoch. Der Akku wird sichtbar.

  15. DIwr2ONopORR2Xpx
    • Weiche den Kleber mit einem Heißluftgebläse auf und hebe den Akku heraus.

    So annoying… got to that last step which would have needed some more pictures and guiding to remove the wire… space is too small to remove the wire head part. Looks like everything (USB plug and all) should be removed.

    isabelle laroche -

    I agree and I'm at that point at this very moment. As a service technician, one trick I have learned is that each of those individual sockets in the plug can be removed. On one side of the plug you will be able to see each individual socket and that each one is held in by a little extruded tab that catches against the plastic connector. If you get a small screwdriver and push on that tab you'll be able to pull that little socket out from the connector. A few words of CAUTION: Do NOT let the exposed connectors touch one other! Also, do NOT let your screwdriver short them out when pushing on the tabs. Work on one at a time, tape them, keep them separated and label them! After they are all removed they can easily be pushed back into the connector again.

    Charles Kulbacki -

    I don’t think it’s necessary to remove the battery as long as you unplug it. I don’t see any benefits from this but maybe I’m wrong so someone can clarify? Does removing of the battery give you better access to the aux/usb sockets?

    ndjenny -

    Just because this procedure is for replacing the battery, it is important to remove the old battery.

    Cam McNicol -

    There was a mountain of hot glue on mine on the battey wires. Since i was replacing the battery anyway, i cut the wires off and made a new hole through the plastic

    Oliver Brasø -

    I like your style!

    Randyll Twardosky -

  16. O332UrKtndpoK5Jl
    • Entlöte die Kabel des mit micro-USB-Anschlusses und der AUX-Anschlüsse und trenne sie ab.

Abschluss

Um das Gerät wieder zusammenzubauen, folge den Schritten der Anleitung in umgekehrter Reihenfolge.

Emilee Hicks

Mitglied seit: 31/08/18

803 Reputation

8 Kommentare

Can anyone post a link to buy the correct replacement micro USB port?

Thanks

thetjfree -

Is there a video out there to demonstrate this repair process?

a_mostafa_k -

Hallo, suche für die “JBL pulse 2” die Bauteile FB5 und D9 auf dem Mainboard.

Wer kennt diese Bauteile ?

Würde mich auf eine positive Antwort freuen.

Liebe Grüße J.R.

Roweda Johannes -

Bonjour pourriez-vous me dire ou acheter cette petite carte électronique merci.

william.avril132 -

Hello , il faut d'abord démonter la JBL pour voir le modèle de connecteur car il semblerait qu'il y ait plusieurs modèle , puis faire une recherche "aliexpress Micro USB JBL Pulse2" ... il faut quand même être un peu outillé pour dessouder et surtout ressouder le connecteur .

lucien.sapet -

Bonjour , n'ayant pas la prise usb identique , j'ai mis un petit bout de cable branché sur le + et - et à l'autre extrémité j'ai mis un micro usb sur platine , mais je vais recevoir une femelle USB type C qui est devenue plus courante et je vais la remplacer .
Hello, not having the same USB socket, I put a small piece of cable connected to the + and - and at the other end I put a micro USB on the plate, but I will receive a female USB type C which has become more common and I will replace it.

lucien.sapet -

Hi wo bekomt man das Flachbandkabel her ? welcher auf den j11 Stecker geht neben dem Antennenanschluss ?

Tho Mas -