Einleitung
Wenn sich der Jabra Elite 85h nicht mehr aufladen lässt oder seine Ladung schnell verliert, muss wahrscheinlich der Akku ausgetauscht werden. Diese Anleitung zeigt, wie das geht.
Werkzeuge
Ersatzteile
-
-
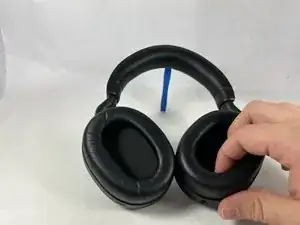
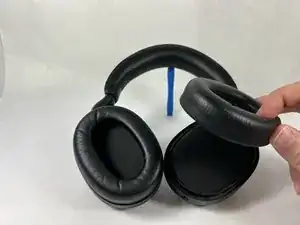
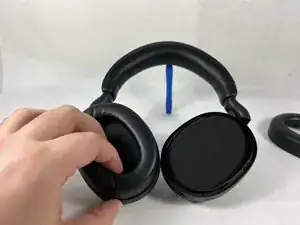
Greife mit den Fingern in die Innenseite eines der Ohrpolster und ziehe es vom Gerät ab. Wiederhole für das andere Ohrpolster.
-
Wenn sich das Polster nicht leicht lösen lässt, dann greife es auf der gegenüberliegenden Seite und ziehe es in gleicher Weise heraus.
-
-
-
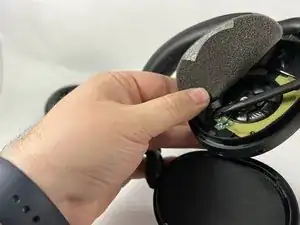
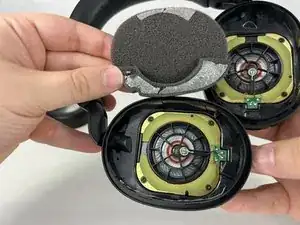
Hebe die Schaumstoffeinlagen mit den daran angebrachten Schutzfolien mit dem Spudger hoch und entferne sie.
-
-
-
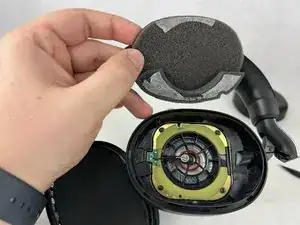
Drehe den Kopfhörer um, so dass der Lautsprecher herauskommt.
-
Wiederhole für die andere Seite.
-
-
-
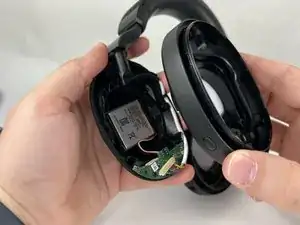
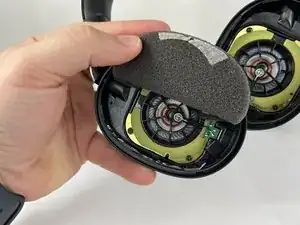
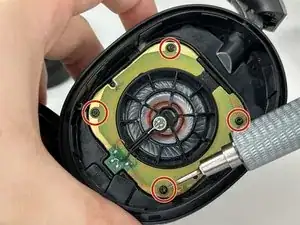
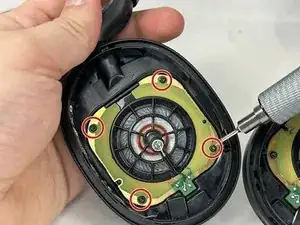
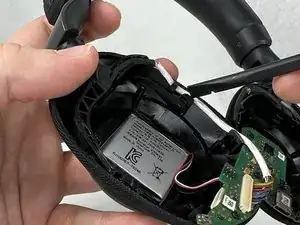
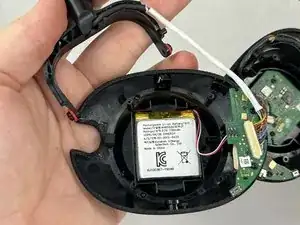
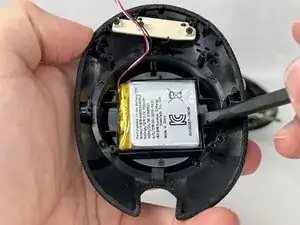
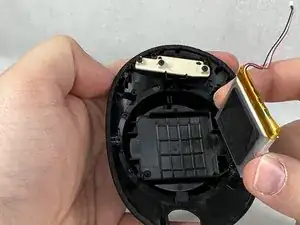
Entferne die Kunststofffassung für den linken Lautsprecher. Dadurch wird der Akku und die Hauptplatine sichtbar.
-
-
-
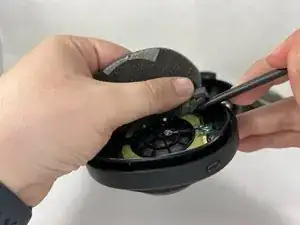
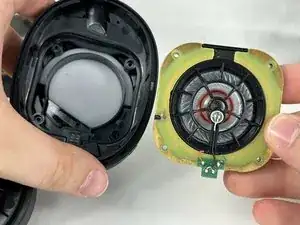
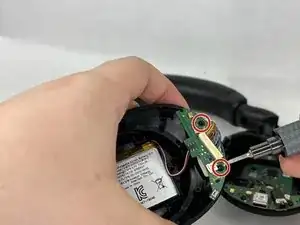
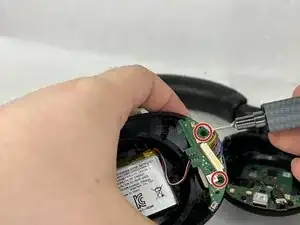
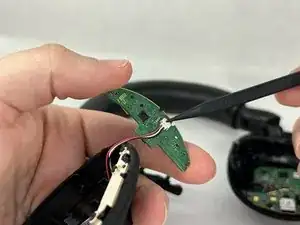
Drehe die Hauptplatine herum. Auf der Rückseite befindet sich ein JST-Stecker mit zwei Kontakten. Löse den Stecker vorsichtig von der Hauptplatine ab. Hebe dann den Akku mit einem Spudger vorsichtig aus seiner Vertiefung heraus.
-

Um dein Gerät wieder zusammenzubauen, folge den Schritten in umgekehrter Reihenfolge.
9 Kommentare
Where do you find a battery to match the connector size?
Thanks, I have the Evolve 2 85h, which is similar and this helped me fix it.
I wish to add that my headset refused to charge at all, due to the battery voltage going to low and then the headset did not manage to trickle charge it to a safe charging level. Thus it was dead and Jabra would not repair or replace it claiming the warranty had passed.
By applying 3.8 volts (and limiting it to 300mA) on a test pin connected to the battery + pole for a split second, the charger was tricked into accepting the battery and started charging. Now everything works fine.
Photo of were to apply the voltage. Plus is red. Ground is black.
Some notes -
How it started - I got a battery low warning while listening on a video conference. I attached a USB-C charger cable while wearing the headset. After about 30 minutes the headset just died.
When connecting to a computer, the Jabra App recognized the headset, but said 0% battery. No charging and no Bluetooth communication was possible.
Does it has 2 batteries? One on left and one on right?
Poon -
It has just one battery
Hi sir, I think your guide is incomplete. Do you have the opportunity to bring a sequel?
Oğuzhan Sancak -
The battery is under the left earcup.
NOT the earcup into which you plug the USB cable.
Not sure why the demo asks you to disassemble the right earcup...
Jimbo -
These instructions could use some work! There is no need to disassemble both sides as the battery is under the left ear cup only.
kelly1 -
I have just disassembled mine, Jabra Elite 85h, model OTE100. The cushions (as described in this step) can not be removed. If that's the case, The foam in the center has to be removed to access the speaker screws. Undoing the screws will split the headphone in half, releasing the pad together with the speaker. This will uncover the rest of the components
Besides, I agree with the rest of the comments - If you're after the battery there is no need to disassemble the right headphone as the battery resides in the left
bystrzak14 -
This is very easy. I just finished mine. You dont need special tools as a tweeser will pull the wire connection apart. The cushions will come off and are replaceable. Do just the left one. Pull it apart like you mean it. Do have a small piece of thick double-sided tape on hand. The AOLIKES 3.7v 850mAh battery from amazon works but the wire is a bit short to orient it like the original. Just don’t press it in place until the circuit board is screwed in place. All I can say now is that it’s charging.
Lastly, I’ve learned from experience that if you’re using metal screws in plastic, when reassembling turn counter clockwise until you hear a click. Thats when they are aligned properly and you’re less likely to strip the thread.
CJ ? -