Einleitung

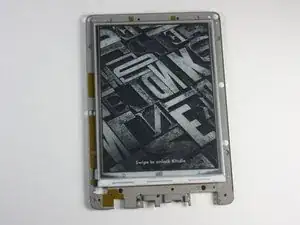
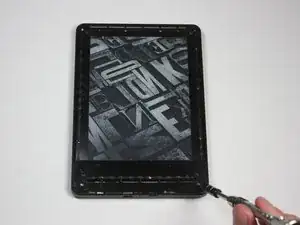
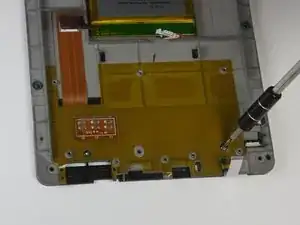
Das Display deines Kindle kann als das zentrale Bauteil betrachtet werden – an ihm sind alle anderen Komponenten befestigt. Obwohl die Reparatur relativ unkompliziert ist, musst du deinen Kindle vollständig zerlegen. Keine Sorge – diese Anleitung führt dich Schritt für Schritt durch den Vorgang.

  1. U224BwRqPPQoxqEx
    U224BwRqPPQoxqEx
    AwlpEvUCxIOEMKTj
    • Schalte deinen Kindle aus, bevor du mit dem Auseinanderbauen beginnst.

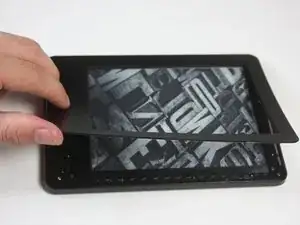
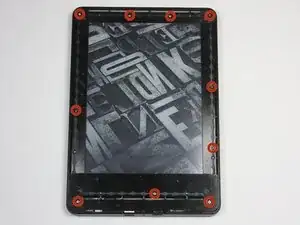
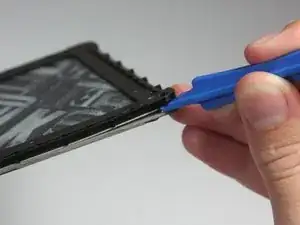
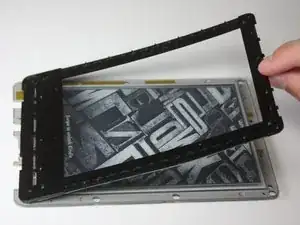
    • Benutze das blaue Kunststoff-Öffnungswerkzeug an jeder Ecke, um die Frontabdeckung zu lösen und vom Klebstoff zu trennen.

    • Fahre mit dem Werkzeug an den Fugen entlang, um die Frontabdeckung abzuhebeln.

    i had a battery that wouldn't even last a full day in the end. by accident i let the battery fall below 10% charge and when turned on it only showed the battery icon. I fully charged it and now i am having no problems with it. what i think happened is it reset the batteries memory and that was the problem. worth trying anyway before buying a new battery.

    soupamanx -

    I have no idea if my kindle is off. Holding in the button for a minute does nothing.

    Manfred Knorr -

  2. tIMKotWQsDZPImRJ
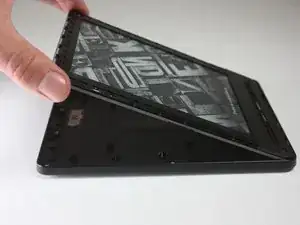
    • Ziehe die Frontabdeckung ab, um sie vom Kindle zu entfernen.

    • Wenn die Frontabdeckung zum ersten Mal entfernt wird, ist möglicherweise ein erheblicher Kraftaufwand nötig, um die Verklebung zu lösen.

    • Um eine Beschädigung der Frontabdeckung zu vermeiden, ziehe sie von den Ecken zur Mitte des Kindle hin ab.

    • Falls du die Frontabdeckung austauschst, kann beim Wiederzusammenbau zusätzlicher Klebstoff erforderlich sein.

    What is the adhesive you are using resecure the screen? Would Tesa 61395 Tape work (4mm) or would this create protrusion?

    Camble Scott -

    Did that option work for you? I'm about to try and change my battery and don't have any idea on what backup adhesive to have

    Lagroth -

  3. DSrvV1cL3BKDbRYS
    DSrvV1cL3BKDbRYS
    N5hIl4JWJ6REHBDs
    • Entferne die zehn 5,0 mm T5 Torx-Schrauben.

    • Eine magnetische Arbeitsmatte kann dir dabei helfen, den Überblick über deine Schrauben zu behalten.

    You will break the newer vision of kindle just like this. there is a peg that connect the top center of the screen to the back case. Remove the black double sided tape in the center and push this peg back .

    Kyle Darnell -

    If you see black double sided tape at the top of your Kindle, as the commenter above did, you are on the wrong model—have a look here to see if this is your model: Kindle Paperwhite 3 Bildschirm/Touch Panel austauschen

    Lipsmeyer -

    My device has a mix of silver 5 mm and black 4 mm screws. The 4 mm screws are the one in the middle of the left side and the 3 on the right side.

    Foxrok -

  4. kMq4PUsvd141fy2l
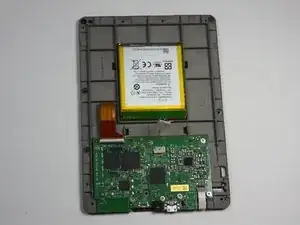
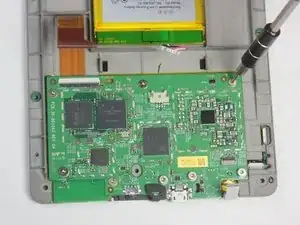
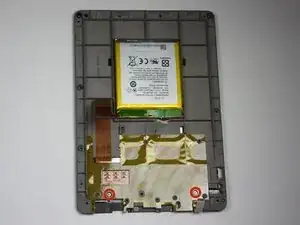
    • Löse das Innenteil von der Rückabdeckung, indem du gleichmäßig an den Ecken und Kanten entlangarbeitest.

    • Das Display wird von vielen Clips an der Rückabdeckung gehalten. Es ist zwar Kraft erforderlich, um die Rückabdeckung zu entfernen, aber du solltest nie das Gefühl haben, dass der Kindle dabei kaputtgehen könnte.

    後の手順5の画像で確認できる、バッテリーの周り4か所が主なクリップ箇所です。

    hi.kinta -

    補足:バックパネル交換ガイドを読んでいる場合は手順5以降がないので、上記の画像を確認したい場合はマザーボード交換ガイドの手順5などを参照して下さい。

    Servause -

  5. TQJ2sGeLLeEbq6nC
    TQJ2sGeLLeEbq6nC
    ueCroQPUDL1dRADP
    • Drehe das Display um, sodass das Motherboard und der Akku sichtbar sind.

    • Verwende die stumpfe Pinzette, um das Kabel, das den Akku mit dem Motherboard verbindet, vorsichtig zu entriegeln und zu lösen.

  6. jWdELvqlx3ilwhu1
    jWdELvqlx3ilwhu1
    i5pNJjwEBxJYD23d
    wOWlxOATi2c3PBre
    • Verwende die Spitze des Spudgers, um die kleine Halteklappe am Nullkraftsteckverbinder (ZIF-Steckverbinder, „Zero Insertion Force“) für das kupferfarbene Kabel hochzuklappen.

    • Achte darauf, die Halteklappe und nicht den Steckverbinder selbst hochzuklappen.

    • Ziehe das Kabel vorsichtig aus dem Steckverbinder.

    • Dabei ist kein Kraftaufwand nötig – wie die Bezeichnung ZIF schon andeutet.

    6 Cal ED060SCP

    gofer diuna -

  7. 24psk6XXQtuUVZQD
    24psk6XXQtuUVZQD
    mQAmQhM2VlVEuqWQ
    • Klappe, ähnlich wie im vorherigen Schritt, die Halteklappe des Steckverbinders für das weiße Kabel nach oben.

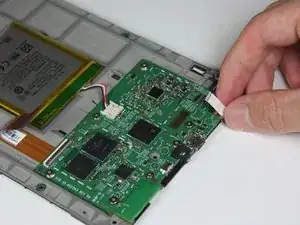
    • Ziehe das weiße Kabel vorsichtig aus dem Steckverbinder.

    • Stelle beim Wiederzusammenbau sicher, dass die Halteklappen der Steckverbinder für das weiße und das kupferfarbene Kabel wieder geschlossen werden. Da es sich um Nullkraftsteckverbinder handelt, könnten die Kabel sonst später herausrutschen.

  8. mQmQZsvw5JXdF6HH
    mQmQZsvw5JXdF6HH
    NOEiBpgeTBpmQtI2
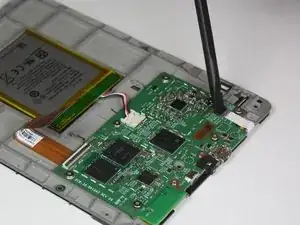
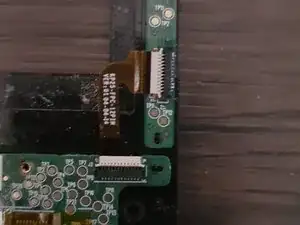
    • Trenne das Verbindungskabel des Touch-Sensors, indem du mit dem Spudger vorsichtig die Laschen an den beiden weißen Steckverbindern wegklappst.

    • Ziehe das Kabel mit einer Pinzette heraus.

    • Das Verbindungskabel des Touch-Sensors ist das Kabel, das diese beiden Steckverbinder miteinander verbindet.

  9. SwIAJt4EscUrPKXh
    SwIAJt4EscUrPKXh
    NhaQoxaIEftCtI5Y
    • Entferne die acht 3,0 mm langen Torx-Schrauben mit einem T5 Torx Schraubendreher.

    • Einige der Schrauben sind mit Unterlegscheiben versehen. Es ist wichtig, den Überblick über die Unterlegscheiben zu behalten und sich zu merken, zu welchen Gewinden sie gehören.

  10. pnd2Zo3qXYkDjomq
    • Entferne das Motherboard.

  11. WgLG42MjNbwd3NQI
    WgLG42MjNbwd3NQI
    qvY56MNm5CVOWKgN
    • Entferne die beiden 2,5 mm langen Torx-Schrauben mit einem T5 Torx Schraubendreher.

  12. p1awZyTNxvvcKKHT
    • Heble den Akku mit dem Kunststoff-Öffnungswerkzeug von der Rückseite des Displays ab.

    • Der Akku ist stark verklebt – das Entfernen kann also etwas mehr Kraft erfordern.

  13. lGVQipMgA1o3ZCQB
    • Fahre mit dem Kunststoff-Öffnungswerkzeug ringsum an der Kante entlang, um die Blende vom Kleber zu lösen.

  14. DmQqEZEP14COlGlJ
    • Entferne die Blende vom Display.

    • Gehe vorsichtig vor – die Blende und die Leiterplatte sind empfindlich, und der Kleber haftet stark.

Abschluss

Um dein Gerät wieder zusammenzubauen, folge diesen Anweisungen in umgekehrter Reihenfolge.

Mitchell

Mitglied seit: 31/01/15

923 Reputation

9 Kommentare

Hi, I have a big problem with my kindle 7th genration, the screen is frozen, I tried the root by pushing start buton for 40 sec and more, nothing, even if I took apart every peace of the tablaet ( main board batery...) it still frozen !!!! how can I fix it? thank you

yassine el fakir -

i just let mine sit for a few months i didn’t even turn it on after a few months i plugged it in then turned it on and it worked

Victor Leija -

My screen froze two days ago while doing a reboot. So I read up on advice and nothing worked. Then I contacted Amazon and spent a mammoth six hours on chat trying to sort out the issue. After 5 consultants I ended up ordering a new kindle with a discount. When trying to apply the discount I spoke to an Australian Kindle guy who told me to drain the battery by leaving it for months without charge. Then I found this page and so I disassembled my Kindle up to removing the battery. Then I plugged the battery back in, and switched it on and it worked!! So I reassembled it and now it is working fine. Only problem is I just paid $249 for a new Kindle.

Marts Liena -

Hi, anyone knows if the replacement screen is still available somewhere? Any other screen I could buy that are compatible? Thanks!

blockemmanuel -

Yes. I believe there are new-old surplus stock display panels available on AliExpress and eBay. Just be sure to check to make sure that you’re ordering the correct EPD panel or assembly.

Kevin Bhasi -

Hi, I need the replacement screen for Kindle 7 Paperwhite model # WP63GW. Where are they available? Can the screen be dissembled further than the picture shown in the instruction above? I can see the mirror from the back of my piece? Can that be removed or else that is it, it can no longer separated from the mirror part?

ambika29 -

My screen is working after disassembling but the touch function is not working which was previously working before dissassembly. what did i do wrong, please help

Khan Haadi -