Einleitung
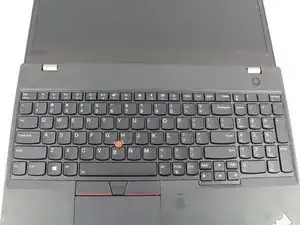
Wenn die Tastatur deines ThinkPad T580 nicht mehr funktioniert, hilft dir diese Anleitung sie zu ersetzen. Die Tastatur transportiert die Eingaben des Benutzers zur Hauptplatine, wenn sie nicht mehr richtig arbeitet kann der Computer nicht mehr richtig bedient werden.
Wenn deine Tastatur Fehlfunktionen zeigt, z.B. Doppelanschläge bei einzelnen Tasten, einzelne Tasten zeigen keine Reaktion mehr, stotternde Anschläge oder Totalausfall aller Tasten, dann löst ein Austausch der Tastatur wahrscheinlich alle Probleme.
Zum Glück ist die Tastatur im ThinkPad T580 modular und kann von der Oberseite aus eingebaut werden. Du brauchst die Bodenplatte zum Auswechseln nicht abzunehmen!
Ersatzteile
-
-
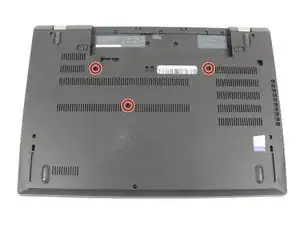
Drehe die drei 3,3 mm langen Kreuzschlitzschrauben #00 heraus, mit denen die Tastatur befestigt ist. Die Schrauben bleiben in den Schraubenlöchern hängen.
-
-
-
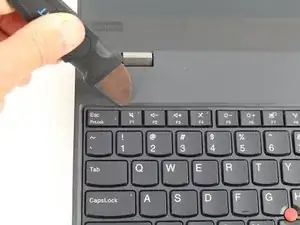
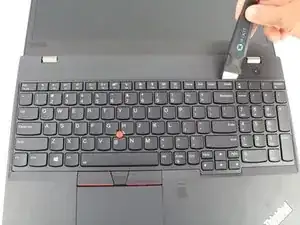
Heble weiter an der Oberkante der Tastatur entlang und löse dabei die Clips.
-
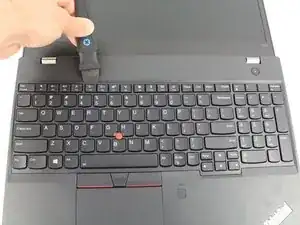
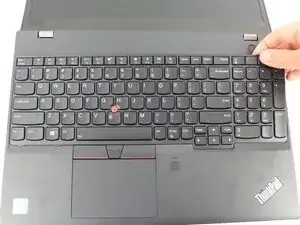
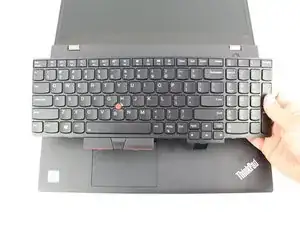
Wenn die Oberkante komplett frei ist, dann fasse sie an und kippe die Tastatur über die Unterkante ein wenig hoch.
-
-
-
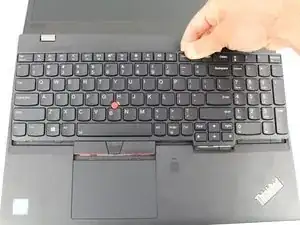
Ziehe die Tastatur von dir weg und löse dabei die Clips an der Unterkante.
-
Klappe die Tastatur mit der Oberseite nach unten über das Trackpad.
-
-
-
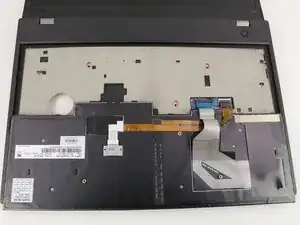
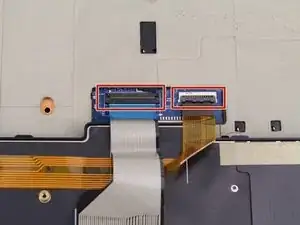
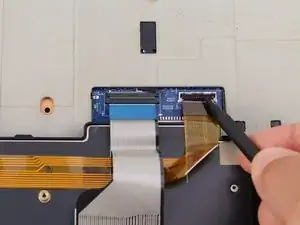
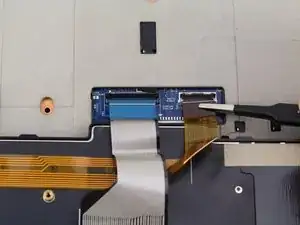
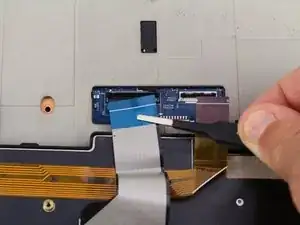
Klappe die beiden scharnierartigen schwarzen Sicherungsbügel an den ZIF-Anschlüssen auf der Hauptplatine mit einem Spudger hoch.
-
-
-
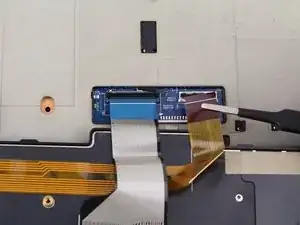
Ziehe die beiden Flachbandkabel mit einer stumpfen Pinzette aus den ZIF-Anschlüssen heraus.
-


Um dein Gerät wieder zusammenzubauen, folge den Schritten in umgekehrter Reihenfolge.

5 Kommentare
Aren't there screws on the bottom of the laptop that ought to be unscrewed as well? That's what the T580 service guide says, I think.
This guide is wrong. You need to remove three screws on the bottom. Then slide the keyboard forward (towards the screen) and lift it up at the front to remove it.
This guide is indeed incorrect. After just pulling the screws out of the back of the keyboard thinking they were "clips" as stated in the article, I can confirm that you DO need to unscrew the three center screws on the back of the laptop prior to removing the keyboard.
Dave -
Hi Dave.
You and the other commenters are 100% right! I have updated the guide accordingly.
Is it possible to replace the non-backlit keyboard into backlit one?