Einleitung

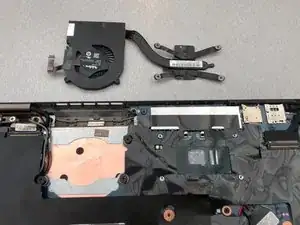
Diese Anleitung beschreibt, wie man das Lüftersystems aus dem Lenovo ThinkPad X1 Yoga (Modellnummer: 20FQ005YUS) entfernen, säubern und ersetzen kann.

Das Kühlsystem ist ein wichtiger Bestandteil, um die Funktionalität des Computers sicherzustellen. Sollte dein Computer langsam sein, überhitzen, oder der Lüfter laute Geräusche machen, ist es Zeit den Lüfter zu säubern oder das Lüftersystems sogar auszutauschen.

Nach Schritt 4 musst du Wärmeleitpaste wieder auftragen. Schaue hierfür gerne nach der spezifischen Anleitung.

  1. ddnAPKxuKSHJ1vyS
    ddnAPKxuKSHJ1vyS
    h52VZyjxom3o2N5Y
    UfOICHUfQXFPQ1lY
    • Schalte das Gerät aus und ziehe den Netzstecker, bevor du mit der Reparatur beginnst.

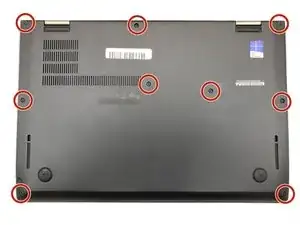
    • Drehe den Computer um, sodass die Rückseite oben liegt.

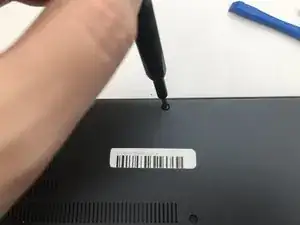
    • Entferne die neun 4 mm Kreuzschlitzschrauben #1 auf der Rückseite des Computers.

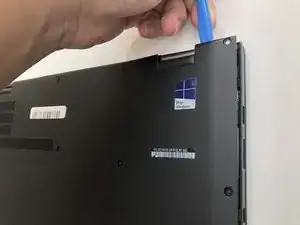
    • Verwende ein iFixit-Öffnungswerkzeug, um die hintere Abdeckung des Laptops zu entfernen.

    Bei der Variante mit integriertem UMTS-Modul die SIM-Karten-Schublade herausnehmen, sonst klemmt die beim Abheben der Gehäuse-Unterseite!

    Fxuser -

    Pry from the side of the hinge first.

    Dante Horatio -

  2. iSJKuMcLJwwwPYxW
    • Entferne die 4,5mm Phillips #1 Schrauben in den Ecken des Wärmeableitsystems.

    CAUTION you will need to re-apply thermal paste to the CPU and GPU if you remove the fan.

    This step is not necessary if you are only trying to access the keyboard and trackpad, or remove the monitor. If so, the steps of removing the Wifi and SSD are also not necessary. Skip to Step 16 Motherboard.

    Dante Horatio -

  3. guofjcqEeCpTgFXb
    guofjcqEeCpTgFXb
    R6DCYCVS3s5uHKmZ
    FmhUEjjiLj4YveSS
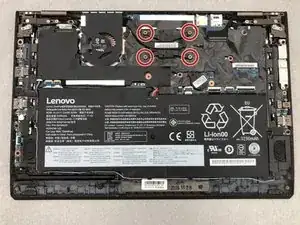
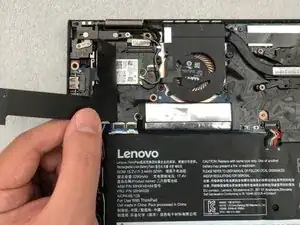
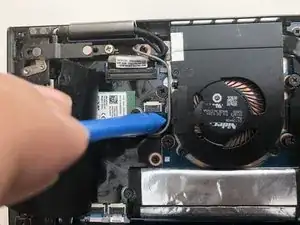
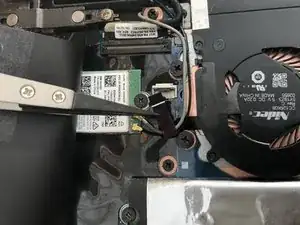
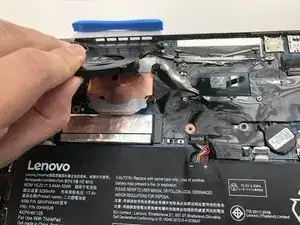
    • Ziehe die schwarze Kunststoffabdeckung, die um den Lüfter herum angebracht ist, vorsichtig ab.

    • Es könnte sein, dass du durch diesen Schritt den Klebstoff

    • Es könnte sein, dass du durch diesen Schritt hörst oder fühlst, dass der Klebstoff abgezogen wird.

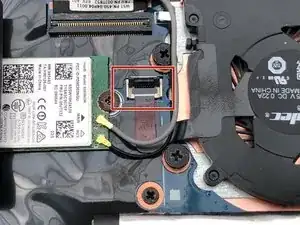
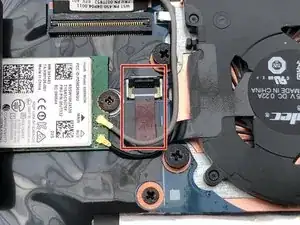
    • Drehe die schwarze Abdeckung des Lüftersteckers mit einem iFixit Öffnungswerkzeug auf.

  4. 52gxk1PdOGy2OotE
    52gxk1PdOGy2OotE
    V1hDf1SQm6PdKK5Z
    • Benutze eine Pinzette, um den Kunststoffstreifen herauszuziehen.

  5. StocvPucrZi5YKLW
    StocvPucrZi5YKLW
    gA1CxOJDjN5JyoAd
    • Entferne den Lüfter aus dem Computer.

    How does the user remove the fan?

    Sandy Branham -

    ****** BEFORE re-assembly
    1- clean material off of cpu (careful!)
    -- use a tool with a dull edge to scrape away the thermal conductive paste on the processor and the heat sink (the processor is the chip under the heat sink, the heat sink is the x shaped assembly that is attached to the fan

    2. apply a fresh coat of NEW thermal paste to the processor, then re-mount the heat sink
    -- google "applying thermal paste to CPU" for hints and tips about the right amount of paste to use and the correct ways to apply it.

    eric jmail -

    Really bad advice! For anyone who's reading, you DO NOT need to remove the fan (or heatsink)! The motherboard can be removed as a whole. This is a totally unnecessary step.

    Mahmoud -

Abschluss

Um das Gerät wieder zusammenzusetzen, folge den Schritten in der umgekehrten Reihenfolge.

Katrina Ternus

Mitglied seit: 07/09/19

595 Reputation

0 Kommentare