Einleitung
Diese Anleitung zeigt, wie die SSD ausgetauscht werden kann.
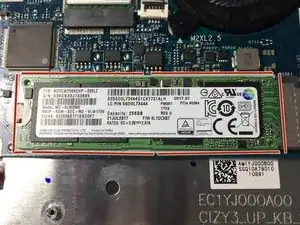
Ersatzteile
-
-
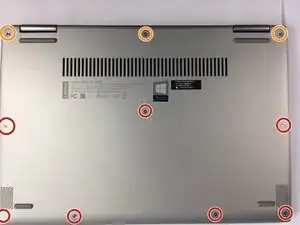
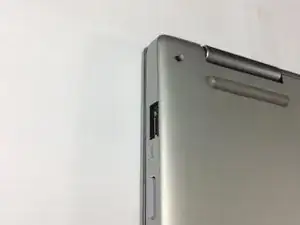
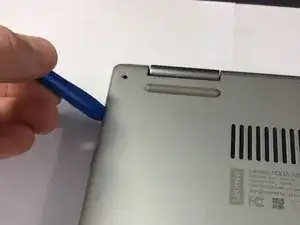
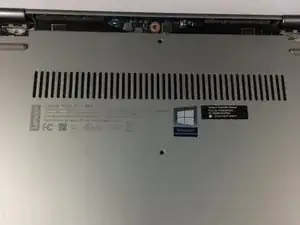
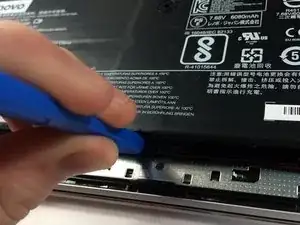
Löse vorsichtig die Abdeckung des Laptops mit deinem Öffnungstool vom USB-Port beginnend.
-
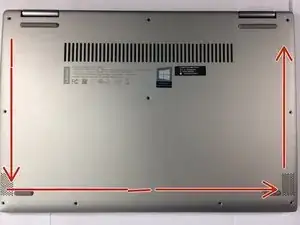
Öffne den Laptop in der Reihenfolge, wie die Pfeile es kennzeichnen.
-
-
-
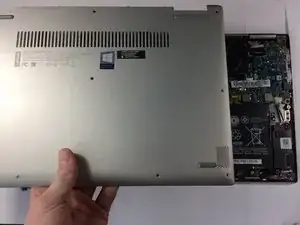
Hebe das Gehäuse von der Unterseite her an. NICHT von der Seite mit den Scharnieren.
-
Sobald du einen Widerstand spürst, ziehe das Gehäuse vorsichtig zu dir hin. (von den Scharnieren weg).
-
Entferne das Gehäuse.
-
-
-
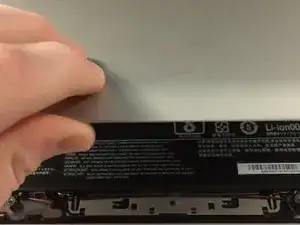
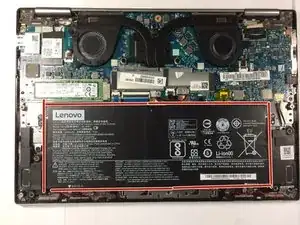
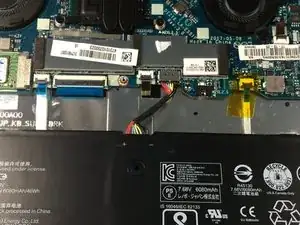
Das ist die Batterie. Bei Anleitungen, die für andere Teile bestimmt sind, wird die Batterie aus dem Grund entfernt, weil es mühsam ist, sie anzuschließen oder abzuklemmen, während sie eingeschraubt ist.
-
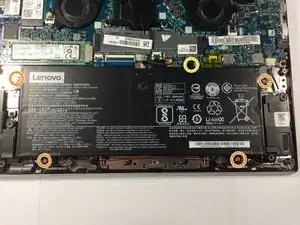
Entferne die vier J1 Kreuzschlitzschrauben.
-
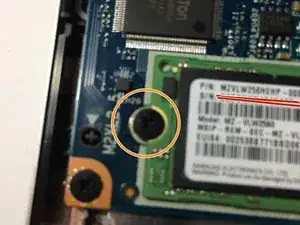
Entferne die eine J1-Kreuzschlitzschraube.
-
Hebe die Batterie mit dem Kunststofföffnungswerkzeug leicht an.
-
-
-
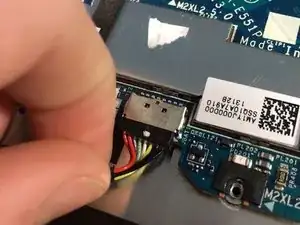
Ziehe die Batterie zu dir hin, bis das Kabel zugänglich ist.
-
Ziehe und wackle vorsichtig an dem Draht, bis er herausspringt.
-
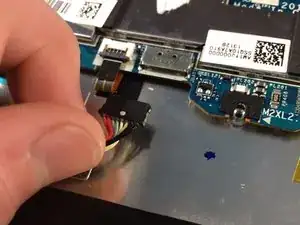
Entferne die Batterie.
-

Um dein Gerät wieder zusammenzubauen, befolge diese Anweisungen in umgekehrter Reihenfolge.
12 Kommentare
Your lucky to have a M.2 ssd. Also take those labels off if your going to have it serviced they may think you have opened it.
@captainsnowball 6000 REP! NICE.
Thanks @paperboypaddy. those labels were always on it. I do need it serviced now though.
Aiden -
I was able to take off the battery. But I stripped the screw for the ssd. It would not come out. I used what I thought was the correct screwdriver. Can any help me?
Thank you,
Alberto
Email: defdasm@yahoo.com
Stripping the screw usually only happens if a] you’re using a screwdriver that’s the wrong size, or b] you aren’t applying sufficient pressure. You may be able to remove the screw by using some fine/needlenose pliers, but I’d urge caution in doing so, and you might want to take this somewhere to have it done professionally if you’re at all uncomfortable doing so safely. Once you’ve loosened it, remove it by hand if possible.
Also, I’d recommend you replace the screw while you have the case apart. It is most likely a metric, m2 (as in, m1, m2, m3, etc. unrelated to the M.2 SSD form factor) x 3mm long, though the length may vary by about 0.5mm. You can sometimes find these at local hardware stores like Ace or a locally-owned non-Ace store. Larger hardware stores like Home Depot or Lowes (in the US) are less likely to carry metric screws that small.
Steps 4-5 appear to be unnecessary for this upgrade unless you’re disconnecting the battery for safety reasons. Is that why they’re present?
Thank you for the help. I would say it was option B. It was a stupid mistake on my part.
The guide easy enough to follow.
I am going to give this a try.
Wie man eine rundgedrehte Schraube entfernt
One of the options I would avoid at all costs.