Einleitung

Wenn dein Mac Pro ein zerkratztes oder beschädigtes Gehäuse hat, findest du hier eine Anleitung, wie du das Gehäuse öffnen und austauschen kannst.

Die Reparatur ist zeitaufwändig, aber gut zu schaffen. Geduld ist der Schlüssel zum Erfolg.

  1. KMpqMEtAbnVdygwu
    KMpqMEtAbnVdygwu
    TQXqRCdIDFjn1CUC
    uK2aKBEKNw6WkOFw
    • Um das Gehäuse zu öffnen, muss eine Klappe auf der Rückseite hochgehoben werden.

    • Die Klappe muss während der Reparatur offen bleiben.

    Por favor….. ¿sabes dónde está ubicada la batería interna que conserva el reloj actualizado?…… Gracias.

    Agustin Redondo -

  2. RMQwwPpmOOxtxx5w
    RMQwwPpmOOxtxx5w
    MyGEuxTG1qapmAVO
    • Die seitliche Abdeckung sollte sich leicht ablösen lassen.

  3. 25KRIKhSjWYvhtnp
    25KRIKhSjWYvhtnp
    KFV5kpyxg4xFNaeV
    • Ziehe die Festplatten mit etwas Kraft heraus und entferne sie.

  4. 3KJcjpQra3WtTLle
    3KJcjpQra3WtTLle
    4QZBgQbKDixI322B
    DPIHuMrvwqoTVxMH
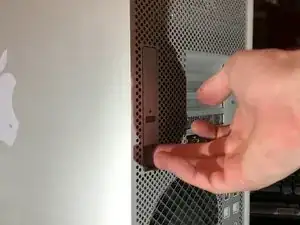
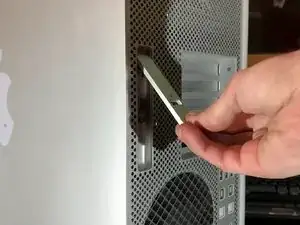
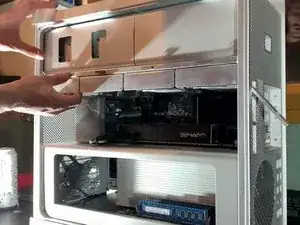
    • Ziehe den Einschub des DVD mit etwas Kraft zu dir heraus und entferne ihn.

    • Trenne die Versorgungskabel und SATA-Kabel der DVD-Player ab.

  5. TofnldQFBL6lrD6H
    TofnldQFBL6lrD6H
    cJqyXpn3YbCVNPEI
    XiAJborotfxYmOfE
    • Drücke auf die beiden Riegel, damit die Halterung frei wird.

    • Ziehe die Einheit heraus.

    • Das sollte ganz leicht gehen.

  6. UGFR2tNW1OqjpNx4
    UGFR2tNW1OqjpNx4
    ickheqqOYcPtKbOv
    • Löse den 6 oder 8-Pin Stecker deiner Graphikkarte ab.

    • Dieser Schritt ist optional - je nach deiner Graphikkarte.

  7. GHnAyEdDkWc3v4Ep
    GHnAyEdDkWc3v4Ep
    QCDvESQIkRsnk2qJ
    MYGZDQAhRIoQSYVE
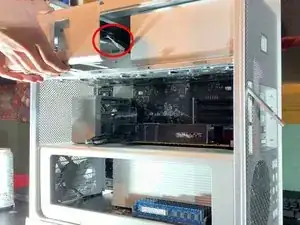
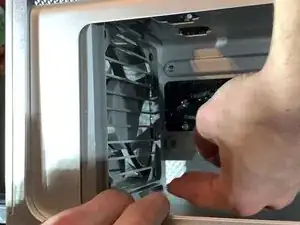
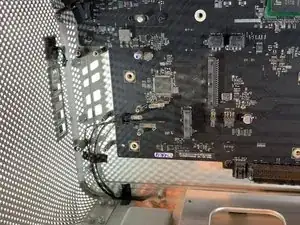
    • An der Halterung des Lüfters befindet sich eine Art Taste, drücke sie herunter und schiebe die Halterung nach links. (Siehe Foto)

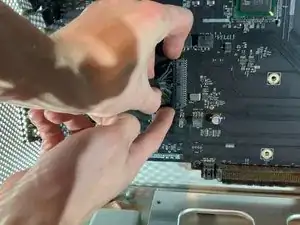
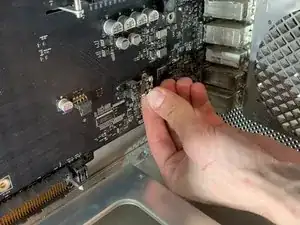
    • Du musst die Grafikkarte zu dir ziehen, um sie aus der Fassung herauszuholen.

    • Dieser Schritt ist optional - je nach deiner Graphikkarte.

    That is not the power supply but rather just a fan shroud. It is important to move that back to release any PCIE cards that have the rear locking tab as it also moves the metal bat shown on the right side of the picture to release the lock from the tabs.

    Kevin Youngblood -

    Hello, the cable between the grey block and GPU is my GPU alimentation (mini 8-pins), so for unplug this alimentation, you need to move the fan shroud

    Please read the whole tutorial, just after this step, I explain how to unplug this cable

    remitouch -

  8. AURq3u2SyLGGTqgP
    AURq3u2SyLGGTqgP
    OxtkGCXMhVVlGBsY
    • Trenne die Kabel zur PCI-e Karte von der Hauptplatine ab.

    • Dieser Schritt ist optional - je nach deiner Graphikkarte.

  9. TRbbyMIEsGKCJuN2
    TRbbyMIEsGKCJuN2
    QqyphuBaneJhvsQQ
    wt5X2wDDrDZaYfKy
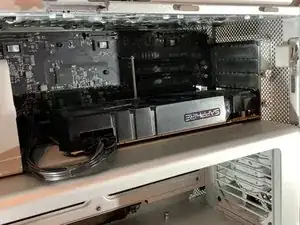
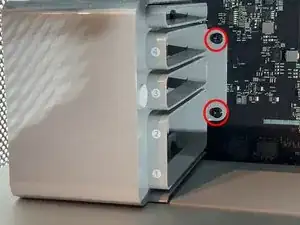
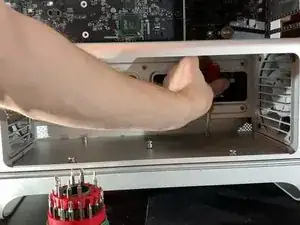
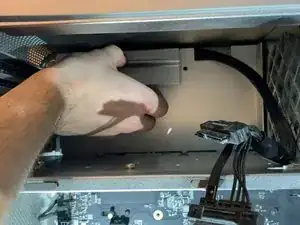
    • Entferne die beiden Schrauben, mit denen die Halterung des Lüfters befestigt ist.

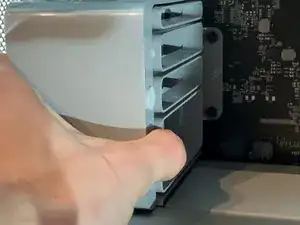
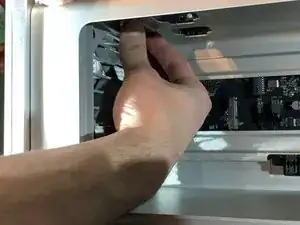
    • Ziehe den Lüfter zu dir aus dem Gehäuse heraus.

  10. Vbsn6GGleRLyLe3G
    Vbsn6GGleRLyLe3G
    aVNVJmtJsC4nAfoZ
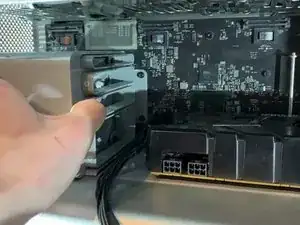
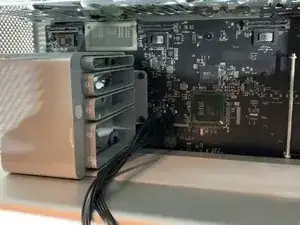
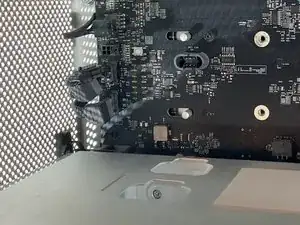
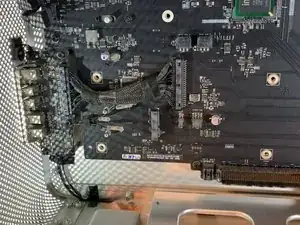
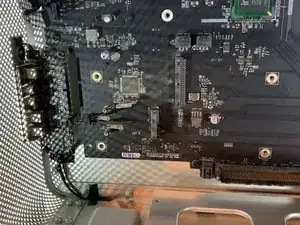
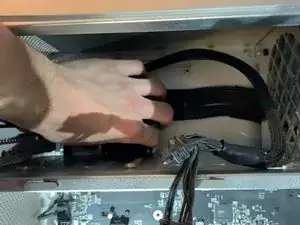
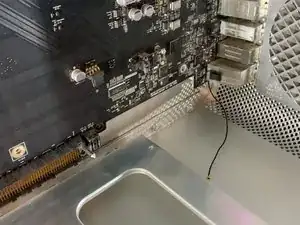
    • Hinter der Halterung für den Lüfter werden zwei SATA Anschlüsse sichtbar, eine zur Versorgung mit vier Mini Pins und einen für den Lüfter mit zwei Pins.

  11. 4OPYATpWhxM2C1Tr
    4OPYATpWhxM2C1Tr
    1MAtjcnSo6NGeIAS
    EdWeMijcTdChF4Ty
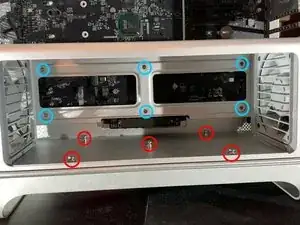
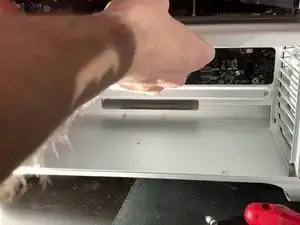
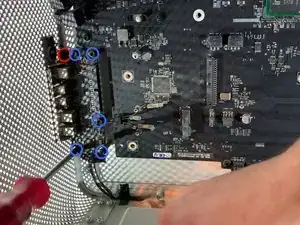
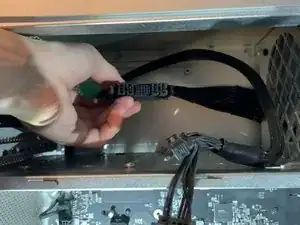
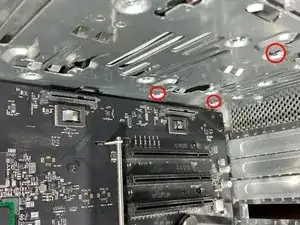
    • Entferne die H 2,5 Schraube am unteren Teil des Trägers. (Bild 2)

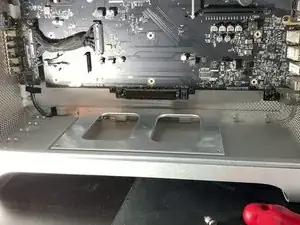
    • Entferne die Kreuzschlitzschraube am Boden (Bild 3).

    The bottom screws are H2.5

    John Zheng -

    corrected, thk

    remitouch -

  12. 31AY4bPtHgJaCpDv
    31AY4bPtHgJaCpDv
    hCR6xnKnrQRaNcqS
    yCGPIVcMNWN46hyv
    • Löse die Rasten oben am Lüfter.

    • Ziehe den Lüfter ein wenig heraus.

  13. 2b1NPWHgTtv5kskA
    2b1NPWHgTtv5kskA
    J6ySinUBoPx1JINL
    • Hebe den Lüfter unten leicht an, um die unteren Rasten zu lösen.

    Where tf os the clip at the bottom???????

    Dan man5000 -

    It is only necessary to move both fans about 1 cm towards the centre of the computer box. You then need to disconnect the plugs for both fans the the loudspeaker in order to slide out the cpu unit. Do not attempt to remove the fans!

    frank booy -

  14. KkDHxfJVOUTUxols
    KkDHxfJVOUTUxols
    MJbhwrKWfeMX6CvO
    rdKAvsqPfSxfF1dE
    • Trenne zwei Stecker mit 4 Pins (Lüfter) und einen mit 2 Pins (Lüfte) ab.

    • Vergiss diesen Schritt auf keinen Fall. Die Anschlüsse auf der Hauptplatine könnten sonst kaputt gehen und unbrauchbar werden.

    Wtf hot the !&&* do you get those out. There like stuck

    Dan man5000 -

    - You need to disconnect/seperate the retaining catch on the motherboard connecting shroud from the retaining clip on the cable connector.

    - To help do this, you can Very Lightly use a spudger/prying tool or cut some piece of scrap recycled plastic off a bottle to slide between the two on the top side of the connector, parallel to the motherboard.

    - Once you have to two interlocking halves held apart, then you may be able to

    * wiggle the connector off

    * use a small flat headed screw driver or similar tool to Again Lightly help start to push from between the motherboard and cable connectors

    * and/or, Gently use a hobby plyers or large tweezers to lightly grab the cable connector from the short edges for a better grip while wiggling

    - If this still doesn’t make sense, then you might try searching for images of “motherboard cable connector retaining clip” or some such.

    Hope that helps.

    Chris Alby -

  15. RqTN51k1qkA55LNC
    RqTN51k1qkA55LNC
    qZkDekL1iTjBmnrX
    CCnS4cDYRvAs2ZIx
    • Ziehe den CPU-Träger zu dir heraus.

    • Das sollte ziemlich leicht gehen. Wenn nicht, überprüfe, ob die Lüfter den Träger behindern.

  16. 1sBTRV3WN3apfwrP
    1sBTRV3WN3apfwrP
    dsVWVVETtsCEQVSZ
    CUEJglssQxGTfTew
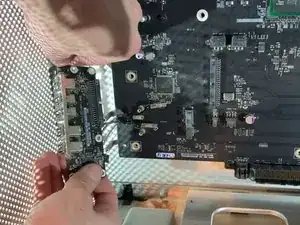
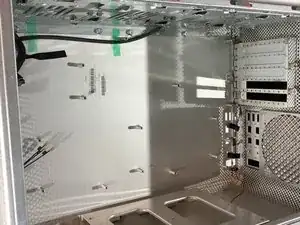
    • Löse die Verbindung zwischen der Hauptplatine und der Erweiterungskarte. (USB, Anschlüsse, Einschalttaste etc)

    • Achtung, ziehe den Stecker so ab, dass die Kontakte auf der Hauptplatine nicht verbogen werden können.

  17. 4PYJyS1UjktlArZM
    4PYJyS1UjktlArZM
    JHOAJHOkSkGWtNDL
    MLNaByFmurFLlCZl
    • Entferne die fünf Schrauben, mit denen die Karte befestigt ist.

    • Ziehe die Taste der Stromversorgung sorgfältig ab.

    Does anyone have a part number or alternate name for the expansion card?

    Ed Cooper -

  18. IStqdMiV4G4NykLP
    IStqdMiV4G4NykLP
    nUKESAtjqR32TqMC
    Z1c5xmFwo4UoirCY
    • Entferne die beiden Schrauben und hebe die Abdeckplatte hoch.

  19. g2JlutGawZmqWjOB
    g2JlutGawZmqWjOB
    HobOeJmoraFf5nAy
    XxPQQtKIWEwbPbyA
    • Drücke auf die beiden Rasten, um den Stecker der Stromversorgung zu entriegeln.

    • Wende keine Gewalt an, wenn der Stecker richtig entriegelt ist, sollte er leicht herauskommen.

  20. EmFvFD5KrVC4x2yT
    EmFvFD5KrVC4x2yT
    b5ovrRMFKJgcl3gW
    • Entferne die vier Schrauben, mit denen das Netzteil befestigt ist.

    The 4 screws used here require a 2mm Hex bit. You do not need to unscrew the Phillips screws to remove the power supply.

    tabbypears4 -

  21. NULAZQSvgKuA1LS2
    NULAZQSvgKuA1LS2
    HLd2ayoipQWBxu2F
    VHxhAsNNeaTCmSQ3
    • Ziehe das Netzteil zu dir hin.

    • Achte beim Ablösen auf den Stecker.

  22. SkhTArwTIB3pyjya
    SkhTArwTIB3pyjya
    YXBgDUq6XMElBVlV
    sKlcWIbYJdN6YRuk
    • Trenne die Bluetooth-Antenne ab.

  23. 54dBOcmvBAuBlFuf
    54dBOcmvBAuBlFuf
    AWSDiLRcOxte1F5u
    upvZGC51NAexHFKb
    • Entferne die zehn Schrauben, mit denen die Hauptplatine befestigt ist.

  24. Jlim6XgiMOQP45ZZ
    • Gehe die Schritte in umgekehrter Reihenfolge durch, um das Gerät wieder zusammenzubauen.

    Great instructions.

    Easy to follow

    Andrew Schmetterling -

    Thanks for posting this teardown! Worked out great!

    Used this to replace all the cooling fans in my macpro5,1

    Andrew Clark -

    how can i take apart the case further as in Taking off the latch and the Wifi and the top piece that holds the PSU?

    CaffeinatedMac -

    how can i take apart the case Further as in the latch and the plastic parts the cheese grater front panel ect.

    CaffeinatedMac -

Abschluss

Um dein Gerät wieder zusammenzubauen, folge den Schritten in umgekehrter Reihenfolge.

remitouch

Mitglied seit: 12/10/16

1009 Reputation

7 Kommentare

Bonjour, j’ai un mac pro 5,1 de 2010 dont les clapets (ou les trappes, j’ignore le terme exact) de la baie des lecteurs de disques restent ouverts à chaque fois qu’ils sont actionnés. Je n’ai pas réussi à les démonter, et les 2 gouttes de 3 en 1 sur les glissières latérales n’ont rien changé au problème. Je n’ai trouvé aucun tutoriel, ni même aucune occurrence de ce problème sur le web. Pourriez-vous me donner quelques conseils ? Merci.

Gabriel Fracque -

Amazing explanations and perfect picture track on each move made.

Thanks much - this was very helpful :)

Dennis.

Dennis OBrien -

Hello sir , I have a problem with my Mac Pro 5,1 mid 2010 Xeon 6core Cpu 64 GB Ram RX580

I erase SSD Hard Drive and I want to reinstall mojave OS and it does not work still appear ‘Missing Operating System’

I try to use all commends on startup like (Option) (Commend+R) (Option+Commend+R)(Option+Commend+R+P) and more commends

but nothing work with it … please I want help . I need your help please , please …

Hussain Khan -

You’d probably get an answer a lot quicker if you just posted that as a question.

[deleted] -

Thanks for posting this guide!

I used it to replace all the cooking fans in my macpro5,1. Worked great!!

Andrew Clark -

The "cooking fans", is your Mac Pro a flat top grill?

guardian10 -

@guardian10

Haha! 😆

I guess my spell check/proofreading skills were not engaged that day…

Andrew Clark -