Einleitung

Dieser Teardown wurde von einem Mitglied der iFixit-Community erstellt.

Den Teardown des Mac mini Ende 2018 findest du hier, die Anleitung zum Austausch des RAM hier.

  1. XCpxa3RBJMbWCDmB
    XCpxa3RBJMbWCDmB
    15ZjMFrxtPOVFmNb
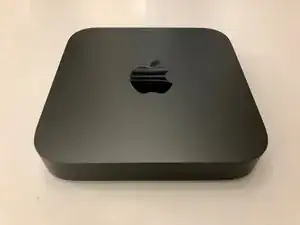
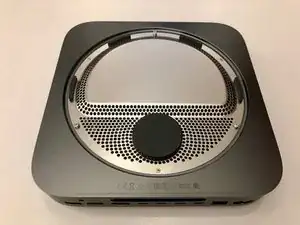
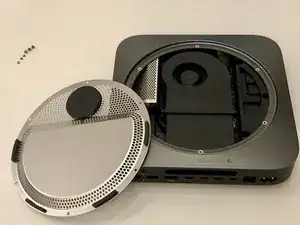
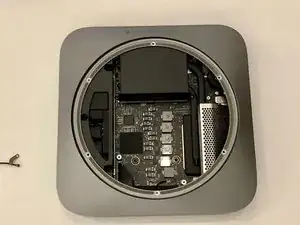
    • So sieht er aus, exakt derselbe Formfaktor wie der vorherige Mac mini, aber jetzt in "Space Gray".

    Before you begin, I encourage you to use an antistatic wristband, but wear it around your ankle instead. This approach allows for greater freedom of movement, making it more convenient to work on your hardware without being tethered by a wristband. Although this guide doesn’t specifically advise antistatic precautions, it’s wise to ensure you’re not a source of static that could transfer to sensitive components, potentially causing damage. Taking this small precaution can help protect your hardware from unintended static discharge.

    Alex Santos -

  2. ASxpGnDWZvvPcWbr
    ASxpGnDWZvvPcWbr
    n6OKrg2YZesUsnEd
    xybYmxveCueNSmWU
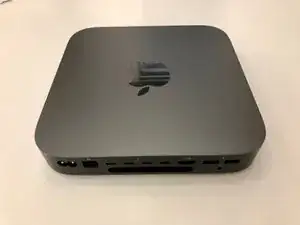
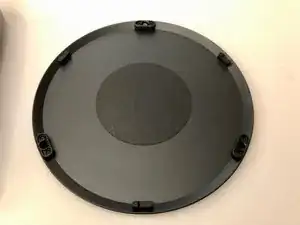
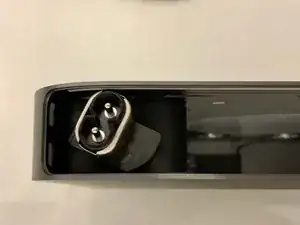
    • Auf der Rückseite ist eine bekannte schwarze Abdeckung zu sehen.

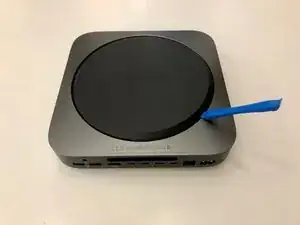
    • Heble die Abdeckung von den drei großen Befestigungsschrauben herunter.

    • Die Abdeckung hat innen eine weiche Schaumfüllung, um die Vibrationen des verbesserten Lüfters zu dämpfen.

  3. rqiGAKdOUK1N5Zic
    rqiGAKdOUK1N5Zic
    sewhvrBjjLCfWiVO
    • Die Abdeckung ist mit den gleichen TR6 Schrauben befestigt wie das 2014er Modell.

    I had to use a T7 torx for all 6 of these. All other screws were the size specified in this guide.

    max -

    Nein, passt nicht, weil es in der Mitte der Schraube noch ein Stift steht. Es muss TR6 mit Loch!

    Klaus Opper-Liebchen -

  4. CBBj6ZVPLTeuLRrb
    CBBj6ZVPLTeuLRrb
    TEVgyxTbj3C3XxBZ
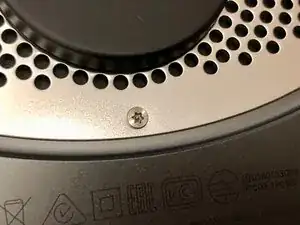
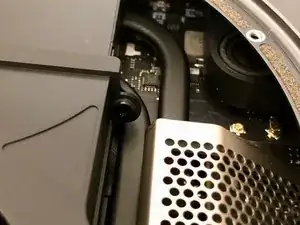
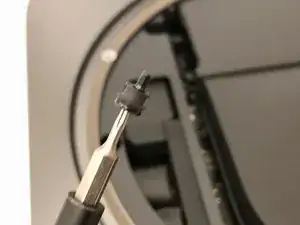
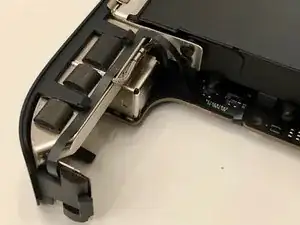
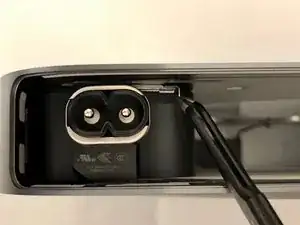
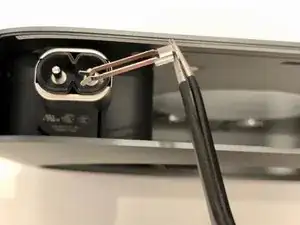
    • Vorsicht! Das Antennenkabel ist sehr kurz. Drehe die Abdeckung vorsichtig, um an das Innere des Mac zu gelangen.

  5. 1t4ks333UokPcKwm
    1t4ks333UokPcKwm
    XVQIyyKYcNGrMlcP
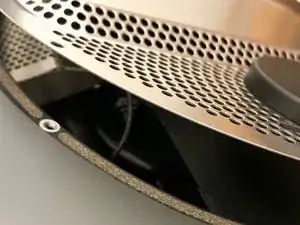
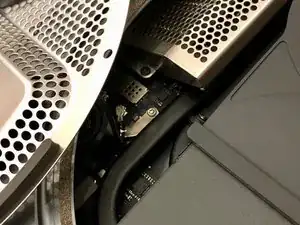
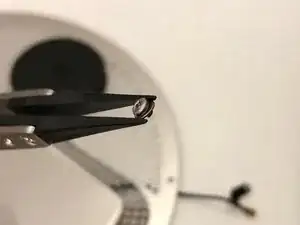
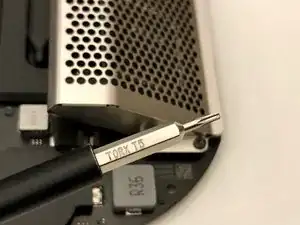
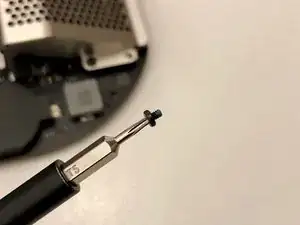
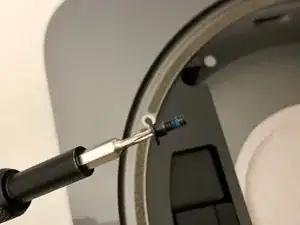
    • Das Antennenkabel wird mit einer kleinen TX6 Schraube befestigt.

    • Eine winzige Unterlegscheibe soll sicherstellen, dass das Kabel nicht unter Zugspannung gerät.

  6. eevcPAcLNaAJfuyI
    eevcPAcLNaAJfuyI
    ADCEs61OLB2wO4j3
    hqkCZSf2CngM4KBG
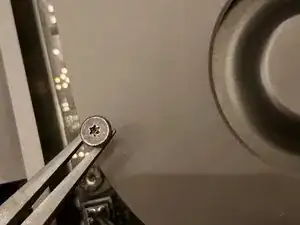
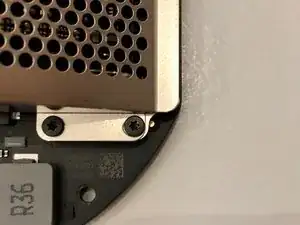
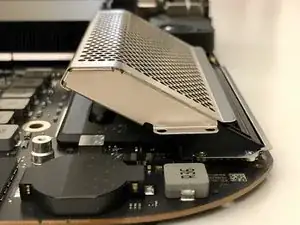
    • Der Lüfter wird mit vier identischen TX 6 Schrauben befestigt.

    • Die Schrauben passen durch eine Gummihülle, um Vibrationen zu mindern.

    Images showing the location of the 4 screws would have been helpful

    Alex Santos -

    In the middle picture, the rubber tube and screw are shown as a single unit. In my case, when I removed the screw, the rubber tube stayed attached to the fan. There’s no need to remove the rubber tube from the fan to match what’s shown in the picture—it can remain inserted in the fan housing.

    Alex Santos -

  7. D1jIK6MJrDfX6d4y
    D1jIK6MJrDfX6d4y
    mEIhri4BDnayxOhX
    G46WEvWWII2iQJwI
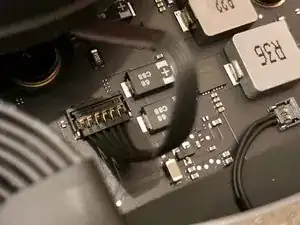
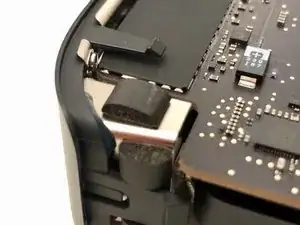
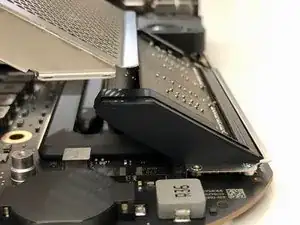
    • Der unterhalb des Lüfters sitzende Stecker ist leicht zu lösen.

    • Der Lüfter ist sehr solide. Er ist viel besser als bei den Vorgängermodellen.

    A word of warning about taking the fan out. The fan cable snaps easily in and out of its socket on the motherboard, but there’s not much holding the socket to the motherboard. No solder, no glue that I could see. After taking the fan out and replacing it repeatedly one day, I managed to bring the socket out with the cable plug. I don’t know at the moment what I can do about it, but I’m not about to plug the computer in and find out what happens.

    Birck Cox -

  8. NerlHjVDWBISGN1P
    NerlHjVDWBISGN1P
    oNKER22aR6gaIPRZ
    j3LhPqeyMMLcnFJu
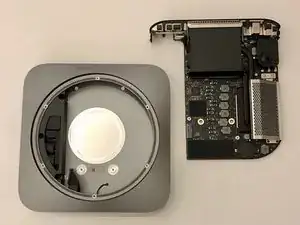
    • "Motherboard" entfernen:

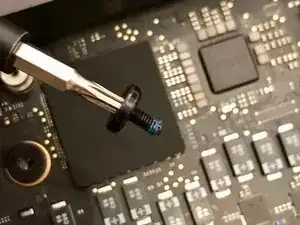
    • Die (für den Mini) sehr stabilen TX10 Schrauben befestigen die Hauptplatine am Gehäuse.

    You may want to unplug the power supply first, as the two T10 screws help secure the motherboard while disconnecting the power cable. Check the next step to see if this approach works for you. If you decide to remove the screws, keep one finger on the screw hole closest to the power cable to hold the motherboard in place as you unplug it.

    Alex Santos -

  9. uGPBeEpERMSogNsW
    uGPBeEpERMSogNsW
    PNpPNo52lam1UvoU
    • Mit einer Pinzette lässt sich der Stecker des Netzteils an möglichst vielen Kabeln auf einmal nach oben herausziehen.

    • Der kleine Stecker des "Power-LED" kann ebenfalls abgezogen werden.

    The power supply should probably be unplugged before the previous step.

    Alex Santos -

  10. BNHLTXvF5jtvjSrA
    BNHLTXvF5jtvjSrA
    vXLKOooKB1ONL6Xm
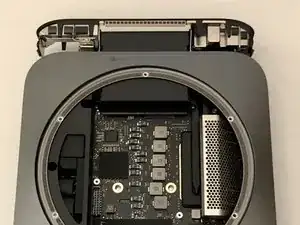
    • Jetzt lässt sich die Hauptplatine mit vorsichtigem Druck auf den Kühlkörper herausschieben.

    Reinserting the logic board is a straightforward process. Ensure that you orient it correctly, as it should be inserted in the same direction as it was removed. I found it helpful to position the machine vertically during this step. As you gently push the board toward the back until it's nearly flush, apply slight pressure on both the left and right sides of the logic board assembly. This will help push the tabs inward, creating enough clearance for the board to slide all the way back in securely.

    Alex Santos -

  11. bKXoYmPQP3SaRGsr
    bKXoYmPQP3SaRGsr
    WUqRh3Ncspp2vByO
    x1DJ3yErQ6ujkTUA
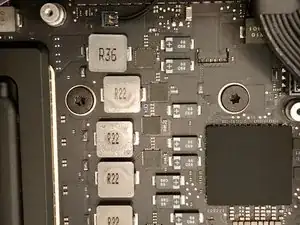
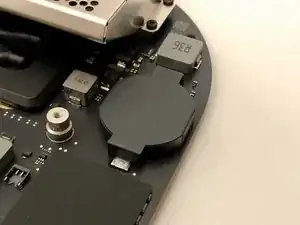
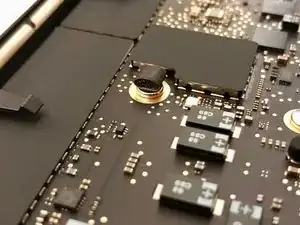
    • Hier gibt es einige interessante Designänderungen. Eine große CMOS Batterie

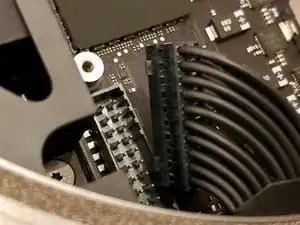
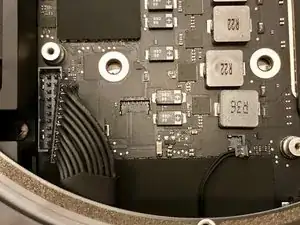
    • Das WiFi-Kabel verläuft unter dem großen Lautsprecher.

    • Die Einschalttaste ist an einem ultraflachen Kabel angebracht, das in einem Bogen am Kühlkörper liegt.

  12. VVYjrCYJYGmsXXNP
    VVYjrCYJYGmsXXNP
    dBBvRcMDKhCquI6p
    brpxeHrQSQ2JAJGC
    • Wir drehen die Hauptplatine um und sehen auf der Unterseite eine Menge winziger Komponenten.

    • Auf der Platine sind auch ein paar bekannte Stücke Schaumgummi verteilt.

  13. AHQQdstCMFIQuvRs
    AHQQdstCMFIQuvRs
    LkwPtACpYFZQCLBj
    Kl1i1QiRYB3Qyu5i
    • Jetzt sind wir beim RAM.

    • Er wird von vier TX5 Schrauben gehalten.

  14. SNVelCEjrxaI1YAk
    SNVelCEjrxaI1YAk
    UrJFQwlbxcVmsrih
    V13xFEOjVXyySuCV
    • Die Abdeckung des RAM lässt sich schräg nach oben wegziehen.

  15. dP5hLlJbfFhyxXs5
    dP5hLlJbfFhyxXs5
    rsuaflB2dyyUIDfg
    • Es wird später beim Einbau sehr schwer werden, diese Gummiteile wieder einzusetzen.

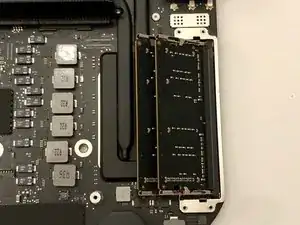
    • Es sind winzige Gummistücke, die in die Metallklammern eingeschoben werden müssen, die den Speicher befestigen.

    Tip: When removing the rubber slips, start by loosening the bottom first, then slide them away from the RAM, similar to how you would remove the RAM shield. This method helps prevent any unnecessary strain on the RAM and ensures a smoother removal process.

    Alex Santos -

    The statement "These rubber parts will be a pain to put back on later" is misleading. In reality, reattaching the rubber side covers after installing the new RAM is quite straightforward. Each cover has two short arms or fingers that easily slide into corresponding holes on the metal edge surrounding the RAM. Once the fingers are properly aligned and inserted, you simply press the base of the rubber cover toward the RAM to secure it in place. This process is typically quick and hassle-free.

    Alex Santos -

  16. d2nVHu6flTKscV5F
    d2nVHu6flTKscV5F
    e3eAXhuLHYjDvDgm
    MCiK1yTFPKLinfjb
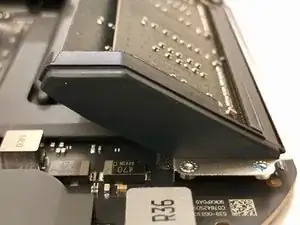
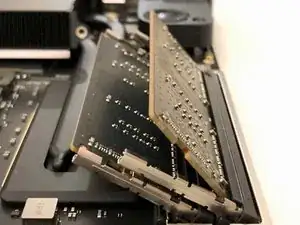
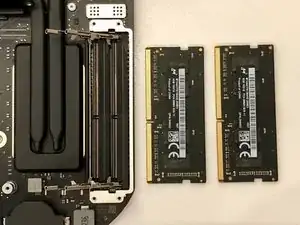
    • Der Speicher selbst sitzt mit der Bestückungsseite nach unten im Sockel.

    • Die Haltefedern sind sehr stark und werden den Speicher mit Wucht herausdrücken. Vorsicht !

    Does anybody knows if this memory is ECC?

    ECC modules have a chip-count divisible by 3 or 5. Usually the extra chip is smaller than others.

    I see only four chips but the extra smaller fifth one maybe is hidden behind the sticker.

    Agnostos Gnostos -

    No, the RAM for the Mac Mini (2018) is not ECC (Error-Correcting Code) memory. The Mac Mini 2018 uses non-ECC DDR4 memory, which is standard for most consumer desktop computers. ECC memory is typically found in servers and workstations where data integrity is critical. The Mac Mini 2018 supports up to 64 GB of DDR4 memory, and it can be configured with 8 GB, 16 GB, or 32 GB of RAM

    Alex Santos -

    When inserting new RAM, begin with the slot farthest from the edge of the logic board. Slide the memory into the slot at a slight angle, greater than the angle at which it will settle. This allows you to press inward gradually. As you do this, you’ll notice the RAM may bump against two tabs. Gently spread these tabs away from the RAM to facilitate its insertion without applying excessive pressure. Take your time and carefully analyze each step of the process to ensure proper installation.

    Alex Santos -

  17. ORuLIJWfCeQHyuvK
    ORuLIJWfCeQHyuvK
    By22v2WGBlxnywgJ
    KSvr4hCO1GKHaVdW
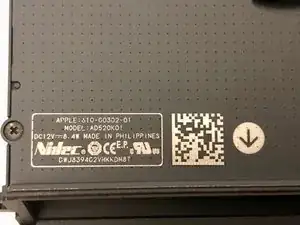
    • Der Stecker des Netzteils ist ähnlich wie das der Vorgängermodelle befestigt.

    • Ein kleiner Clip muss entfernt werden und der Stecker kann gedreht werden.

  18. euybZMosgsGRKkxK
    euybZMosgsGRKkxK
    DjSCRYUR1rI635Ms
    5i6DpuynwZWKaqKC
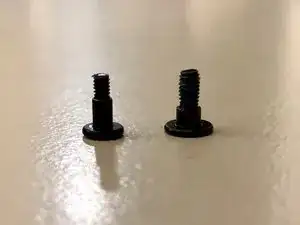
    • Das Netzteil wird mit drei TX6 Schrauben befestigt.

    • Sie sehen aus wie die Schrauben des Ventilators, scheinen aber ein wenig dicker zu sein und ein längeres Gewinde zu haben.

  19. IkJIinDVhYwqRHou
    IkJIinDVhYwqRHou
    TPnG62ijHPEGvnxq
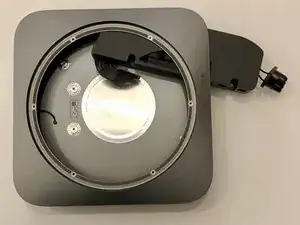
    • Nach dem Entfernen des Netzteils bleibt uns nur noch eine leere Hülle.

    • Es hat Spaß gemacht, den Mini aueinanderzunehmen. Das Urteil: Es ist sehr viel einfacher als das 2014er Modell, weil die Kabel an viel logischeren Stellen angebracht wurden.

Abschluss

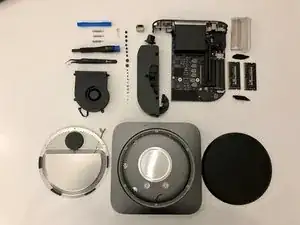
Um dein Gerät wieder zusammenzusetzen, folge den Anweisungen in umgekehrter Reihenfolge.

Wouter de Vries

Mitglied seit: 08/11/18

655 Reputation

6 Kommentare

What happens to the machine if the SSD fails? Will the entire logic board need to be replaced? I have a feeling that the chances of SSD failing would be significantly higher than Ram… So shouldn’t apple make SSD removable as well?

Sam -

Failing SSD means a failing motherboard. In my experience, apple ssd-s are very reliable. Upgradable memory allows you to use a device longer. If you configure it with 16GB today, you might want to max out the memory in the future, once prices go down.

Wouter de Vries -

What about the CPU, is it in a socket or soldered in?

Steve Seg -

I didn’t have the courage to take the heatsink off. So we’ll have to wait for someone who does.

Wouter de Vries -

Mich würde interessieren, wie die CMOS Batterie getauscht wird, bzw. welcher Typ es ist.

Sven Arendsen -

Please advise. How can I change pram battery? It seems very hard to take off cover? from battery.

居谷道康 -