Einleitung

Folge dieser Anleitung, um den Ohrhörer-Lautsprecher deines Motorola Droid Turbo zu ersetzen.
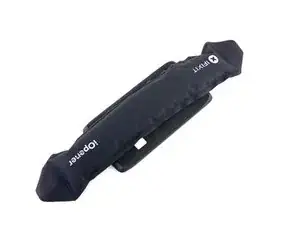
  1. AXEePnT6RB6V26sV

    This di not work; I had to use a blow dryer.

    Caroline Downie -

  2. tCZUL1xPGuWG2N6U
    tCZUL1xPGuWG2N6U
    IjXaZOLUXmbQ2ebl
    • Heble die Rückseite mit einem Plastiköffnungswerkzeug ab.

    • Entferne die Rückseite.

    • Die Ladespule könnte innen an der Rückseite festkleben. Trenne sie in diesem Fall von der Rückseite bevor du diese abnimmst.

    I had to go around the case, starting on the non-button side, around the top and then the other side. This, unfortunately, pulled on the rear case, pressed the power button and turned the device back on. I would suggest starting on the button side and going around.

    Ryan Helinski -

  3. k2MAinY3olQTigXK
    • Entferne die Blende um den Mittelrahmen.

    The next immediate step should be to remove the cable for the battery from the motherboard, lower left corner. That will keep you from accidentally turning the phone on while working with it.

    decker5 -

  4. ccCTRolaCRGRQo5c
    • Die Platte des Mittelrahmens ist mit vier Torx T5 Schrauben befestigt. Drehe sie heraus.

    Step 4, there are also 2 T shaped tabs on the sides locking the mid frame plate. Above them you can see an angled hole where you can insert a paper clip to push them out and up to unlock them.

    Mike Mangiaruca -

    The WiFi on the Turbo I’m working on has stopped working. The phone was reset to factory to see if this would fix it after all other try-this-first methods to fix had failed. I opened it to check there and find nothing apparently wrong.. No bent connectors or dirty pins. Any suggestions? I started to clean this section with alcohol but decided I’d better ask first. Any suggestions?

    Rongwey -

  5. iqXC3OOKukmQ3LPp
    • Nimm den Mittelrahmen heraus.

    There's two clips to the left and the right of the midframe. Use a SIM tool and insert them into the holes above the clips, and push the clips out from the inside. Once both have been pushed the midframe is released.

    rkarnes1988 -

    Many ANY thanks for that additional tip. Rather important!

    Nate Baxley -

  6. HAZCsbCS3im3ep3K
    HAZCsbCS3im3ep3K
    LTdRuQpf6GYoGbvF
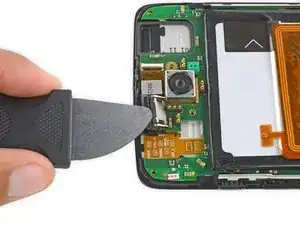
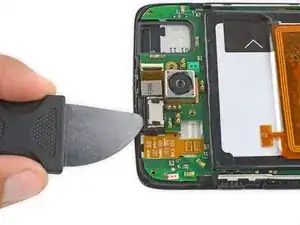
    • Benutze einen Jimmy, um unter dem Lautsprecher zu hebeln und ihn anzuheben, um ihn zu entfernen.

    • Achte darauf, dass du dein Werkzeug unter der gesamten Lautsprechereinheit an den Kunststoffrahmen anlegst und dort hebst.

    • Diese Fotos zeigen eine falsche Position des Werkzeugs - wenn du so weit oben am Lautsprecher ansetzt, kann er beschädigt werden. Platziere dein Werkzeug unter dem Lautsprecher, nicht wie hier gezeigt an der Kante.

    • Der Lautsprecher ist mit leicht festgeklebt, daher kann etwas Kraft erforderlich sein.

    Where the sesamo in the picture is pushing against is actually part of a seperate plastic assembly. You get most torque and the most control by inserting the sesamo between the plastic of the front frame and the assembly the speaker is sitting in, just behind where the knife is in the picture.

    rkarnes1988 -

    You also need to be very careful where you apply pressure or you’ll break the speaker in half, destroying it…

    kempenbills -

Abschluss

Um dein Gerät wieder zusammenzubauen, folge den Schritten dieser Anleitung in der umgekehrten Reihenfolge.

Geoff Wacker

Mitglied seit: 30/09/13

91357 Reputation

0 Kommentare