Einleitung

Diese Anleitung wurde von iFixit-Mitarbeiter:innen verfasst und ist keine offizielle Reparaturanleitung von Google. Hier erfährst du mehr über unsere Qualitätsstandards.

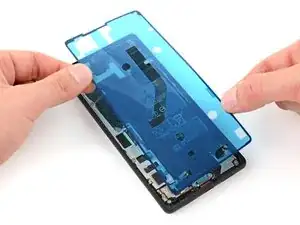
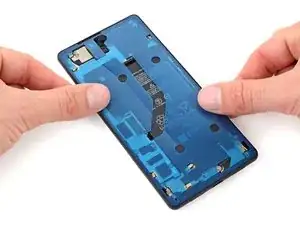
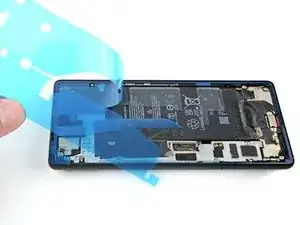
Diese Anleitung zeigt, wie die Klebestreifen im Google Pixel 7 nach einer Reparatur wieder angebracht werden.

Ob dein Gerät nach der Reparatur noch wasserdicht ist, hängt davon ab, wie gut du es beim Zusammenbau versiegelst. Die IP-Zertifizierung wirst jedoch verlieren.

Hinweis: Diese Anleitung wurde für das Google Pixel 6 erstellt, das Verfahren ist aber gleich.

  1. FMMmDS4NHPcCEGXX
    FMMmDS4NHPcCEGXX
    nFSaENRYloNc4iHd
    IUliStATsQWJIuQq
    • Wenn noch Reste vom Kleber zurückgeblieben sind, wird das Display nicht gut haften.

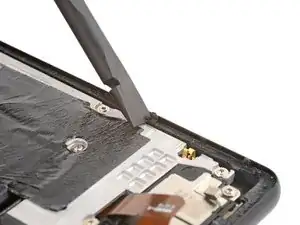
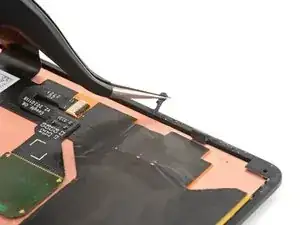
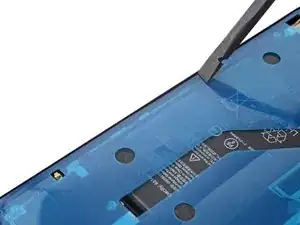
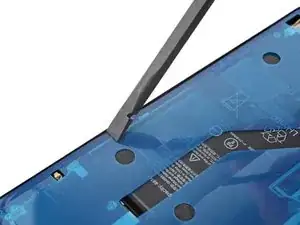
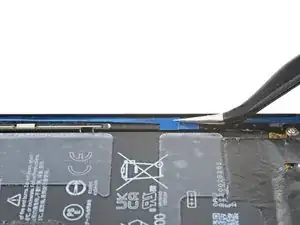
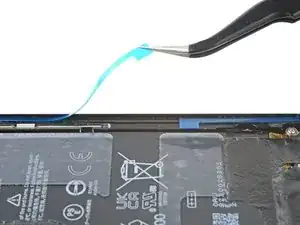
    • Schabe mit dem flachen Ende des Spudgers soviel Kleberreste wie möglich ab.

    • Achte darauf, dass die Federkontakte am Rand des Rahmens nicht beschädigt werden.

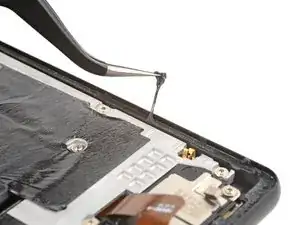
    • Ziehe noch verbliebenen Kleber mit dem Finger oder einer Pinzette vom Rahmen ab.

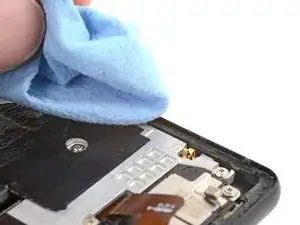
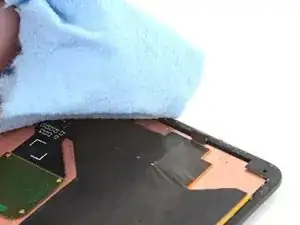
    • Reinige den Rahmen rundherum mit etwas hochkonzentrierten Isopropylakohol (mindestens 90%ig) und einem fusselfreien Mikrofasertuch.

  2. D15AeZfLxoVLV5PP
    D15AeZfLxoVLV5PP
    DIrKwqUbWdslDbbH
    4gtZbBSWZyGQaE6H
    • Wenn du das Display weiterverwenden willst, dann reinige es genauso.

  3. wbWQ1WYIoqAHHASP
    wbWQ1WYIoqAHHASP
    OtToUXWCcX1MfkwA
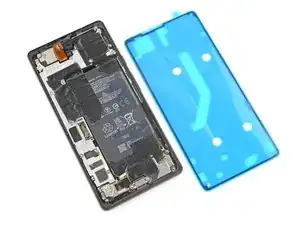
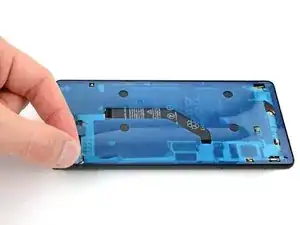
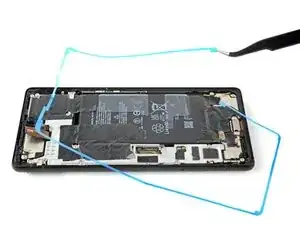
    • Bevor du die Klebefolie befestigst, lege sie erst probeweise über den Rahmen, um die endgültige Position zu finden.

    • Orientiere dich an den Ausschnitten für den Lautsprecher sowie der unteren linken und der oberen rechten Öffnung, um die Klebefolie richtig auszulegen.

  4. SRVbG2u2lnSM6ZE6
    • Fasse die Lasche auf der Rückseite an und ziehe die Schutzfolie ab.

    • Dadurch wird die Klebefläche auf der Rückseite freigelegt.

  5. EqVBPhJRsPOS2rYx
    EqVBPhJRsPOS2rYx
    n3JGbjmfgFoPhbX5
    D2lPi1vk4XJXFTwG
    • Arbeite bei diesem Schritt sehr sorgfältig! Der Kleber haftet sehr stark, wenn er einmal festklebt, kann er nicht mehr neu ausgerichtet werden. Falsch aufgeklebte Folie kann dazu führen, dass die Versiegelung nicht funktioniert.

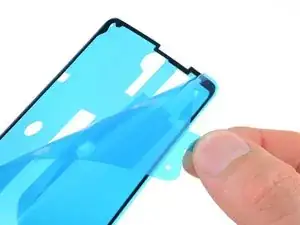
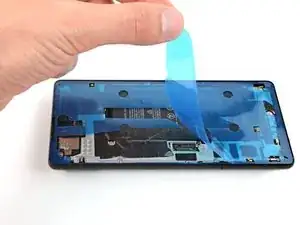
    • Lege die Klebefolie an der Unter- oder Oberkante beginnend auf den Rahmen auf. Korregiere ganz leicht, während du sie nach und nach festklebst.

    • Beim genauen Ausrichten helfen die Öffnungen in der unteren linken und oberen rechten Ecke.

    Instructions and photos should be clear about not touching any part of the edge where the adhesive is exposed. It appears as if it's okay if your fingers tough the edge, but you can't let any of the adhesive touch anything or else it will stick so badly that it stretches and no longer will adhere cleanly and flatly on the edge of the phone. I will need to buy a new adhesive andy phone is wide open and exposed in the meantime.

    ALR -

  6. JIssKlOsKVaUXYbG
    JIssKlOsKVaUXYbG
    b2EcjNiejPrC1THR
    QZWmnK3We1HxXhjq
    • Drücke die Klebefolie rundherum mit dem Finger oder dem Spudger auf dem Rahmen fest.

    • Achte darauf, dass die Federkontakte am Rand des Rahmens nicht beschädigt werden.

  7. p6g4f2aoXmohTL3D
    p6g4f2aoXmohTL3D
    YCTnyydoSQdgID14
    vVlCP2ulLi5TkbwW
    • Fasse die Lasche in der oberen linken Ecke des Rahmens und ziehe die große Deckfolie ab.

    Don't remove the final skinny liner around the outer adhesive - only remove the big liner. Leave the skinny blue liner in place until step 10 after the bracket has been attached.

    Amanda B -

  8. RPedlaFw6kbOLMBy
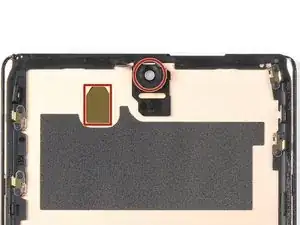
    • Wenn du das Display ausgetauscht hast, dann kontrolliere die Öffnung für die Frontkamera und den Ausschnitt für den Sensor. Entferne alle noch vorhandenen Schutzfolien.

  9. H2CqVG2UNhwye1hM
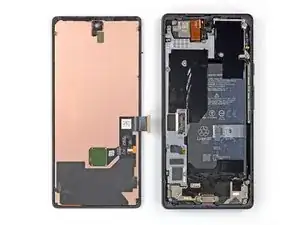
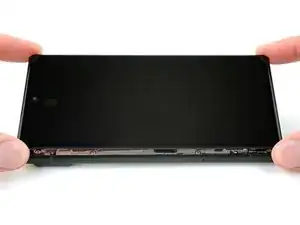
    • Gehe wieder zurück zur Anleitung für dein Smartphone und setze den Zusammenbau fort.

    • Vergiss nicht, die Halterung des Displaykabels zu befestigen.

    • Komme dann wieder hierher zurück, wenn dein Display fertiggestellt ist und das Smartphone zugeklebt werden kann.

    My new screen came with a tab on the selfie camera opening. Remove before sealing!

    Alex Thengvall -

    Guide fails to add step or note to reinstall the metal bracket and screw sitting on top of the display cable connector. I followed guide and resealed my phone only to realize this was not mentioned and now my phone is sealed without the bracket..

    Derek -

    Hi Derek, we're sorry that an instruction was missed! In this case, which guide did you follow to continue reassembly?

    Clay Eickemeyer -

    Would be good to add some tips on re connecting the display cable connector - took a bit of fiddling.

    bogdan dobrin -

    I plugged the screen cable in with the screen hanging over the right side of phone, snapping both top and bottom of the cable in. Then I moved the screen back to the left and put that metal bracket in place. Does anyone know if this is the correct way. There wasn't instructions on this part.

    Simon B -

    I missed a step or misread instructions and pictures. cleaned all the adhesive off the digitizer and put new adhesive on digitizer plugged it all in realized screen has digitizer on it.. the good news is all these missing steps means I order another adhesive. Almost broke screen getting it off.. be careful..

    The bad news is I really don't recommend these directions.

    Simon B -

  10. VJbNash5eiqUZ2nA
    VJbNash5eiqUZ2nA
    kH4ewXTUg4ut5Uqr
    lKv6OushZQpTIKKX
    • Achte darauf, dass du den Akku nicht mit der Pinzette anstichst, aus einem beschädigten Akku können gefährliche Chemikalien austreten, oder er kann in Brand geraten.

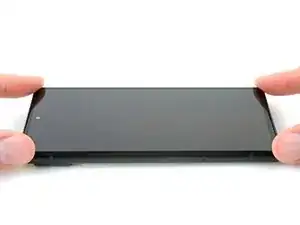
    • Fasse die Lasche an der unteren rechten Ecke des Rahmens und ziehe die Schutzfolie rund um den Rand ab.

    • Achte darauf, dass die Klebefolie nicht mit abgeht.

    Add an image of the screen already connected with the display cable. It should eliminate any confusions (it's way easier to fiddle connecting the display cable when you don't have to worry about touching the adhesive (like I did).

    bogdan dobrin -

    This layer should be removed ONLY when the screen is connected and tested !

    LGRI -

    Directions and order of steps are not clear. There should be an earlier warning about keeping the final liner on. It was confusing when the large liner was peeled off because you don't know if the final liner should or should not stay on.

    ALR -

    The liner was like 1mm longer than normal, so while laying it down it clipped one of the sides but didn't notice until I took off the first liner.

    To my dismay, it was not the most simple task up pull up the adhesive from the inner side wall of the device to lay onto the flat track it is meant to go on, but I did the best I could.

    I'm hoping that when I go to cure the adhesive it'll flatten out the way it's supposed to for surface area, as well as maintain water resistance.

    The first time I performed a screen replacement (this is 2nd) I actually was able to submerge device with no water leakage so if done properly (and the sheets are cut to specifications) it is very possible to retain water resistance after screen replacement

    Zachary (Zach) -

  11. TkAkRLEQkKbKhBsk
    TkAkRLEQkKbKhBsk
    p2TE4fwBsRQVfLBH
    • Drehe das Display um und lege es auf den Rahmen.

    • Drücke das Display rundherum fest.

    I wish there was a warning here not to close the screen without testing it if reinstalling one. I thankfully was able to separate my newly installed screen and discover my display cable connection wasn't fully attached, but I am not sure if I compromised the seal or not. We will see!

    Edward Rowe -

  12. NwAtTv6AriWRfDrA
    NwAtTv6AriWRfDrA
    3ZgBh3qGSwjGnKJZ
    c5oA2BK5vIbKFHo6
    • Damit der Displaykleber besser am Rahmen haftet, muss er gleichmäßig angedrückt werden. Die Kameraleiste muss dabei berücksichtigt werden.

    • Wenn du Display-Schraubklemmen hast, kannst du die Kameraleiste aussparen. Bringe die Klemmen am Rand des Gerätes an..Screen Vise Clamps 6-Pack

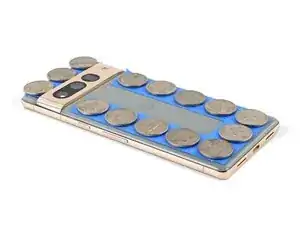
    • Schütze das Rückseitenglas am Rand mit Klebeband, so dass es keine Kratzer bekommt.

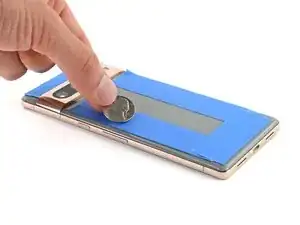
    • Platziere Münzen oder ähnlich dicke Gegenstände an den Rändern des Rückseitenglases. Achte darauf, dass sie mindestens genauso dick wie die Kameraleiste sind.

    • Lege einen Stapel von Büchern oder andere schwere Gegenstände auf das Smartphone. Lasse sie dort mindestens eine halbe Stunde lang liegen, am Besten über Nacht.

    Would be useful to list these coins (spacers) as a requirement for the installation. Not everyone has coins or similar spacers around.

    bogdan dobrin -

    Excellent guide. I recommend reading through it a couple times before starting, but really good instruction.

    msqualls -

Arthur Shi

Mitglied seit: 03/01/18

296783 Reputation

3 Kommentare

Fantastic guide. Read through it first. Go slowly and re-read each section as you do it. Get the iFixit tools. They are invaluable.

msqualls -

Do not force anything during any step of this guide. Like most sensitive electronics, force is rarely if ever required.

Take your time, be patient, if something is proving to be tricky take a small break and come back to it in a few minutes.

Things I felt should be included in guide or I had issue with:

1. You might end up cracking or breaking the original screen as you insert the pry tools. If replacing the whole screen, this should not matter to you and it’s ok if you notice cracks or breaks.

2. You want to aim for under the black plastic frame that is UNDER the screen to insert your pry tool.

3. Have extra alcohol wipes or isopropyl alcohol on hand. Repair kit only comes with 1 wipe (seriously??). You can use goo gone if you have some but USE SPARINGLY DO NOT SATURATE. Allow time to air out and evaporate before applying new adhesive. I was able to remove about 95% of old adhesive this way.

4. When you think you’re ready to reassemble, don’t forget the bracket and adhesive before sealing the new screen!!!

Zachary (Zach) -