
Einleitung
Irgendwann muss vielleicht die Hauptplatine deines Nintendo 2DS XL ausgetauscht werden. Diese Anleitung zeigt Schritt für Schritt, wie das geht. Ziehe vor Reparaturbeginn das Netzteil vom New Nintendo 2 DS XL ab.
Werkzeuge
-
-
Bevor du mit der Reparatur beginnst:
-
Entferne den Stylus
-
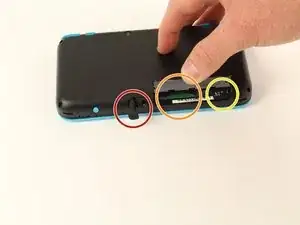
Entferne die Game Cartridge
-
Entferne die SD-Karte
-
-
-
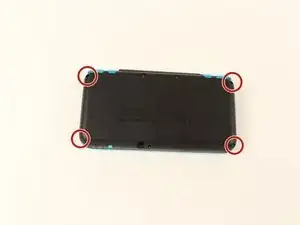
Heble die untere und obere Gehäusehälfte mit dem flachen Ende des Spudgers behutsam voneinander.
-
An der Scharnierseite sind viele Rasten, wir empfehlen, zuerst an einer kurzen Seite und den beiden langen Seiten anzufangen, dann erst die letzte kurze Seite zu bearbeiten.
-
-
-
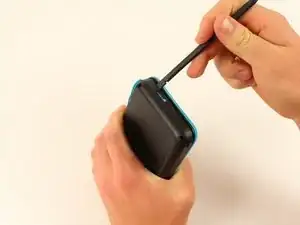
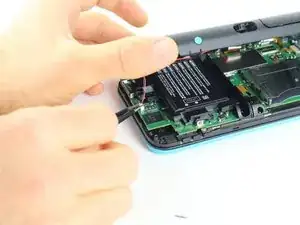
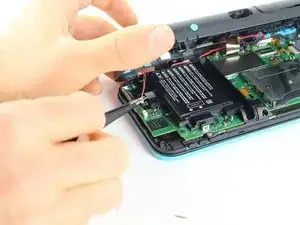
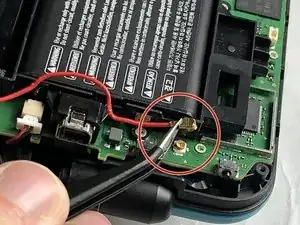
Hebe den Akku mit einem Spudger heraus.
-
Denke dran, dass der Akku mit einem Klebepad in seinem Fach festgeklebt ist. Es kann schon sein, dass du mehrere Werkzeuge benutzen musst, um den Akku aus seinem Fach und von der Hauptplatine zu lösen.
-
-
-
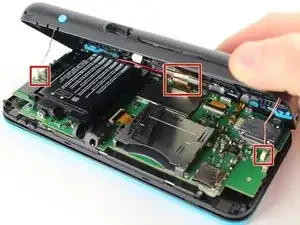
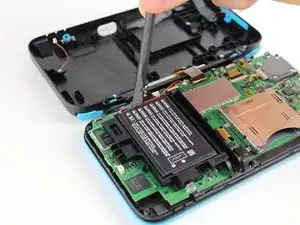
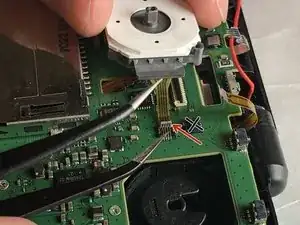
Im Foto sind acht Flachbandkabel zu sehen, die gelöst werden müssen.
-
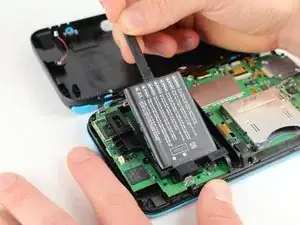
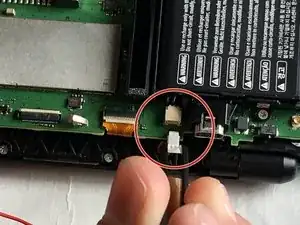
Klappe die Sicherungsbügel an den restlichen sechs Anschlüssen (rot markiert) mit einer Pinzette hoch und ziehe die Flachbandkabel heraus.
-
Im zweiten Bild ist ein kaputter Anschluss neben dem Anschluss für den Joystick (rechts vom roten Pfeil) zu sehen. Versuche nicht diesen Anschluss so wie im Bild gezeigt zu öffnen!
-
-
-
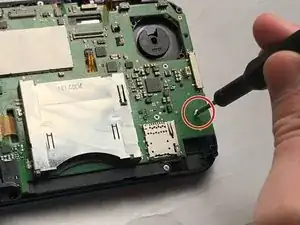
Entferne die sieben 4,4 mm langen J00 Schrauben. Du kannst auch iFixits PH00-Bit verwenden.
-
Entferne die Hauptplatine vom Gerät.
-


Um dein Gerät wieder zusammenzubauen, folge den Schritten in umgekehrter Reihenfolge.
6 Kommentare
On step 6, what is the top left circled connector for?
The screen on the device I am repairing keeping going black and this connector is damaged. (it doesn’t clamp shut)
Can anyone recommend where to buy a replacement board connector?
This doesn’t actually give ALL the tools you need. You can’t use a Tri point screwdriver on the CROSS screws that are in the pictures on the motherboard.
tomh1512 -
I know this might be a year too late, but the tri point is required for removing the back plate of the system. If you don't have a small philips head laying around your house, idk what to tell ya
Followed on a 2ds having bad input feedback, no major issue. screws on motherboard are cross so you need a small one (most diy nintendo kits have one) and a small clamp (like the one in pictures) is mandatory for the 7 small cables. there is something a bit tricky regarding volume button which is a bit hard to get back in place when you reassemble the console, take care of pushing the inner slider to the most far position for easier mounting.
This is a great repair instructional, but I would advise also looking at the below video link. (I used both.) Sometimes watching 2 repair guides can help when you think you think you’re stuck. For example, I had a really hard time getting the hinge off!
https://www.youtube.com/watch?v=Zuu_T2ls...
(HINT: Works best if you rotate it 180 degrees, so that you are repairing it from the same perspective as the technician)
skat1140 -