Einleitung

Hier wird der Ausbau der Auslösetaste gezeigt, entweder um sie zu reparieren oder zu reinigen.
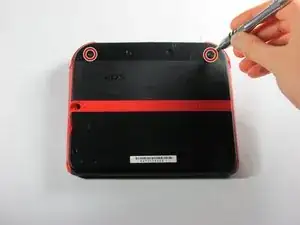
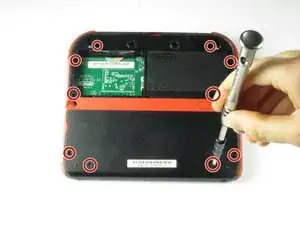
  1. wg4RTxdhgZNOVaab
    • Drehe die beiden unverlierbaren Kreuzschlitzschrauben am oberen Rückdeckel heraus.

    • Diese unverlierbaren Schrauben bleiben im Deckel hängen.

  2. cdb3AdyJTrNhIjrr
    cdb3AdyJTrNhIjrr
    okYxlIGDUBKBdGNP
    • Drehe den Deckel nach oben und nach außen um ihn zu entfernen.

  3. YA2mNvc2fLpeZ4NZ
    YA2mNvc2fLpeZ4NZ
    yjKMPFAO1SC1LncE
    HRaiAoWcVXEMByll
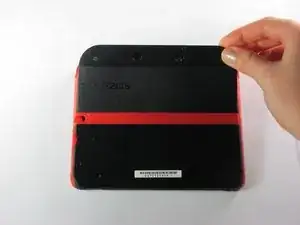
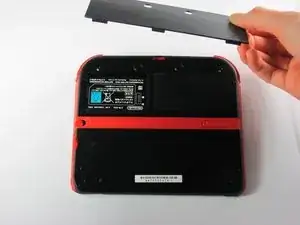
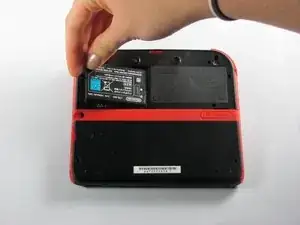
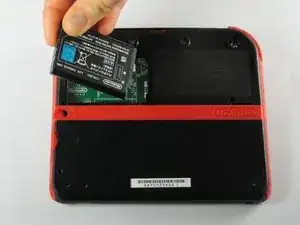
    • Entferne den Akku aus seinem Fach. Hebe ihn dazu an der Seite die direkt an der Außenkante liegt hoch.

  4. vkEjnCVvCfkcXpKn
    • Entferne die zehn Kreuzschlitzschrauben, mit denen die Rückabdeckung befestigt ist.

    Can't take off the screw top left next to the battery. What type of screwdriver do I use and where can I find some?

    Little Mac -

    I used a husky with changeable heads, you could probably find one on amazon

    Minecrafter Pig -

    These screws aren't Phillips, they're JIS, if you use a Phillips head you can and will strip the screws, please update this as it can cause more harm to people's systems than good if they get stripped.

    Sneakii -

    yep. i stripped my screws

    Persvicx -

    The screws are 6.2mm long

    Martin Samuelsson -

    god I thought it was because I was repairing a sibling's ds that had something spilled on it (idk maybe that they didn't clean it good when it happened) but continued to struggle even with screws that looked fine... wish I had checked the comments sooner :/ Please like the above, update this guide! It sucks knowing that someone like me is also gonna probably miss this. I didn't get super far but well. I already stripped down some which sucks either way. Ironically, I noticed that using a size slightly smaller gets the job done better. Ironic in that you'd normally avoid that because it's more likely to strip with small bits scrapping the inside. But if you are real careful it can hang on and twist. I'd recommend just getting the JIS but maybe this might work for some- I also want to emphasize SLIGHTLY smaller phillips.

    Alexandria.P -

  5. ona5d6XElywnV2F6
    • Die Rückabdeckung ist mit einem Flachbandkabel an der Hauptplatine verbunden. Entferne sie deswegen nicht zu weit vom Gerät.

    • Ziehe die Rückabdeckung vorsichtig vom Gerät weg nach oben.

    Y si se corta el cable que pasa?

    Laura Pernía López -

  6. fVKP4KxbkT6Fggne
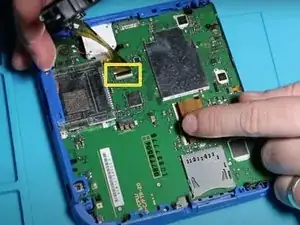
    • Klappe den Sicherungsbügel des Flachbandkabels mit dem Fingernagel oder dem flachen Ende des Spudgers hoch und ziehe das Kabel von der Hauptplatine ab.

    • Löse das Kabel aus dem Anschluss ab.

    • Nutze die Gelegenheit um gleich die rechte und linke Auslösetaste zu entfernen. Sie haben eine Feder und eine Achse, achte darauf diese Teile nicht zu beschädigen oder zu verlieren.

    You can also detach the cable from the motherboard safely by flipping up the connector on the motherboard. Just don't forget to reattach. Some will find this tedious but may save time if you know what you're doing with said connectors.

    Blackbeard -

    I agree, this is what the guide i followed said to do and since I was disconnecting all the other ribbon cables it made perfect sense to do it that way.

    Lin -

    pay attention: my 2ds dropped it's lens covers at this step

    Jos van Reenen -

    Likewise, I used a tiny drop of glue to put the lens back in place. Take care not to dirty the lens.

    Elliot West -

    The picture you have there has the camera lens ribbon installed upside down. The ribbon needs to be pointing down when you re-attach it not up.

    Rick Parrish -

    Agreed, ribbon cable looks upside down in picture

    Elliot West -

  7. oF4BMwnIvFaWZXSd
    oF4BMwnIvFaWZXSd
    lbAaJ41kjAcnhvVt
    • An der Auslösetaste sind kleine Federn befestigt, sei deswegen vorsichtig, wenn du sie vom Gerät entfernst.

    • Ziehe die Auslösetaste weg vom Gerät und entferne sie.

    Thanks so much for these instructions. My nine year-old son just got Pokemon Sun and Moon on Friday evening. He had been talking about it non-stop for several months. On Saturday, he managed to bend the plastic lip on the base of his 2DS right trigger - the trigger button no longer worked. He was devastated, because we thought he had permanently broken his 2DS. We were afraid he would have to wait until Christmas (over a month away) before we could get him a new one.

    I found these instructions via Google, followed them to take apart his 2DS and remove the trigger button. I gently bent the plastic lip of the trigger back with needle nose pliers, reassembled the 2Ds, and the trigger worked perfectly! He now thinks I am the greatest dad in the world.

    bruce -

    same situation here

    Minecrafter Pig -

    Hi there, does anyone know which type of springs they use in a 2DS? Because I don't really want to pay 7€+15€ shipping just to replace one spring I lost and I could get most sorts and sizes of springs in a hardware store for less than 5€ for 50.

    Any help would be very appreciated.

    Christian Adamczyk -

Abschluss

Um dein Gerät wieder zusammenzusetzen, folge den Schritten in umgekehrter Reihenfolge.

Fina Beauchamp

Mitglied seit: 12/01/15

3186 Reputation

3 Kommentare

Nice job! My right button was jammed for at least two years. Now I can finally demolish my friends in Mariokart.

Minecrafter Pig -

Can’t seem to get the second set of screws to budge at all.

Zom baygal -

now what????

Karim Eltaib -