Einleitung

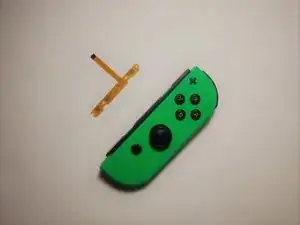
Ein verbogenes SL/SR Button Board Kabel führt dazu, dass die SYNC-Taste, die LEDs und die SL/SR-Tasten nicht mehr reagieren. Dies führt dazu, dass der Nintendo Switch Joy-Con nicht in der Lage ist, sich ohne einen zweiten Joy-Con mit einer Konsole zu verbinden.

Bevor du mit dieser Anleitung beginnst, gehe sicher, dass deine Tasten nicht funktionieren. Teste in den Einstellungen deiner Switch alle Tasten.

  1. qCUmEWTRWEdt4QrZ
    qCUmEWTRWEdt4QrZ
    iPfy3p1ZATgyikIK
    k5DUvqlvrSDuCprZ
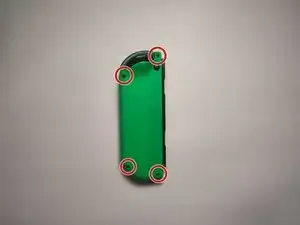
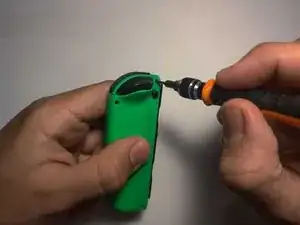
    • Entferne die vier 6-mm-Schrauben auf der Rückseite des Joy-Con mit dem Tri-Point-Schraubendreher Y00.

    • Während des ganzen Prozess solltest du die Schrauben irgendwo verwahren, wo du sie nicht verlierst.

  2. oegGqkkt31LnXEsY
    oegGqkkt31LnXEsY
    HEVbSsSDbcdK4WXM
    dsJX1bvkCMeYWJ5E
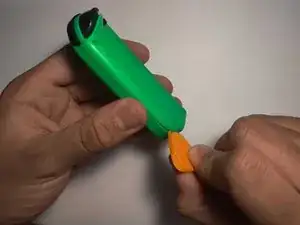
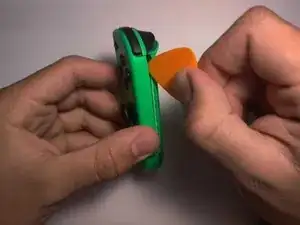
    • Öffne den Joy-Con, indem du das Plektrum in die untere Ecke einführst und nach oben schiebst.

    • Achte beim Öffnen darauf, die beiden Joy-Con-Hälften nicht zu weit auseinanderzuziehen, da sie noch mit Kabeln verbunden sind.

    • Die Flachbandkabel sind empfindlich. Zu kräftiges Ziehen kann zu Schäden am Gerät führen.

    My joycon would not open as cleanly as what is pictured here. The white box at the bottom of the controller in the last picture stuck to the top compartment and became detached from the part with the battery. It's possible it could have detached the other way, but I didn't risk it. I was still able to do the repair, but it gave a much tighter window as I needed to be very careful to not be to forceful on the battery wires.

    lipolane -

  3. 5oIT4HTlaHvJxrpy
    5oIT4HTlaHvJxrpy
    ZiMsdfDIU3od5W1G
    gdCPtPX3kZTmJTae
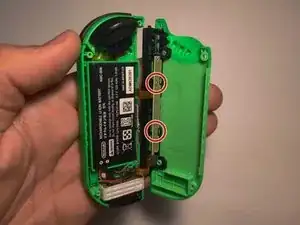
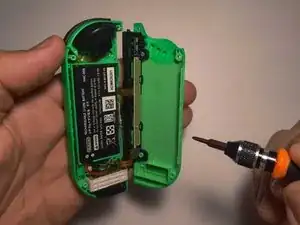
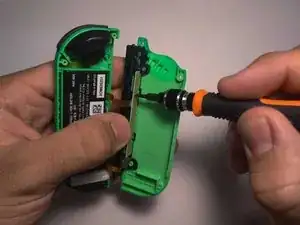
    • Entferne die beiden 3 mm Schrauben an der Ladeschiene mit dem Kreuzschlitzschraubendreher #00.

    • Das Teil, das ausgetauscht werden muss, ist die Knopfleiste direkt unter diesen beiden Schrauben.

    Be careful when removing. What is not noted here, is that the SL, SR, and reconnect buttons will fall out. Just make sure you are over a table so they don't get lost.

    lipolane -

  4. 1okmN2XdGkIiUEOk
    1okmN2XdGkIiUEOk
    AGVCODAJJU4kyLqH
    TcP4RYMtKCxjsd62
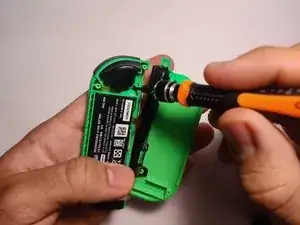
    • Entferne die drei 3 mm langen Schrauben des Batteriefachs mit dem Kreuzschlitzschraubendreher #00.

    • Wenn das Batteriefach gelöst ist, ist die Verriegelungslasche, die das Kabel festhält, leicht zugänglich.

    En la imagen se realiza sobre el Joy con derecho, si es el izquierdo, solo será un tornillo en la parte baja, se despega la batería y se sacan los dos tornillos de la chapa

    Daniel otero ambroa -

    I must have had a different model because there weren't any screw near the trigger on top of the battery for me. Those screws were located under the battery, which you can lift up (it is a little sticky). To do this on mine, I had to detach the rail from the lid in order to give myself enough clearance to lift the battery out.

    Originally, I tried to do the next steps without lifting the battery compartment, but it was too difficult to mess with the locking mechanism on the ribbon.

    lipolane -

  5. TBQigH3DOFnpZMkk
    TBQigH3DOFnpZMkk
    PGai5Qh2r5EYtkuT
    QkRdGyLtefQZJ3ZK
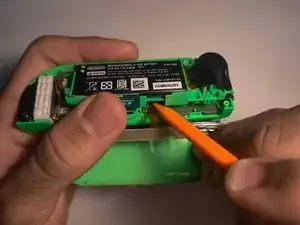
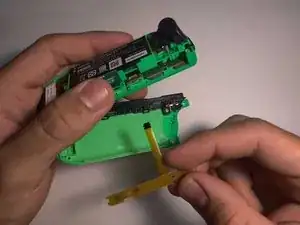
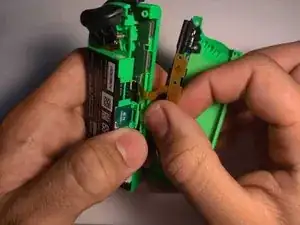
    • Hebe die Lasche, die das verbogene Kabel der Knopfleiste hält, mit dem Plastikwerkzeug an. Hebe das Batteriefach leicht an, um dabei mehr Platz zu haben.

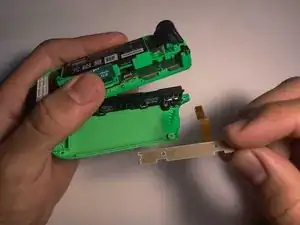
    • Sobald die Lasche entriegelt ist, kannst du das verbogene Kabel entfernen.

  6. jMRsAYsM3ndubpuU
    jMRsAYsM3ndubpuU
    WuicTSQMjPOEWiCP
    16VJrOw6I2a6QPPW
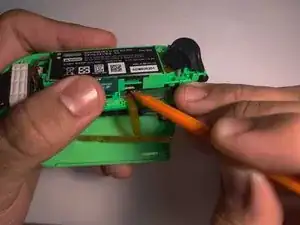
    • Stecke das neue Button Board in die Lasche.

    • Nutze den Spudger, um die Lasche wieder zu verriegeln, damit das neue Teil an seinem Platz bleibt.

    Die Lasche ist bei mir sehr locker. Das Kabel rutscht immer wieder raus, fixiert die verriegelte Lasche für gewöhnlich das Kabel? Ist die Lasche bei mir defekt?

    Bobo -

    I can’t this to lock in to place any ideas on who to get it to work

    bubbles290784@yahoo.com -

    do i have to purchase a new replacement?

    Alex Franks -

  7. rslgRrJRlkVGCiQq
    rslgRrJRlkVGCiQq
    AH1nRxgVgvSjA4bV
    DdtKHZduFoeVm1t3
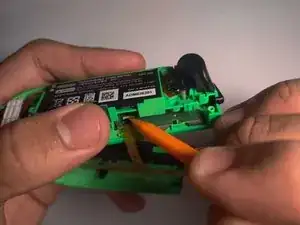
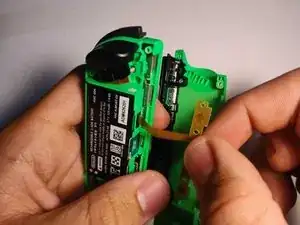
    • Um das gleiche Problem in Zukunft zu vermeiden, stelle sicher, dass das neue Kabel nach dem Wiederzusammenbau unter dem Batteriefach gebogen wird.

    • Hebe das Batteriefach leicht an, damit du das neue Kabel der Knopfleiste leichter darunter biegen kannst.

    • Der Raum zwischen der Batterie und der Rückseite des Joy-Con ist sehr eng, was dazu führte, dass das Originalkabel geknickt wurde und nicht mehr funktionierte. Wenn du das neue Kabel unter die Batterie schiebst, hat es mehr Platz.

Abschluss

Um dein Gerät wieder zusammenzubauen, folge den Schritten ab Schritt 4 in umgekehrter Reihenfolge

Javier Cora

Mitglied seit: 18/03/22

2235 Reputation

18 Kommentare

Valuable step-by-step guide plus pictorial samples. Keep writing your good stuff, Javier!

Rudi Lim -

Nice guide. To loosen the battery compartment on my controller I had to remove te battery first. I couldn't see te top 2 screws in step 4. The battery was sticked to the bracket with some tape but removes easily. Underneath the battery were two screws.

Edit: maybe its different because I had to change the button board on the left JoyCon.

Stefan Haarman -

Yes! This Guide above shows the right Joycon. As for the left one there are two screws below the battery as you said!

Paul Stachowiak -

Very helpful step-by-step guide. Thank you.

Had to change the Button Board on the left Joy-con. The screws were also located under the battery in my case. Attention: there 4 screws under the battery, two of which diagonal to each other that hold the battery compartment in place. No need to unscrew all 4.

Tone -

I’ve replaced the board, but SL and SR still not working, also two lights not working. What to do?

Mike -

Will this replacement also fix the LED lights that are now not working on my controllers? And if not, will this be a problem for playing with one Joy-con?

Sofie Lazeroms -

Depends on why your LED´s are not working. For my it was because the SR SL input was not registered, which will be a problem (only) for single joycon use. If its only the LED which is not working, then you should be fine.

Paul Stachowiak -

Thanks for spreading this knowledge to us.

Nolan Lester -

Thank you! My right button on the side turned unresponsive. I replaced the button board with this guide and fixed it!

Bouw De Vrieze -

Great guide - thank you. i need new eyes though... can barely see the screw heads!

Matt Glover -

I followed this guide, the LEDs, sync button and charging all work again, but the sl sr buttons still don't work

Julie -

Mega, nach dieser Anleitung funktioniert der Joy wieder einwandfrei 💪🏼👍🏼.

Andreas Kaiser -

Excellent guide, thanks!

I also had a left joycon, so thanks to everyone who commented about the difference with the battery screws.

After I closed everything, i could feel the battery moving inside, I think it'd be better to stick it in place woth some tape.

Also, the hardest part for me was stel 6, inserting the new cable into the tab. I couldn't make it stay inplace. Then I broke the black tab lock. But finally I managed to put the cable into the tab, fold it like described and close the battery compartment, and the cable stayed in place.

The joycon works! I hope that shaking the joycon won't free the cable as nothing is locking it in place except for the cable tension due to it being folded.

Assa -

Just used this tutorial today to fix my left joycon, thanks for the tips! One thing I’d also recommend is reinforcing the part so the SL and SR buttons are more clicky. To do this, I took the old, faulty part and ripped off the ribbon cable, then used a knife to remove the electronic parts from it so it was just a flat board of the exact same shape. I then screwed both in together one on top of the other, so that the part didn’t flex as much when the buttons were pressed. It’s now more clicky than the original board, which is nice! The piece flexes less too so less prone to breaking.

Wex -

Thank you for the guide Javier! Thought my luck had run out when my OG joycons stopped working individually, but this guide and parts saved them! 7 years strong and going.

Definitely recommend folding the cable under the battery. It can feel tight because the new boards' cables come super straight, but just fold it over as much as you can and press the battery down on top. No matter how hard you press the battery the space stays quite big for them so just keep it in place while you screw it back in

Salucks -

The guide is incomplete. It should include a 'how-to' section for the left Joy-Con as well, since the steps are different enough to cause confusion.

Raul Adrian Izarraras -

Should have read other people's comments before changing the left Joy-Con board :) Still, great guide!!!

ShelfCrit -

Bought a used switch with broken sync/SR/SL ribbon on both joycons, fixed them thanks to this tutorial and the parts bought in the ifixit store, used @Tone method for the left joycon.

Great tip to set the ribbon under the battery compartment.

rbfr31 -