Einleitung

Die Hauptplatine ist ein essenzieller Bestandteil einer einer Spielkonsole. Wenn eine Fehlersuche nicht hilft und du die Hauptplatine deiner Wii U austauschen musst, wird dich diese Anleitung durch den Prozess begleiten.

  1. JCHLhn5MYdDxfPrg
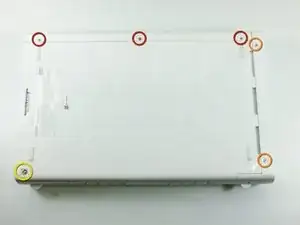
    • Lege die Konsole mit dem Boden nach oben. Unter den sechs quadratischen Gummiaufklebern befinden sich Schrauben. Ziehe die Gummiaufkleber ab und drehe folgende Schrauben heraus:

    • Drei 5,1 mm Kreuzschlitzschrauben

    • Zwei 6,1 mm TriWing Y0 Schrauben

    • Eine 13,2 mm TriWing Y1 Schraube

  2. aigP65yoJHPSGAir
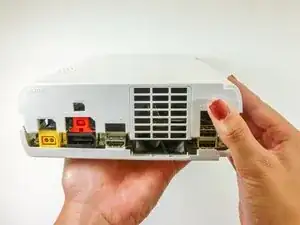
    • Drehe die Konsole mit dem Lüftungsgitter zu dir.

    • Entferne die beiden 7,1 mm Kreuzschlitzschrauben #00.

    Both screws are not “7.1mm” in length, only the one to the right is (center of the console’s side). The left one (towards the front of the console) is 5.1mm.

    LogicalMadman -

    There’s a third screw to remove bottom-left corner of this picture. On step 9 it’s already been removed, and you need it to be removed in order to remove the metal casing in step 13.

    Pascal Dagenais -

  3. 1Iyrqx4nOFBdCJ2h
    1Iyrqx4nOFBdCJ2h
    2NCIyw2H2DATp1Mk
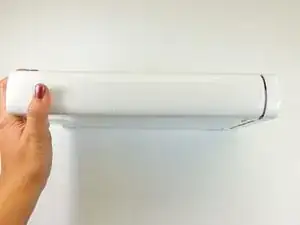
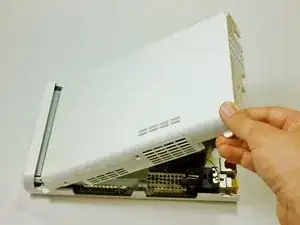
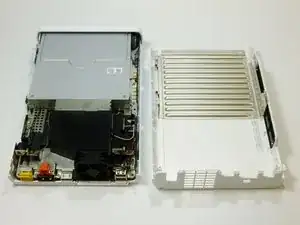
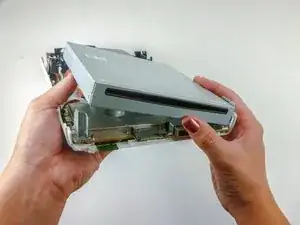
    • Fasse die obere Abdeckung gegenüber dem Lüftungsgitter an, schiebe sie nach hinten und hebe sie hoch, um sie abzulösen.

  4. BgtQWjfJFCI2Obtg
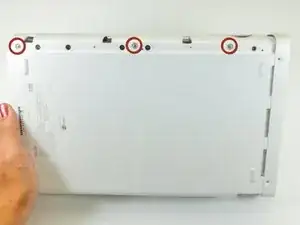
    • Auf der Unterseite neben der eben entfernten Abdeckung findest du drei 13,2 mm TriWing Y1 Schrauben. Drehe sie heraus.

  5. SFXFKigB4FgwXNHW
    SFXFKigB4FgwXNHW
    emE6ahHlKSKLyLVG
    XXLXP25j5OJr3Cu5
    • Hebe das obere Gehäuseteil hinten hoch und löse es vom Gerät.

    The front portion of the side of the cover with the vents was kind of stuck on mine. There’s a little rubber piece in there that was the cause of this. But that same rubber piece also makes up the little handle-shaped nub that sticks out of the side there. (There’s also one at the back of the same side, but that one didn’t stick for me.) Lifting also using the little handle made it easy to remove the cover.

    Nicholas Halderman -

  6. QANVbARsH6IjOTQI
    QANVbARsH6IjOTQI
    sPaqjSSEr66bZ6hX
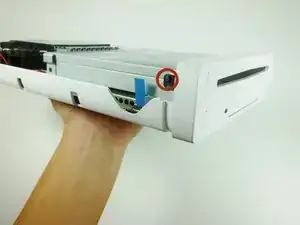
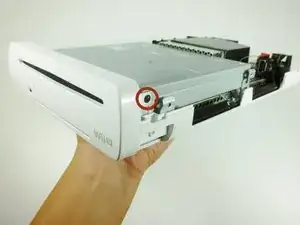
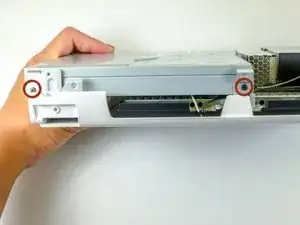
    • Drehe das Gerät mit der Frontplatte zu dir.

    • Die Frontplatte ist auf jeder Seite mit einer 3,5 mm Kreuzschlitzschraube am CD Laufwerk befestigt. Drehe beide heraus.

    My screw won't come out, and I feel as if my screw was screwed in too tight when they made the wii u, or the 3.5 #0 is too big. I have tried other screws and I think the screw might be done for because the metal is coming off of the top and deforming the shape. I am very lost and if anyone could help me, that would be amazing.

    Elijah Travers -

    Those #0 screws might be tight and they’re easy to strip. Put some force on the screwdriver to make sure you start unscrewing them and not stripping them.

    Pascal Dagenais -

    One of the screws started to deform instead of unscrewing. I used a bigger Philips screwdriver (size 1), added a rubberband between it and the screw and used more force to avoid stripping it more and make sure it would start unscrewing. It worked hopefully ! But I wasn’t sure it would.

    Pascal Dagenais -

    I stripped the right screw and fortunately managed to remove it by removing and twisting the bracket it was held on to.

    Dane Elliott-Dyson -

  7. FGbMK3dG2BpKU2bJ
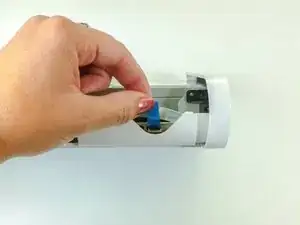
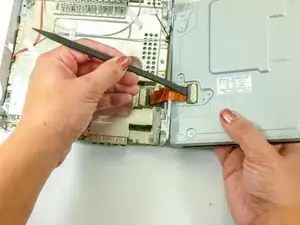
    • Drehe das Gerät so, dass die Frontplatte rechts ist und das Flachbandkabel sichtbar wird.

    • Das Flachbandkabel ist mit dem System mittels einem Riegel verbunden, welcher die blaue Lasche befestigt. Hebe diesen Riegel nach oben an, um sie zu lösen.

    • Ziehe an der blauen Lasche um das Kabel zu lösen.

    There is a step to do before to "lift up on the blue tab in order to release the ribbon cable". We must lift up the connector who maintain the ribbon cable. By default, his position his locked and in order to unlock it, must put it in his top position.

    Frederic Morelli -

    What if the screw is stripping??

    Just Ro -

  8. K23ibnjRbkeVBBoW
    • Entferne die Frontplatte.

  9. 4FrjNj1QtjgIRGlf
    • Entferne die zwei 4,6mm #0 Kreuzschlitzschrauben auf jeder Seite des DVD Laufwerks.

  10. VoPXvqqhXhCyhsDP
    VoPXvqqhXhCyhsDP
    4MFTPWX4oiWLTCZB
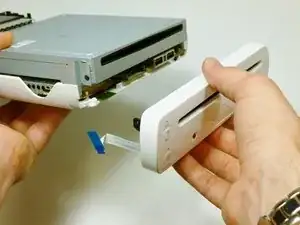
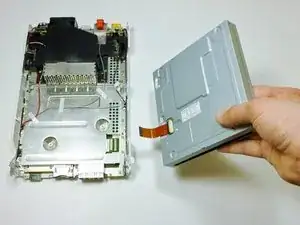
    • Drehe das Gerät, sodass der Laufwerkschlitz sichtbar ist.

    • Ein Flachbandkabel ist an der unteren rechten Seite des Laufwerks angebracht. Dieses Flachbandkabel kann reißen, wenn es nicht ordentlich entfernt wurde.

    • Hebe das Laufwerk aus der Halterung und klappe es nach rechts, sodass es wie ein Buch zu liegen kommt.

    • Benutze einen Spudger, um das Flachbandkabel zu entfernen.

    This step is not entirely clear on how to remove the ribbon cable with the spudger. It seems you need to pry up the black part.

    Daniel Green -

  11. YgDxgMZveOGqAWhv
    • Entferne das DVD Laufwerk

    The Disc Drive Logic Board can but must not work with the Console, because there are different Drives. If you're lucky it'll work but sometimes it doesnt it happend to me often when i tried to change drives from 2013 and 2014 produced Consoles

    Mikitutin -

  12. SVfWjFfX4N1ZZ2Mf
    SVfWjFfX4N1ZZ2Mf
    IUxQeqI6KLQRKG4Z
    T2hijIGRsl1qpDfy
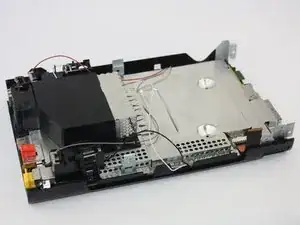
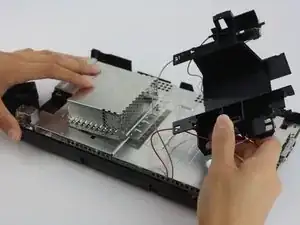
    • Entferne die schwarze Plastikabdeckung, indem du die Schrauben mit einem Kreuzschlitzschraubendreher löst.

    • Räume die Antennenkabel sorgfältig aus dem Weg, um einfacher weiterzuarbeiten.

    It would be nice to add indications on the location of those screws.

    Pascal Dagenais -

    I agree with Pascal. I figured it out by taking my own pictures as I tore my unit apart. as I took each screw out I laid it beside the hole and took a picture when I was done. I also noticed that on the top shield look for arrows (put a screw here) and X (don’t put a screw here). It gets a little weird around those 4 standoffs that hold the disc drive. And by the way that standoff in the wrong place in the lower left in that first picture.

    Thomas King -

    If the black plastic shielding is not coming off once all the screws holding it down have been removed, try pushing it in the direction of the ports, and then try pulling up once the shielding has moved.

    Sussy Baka -

    Thank you! That worked for me.

    Dane Elliott-Dyson -

    There are four Philips #1 screws that need to be removed.

    DeKay -

  13. xnv6pIYxTlmYFQTy
    xnv6pIYxTlmYFQTy
    kPiVpCHWIgEfCQJL
    LrOWYv5GbPToo6lY
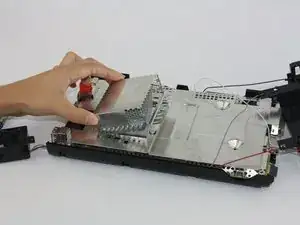
    • Um die Metallkappe zu entfernen, musst du keine Schrauben lösen, sie sollte einfach anzuheben sein.

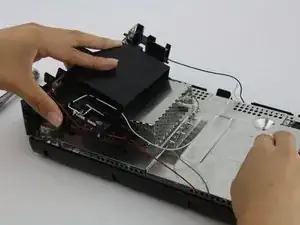
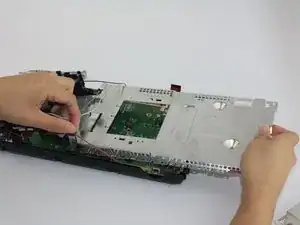
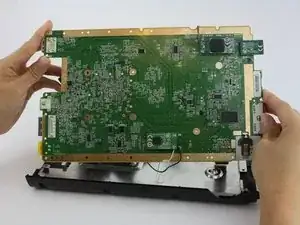
    • Entferne alle Schrauben, die den Bereich der Platine umranden mit einem PH1 Schraubendreher.

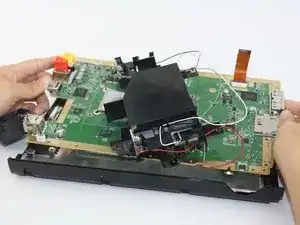
    • Entferne die silberne Abdeckung, wenn alle Schrauben entfernt wurden. Sei vorsichtig, wenn du sie unter den Antennenkabel herausziehst.

    This omits the step of undoing the 4 screws around the heatsink. That has to be done or the bottom shielding won’t come off.

    Petie Martin -

    Yup, This step is pretty critical. If you don't have the solid base of it in the plastic makes it hard to keep control of the heat sink when you take it off outside. ended up slicing something off my mainboard. Not sure why this critical step is left out. Rip me I guess.

    GARRETT KIPPS -

    There are twelve PH1 screws around the periphery of the shield and two more under the DVD drive. All screws are the same size.

    DeKay -

    Just so you know, you will need to slide the metal cap toward the back ports before removing.

    Dane Elliott-Dyson -

  14. mqMS3ImAQRBP1b1H
    mqMS3ImAQRBP1b1H
    OxDDjoPCfQMdufbr
    • Nun solltest du die Hauptplatine einfach vom Unterbau der Konsole entfernen können.

    From step 13 to 14, you also need to unscrew the 2 screws in the hollow areas in the middle of the metalicboard and the 4 screws around the metallic square that was under the metal cap. Otherwise the motherboard will stay stuck with the metal layer underneath. You might also need to remove the black plastic pieces around the motherboard and the metal layer to separate them.

    Pascal Dagenais -

Abschluss

Um dein Gerät wieder zusammenzubauen, folge der Anleitung in umgekehrter Reihenfolge.

Emily Vasquez

Mitglied seit: 24/02/16

932 Reputation

3 Kommentare

Does anyone knows where I can buy a Wii U Motherboard? mine has a dead CPU/GPU :(((((

AppleTopic -

This really feels like a "draw the rest of the f***ing owl" kind of guide. "Remove the black plastic shielding by unscrewing connecting screws"? Which ones???

Lucas Newton -

Everything from Step 12 on is honestly not helpful. Someone needs to address this, especially with the Wii U starting to gain in popularity and the number of known issues with the systems... Call out the screw locations like the earlier steps, show an actual top/bottom photo of the motherboard once it has been removed, etc...

Nick Exarhos -