Einleitung

In dieser Anleitung wird gezeigt, wie du den Home Button deines Nokia 6 ersetzen kannst.

  1. 6pPHyCErEZXsgldq
    6pPHyCErEZXsgldq
    MbclBWGq5ByVVkBH
    tV2HoHPEdBW4HISd
    • Bevor du dein Nokia 6 auseinanderbaust, schalte es aus.

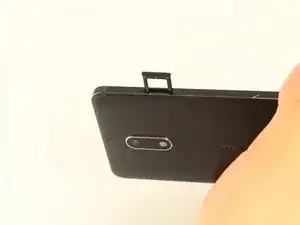
    • Führe das SIM-Karten-Auswurfwerkzeug in das Loch auf der linken Seite des Telefons ein.

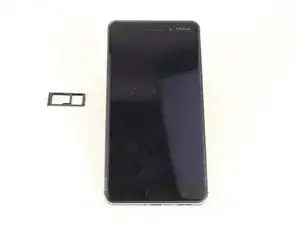
    • Entferne die SIM-Karte und die microSD-Karte.

  2. 1VgvWPoaEXkypKjf
    • Wenn dein Displayglas gesprungen ist, triff Vorsichtsmaßnahmen, indem du das Display mit Klebeband überklebst, um weitere Brüche und Schäden zu vermeiden.

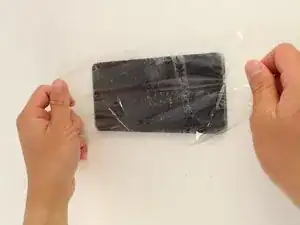
    • Lege überlappende Streifen durchsichtigen Klebebands über das Display des Nokia 6, bis das gesamte Display bedeckt ist.

  3. 42n2clb2u4gROjn5
    • Um den Kleber aufzuweichen, verwende eine Heißluftpistole und erhitze eine Kante des Telefons fünf Minuten lang.

    • Um die Heißluftpistole zu verwenden, schließe sie an eine Steckdose an.

    • Wenn die Heißluftpistole eingesteckt ist, schaltet sich die Heißluftpistole automatisch ein und beginnt, heiße Luft zu blasen.

  4. yOjEn4HPJi6CMBPO
    • Nimm einen Jimmy und schiebe ihn unter das Glas, nachdem der Kleber aufgeweicht wurde.

    • Lege ein Plektrum unter das Glas, nachdem du es mit dem Hebelwerkzeug angehoben hast, damit das Display nicht wieder am Rahmen haftet.

    • Achte darauf, den LCD-Rand unter der Glasschicht nicht mit dem Metallhebel oder den Karten zu berühren. Dies kann die darunter liegenden Flachbandkabel beschädigen und die strukturelle Integrität des Telefons selbst beeinträchtigen.

    • Die Ecken des Displays sind der empfindlichste Teil des Displays. Stelle sicher, dass der gesamte Rand des Displays vom Rahmen gelöst ist, bevor du an den Ecken hebelst.

    The display has a small flat cable curving under the right “square” button about 5 mm from the right edge. It It’s very easy to accidentally cut it with a pick when slicing glue under the bottom right corner, especially when coming down the right edge. A photo of the cable (cut, unfortunately), another photo from a different angle.

    Tarmo -

    It isn't obvious from the description that the major glued areas are at the ends, and particularly the corners. Further, the glass screen itself is overlaid with a thin, flexible cover, and this extends from the glass edge about a centimeter top and bottom. The real danger of screen break is at the sides, where the underlying glass comes very close to the edge of the plastic cover. What you see in the picture is OK, the spudgers going under the cover but not too close to the glass at the end. You need to lift both ends of the screen very slightly before easing the sides up. And the glue patches at the ends are pretty tenacious.

    L Zipp -

  5. qCfOKVGKNuoZvCWR
    • Entferne das Display.

  6. MCJHJesy1gpWb4Bs
    MCJHJesy1gpWb4Bs
    KHUilvc5p2AL2btH
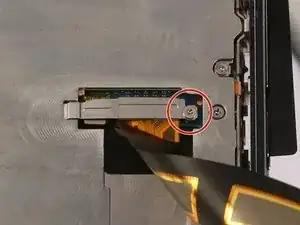
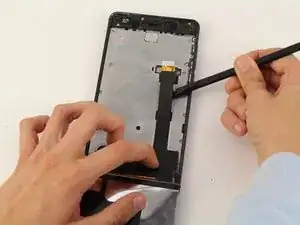
    • Entferne mit einem Kreuzschlitzschraubendreher #000 die 1 mm x 1,4 mm große Schraube, mit der die Metallhalterung über dem Flachbandkabelstecker des Displays befestigt ist.

  7. MoI2cYfOpG1PwRNb
    • Entferne die Metallhalterung mit einer Pinzette.

  8. Nn3nCRDcVG241wpW
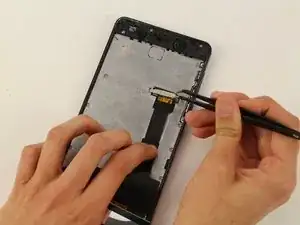
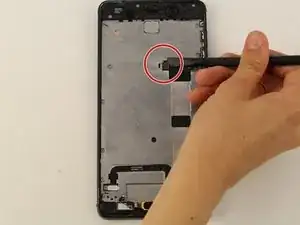
    • Trenne den Flachbandkabelstecker des Displays mit einem Spudger ab und löse die Displayeinheit ab.

    • Die Ecken und die Kante des LCDs sind zerbrechlich. Sei vorsichtig, wenn du es an der Rückseite des Telefons befestigst.

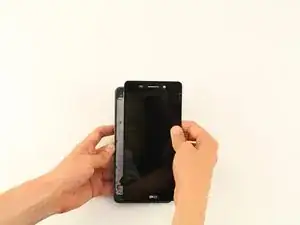
    • Entferne das Display vorsichtig vom Gerät.

    Although below it says that you simply do the reverse to reassemble, be aware that the home button has to be very carefully positioned else it tends to hold the screen up and it won't work reliably. Secondly, you need to clean off the glued areas on the frame very thoroughly, because they pucker badly when taking the screen off. If you buy a reputable screen, included with it there should be a couple of double-sided sticky pads, shaped to fit the ends, which will hold the screen down.

    L Zipp -

  9. D3QvhQmCLUHU3rv5
    • Trenne den Akkustecker mit einem Spudger ab.

    Battery kaha hothe hai front mein ya back per

    Princesses Princesses -

  10. H2eVpqAPebwbwJHp
    H2eVpqAPebwbwJHp
    1MJCPyMTQOi1pCxM
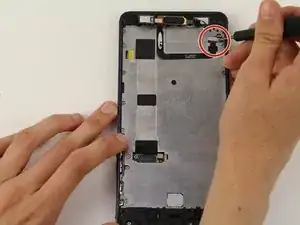
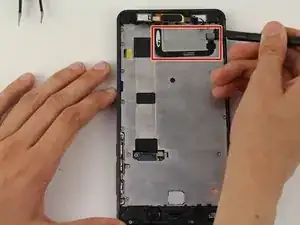
    • Entferne mit einem Kreuzschlitzschraubendreher #00 die 1,2 mm x 2,2 mm große Schraube in der oberen Ecke des Telefons.

    • Verwende eine Pinzette, um die Halterung zu entfernen.

  11. AnX3RXMqQWyF6XyB
    AnX3RXMqQWyF6XyB
    JdOTiN4UKgXCHBcE
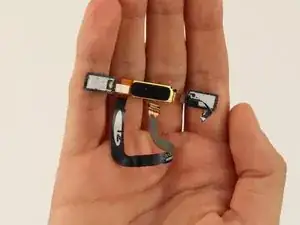
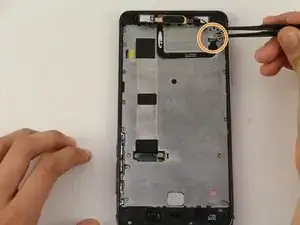
    • Löse das Kabel mit dem schwarzen Nylon-Spudger.

    • Löse die Home-Taste ab und entferne sie vom Gerät.

    DON’T remove it if you are only changing the battery. The screws in the next step can be removed easily by just lift up the buttons. Leave it sticks on the middle plate can save you a lot of trouble.

    L.B.Y -

Abschluss

Um dein Gerät wieder zusammenzubauen, folge der Anleitung in umgekehrter Reihenfolge.

Chrissy Robins

Mitglied seit: 15/04/19

1567 Reputation

Ein Kommentar

I am very grateful for your help,now I got it all figured out..I can do it own my own without necessary taking it to the Nokia center right here in Kenya. friday night funkin mods online

Britt Isaacs -