Einleitung
Benutze diese Anleitung, um einen abgenutzten oder kaputten Akku zu ersetzen.
Falls dein Akku aufgebläht ist, musst du entsprechende Vorsichtsmaßnahmen treffen.
Entlade den Akku für deine eigene Sicherheit auf unter 25%, bevor du das Smartphone auseinanderbaust. Dies verringert das Risiko, dass sich der Akku entzündet oder sogar explodiert, falls er während der Reparatur versehentlich beschädigt wird.
Ersatzteile
-
-
Schalte dein Smartphone aus.
-
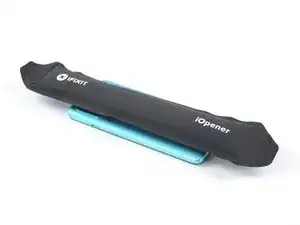
Erhitze einen iOpener, um den Klebstoff unter der Glasabdeckung auf der Rückseite zu lösen. Wende den iOpener für mindestens zwei Minuten an. Möglicherweise muss dieser Schritt mehrmals während dem Öffnen wiederholt werden
-
-
-
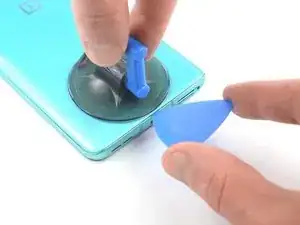
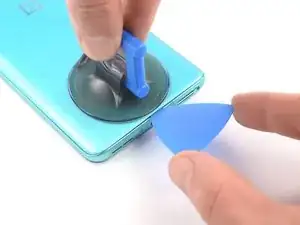
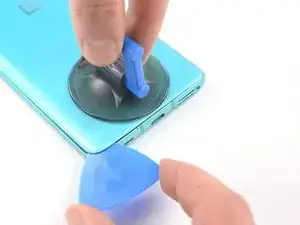
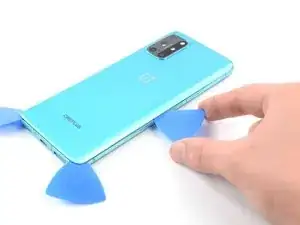
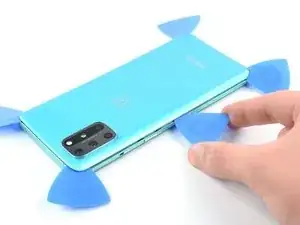
Bringe einen Saugnapf auf der Rückseite des Smartphones an, und zwar so nah wie möglich an der Mitte der Unterkante.
-
Ziehe an dem Saugnapf, um einen Spalt zwischen der Rückseite und dem Rahmen zu schaffen.
-
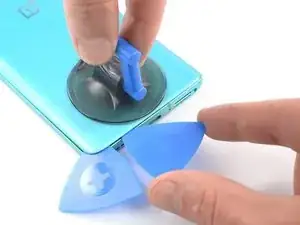
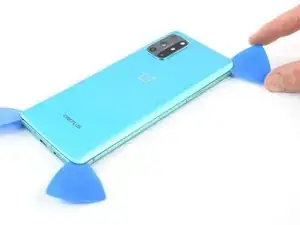
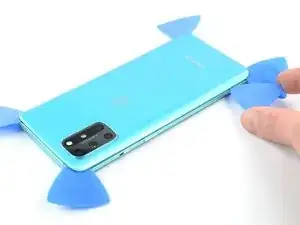
Führe die Spitze eines Plektrum in die Lücke ein und schiebe sie in die linke untere Ecke.
-
Lasse das Plektrum an seinem Platz, um zu verhindern, dass sich der Klebstoff wieder verschließt.
-
-
-
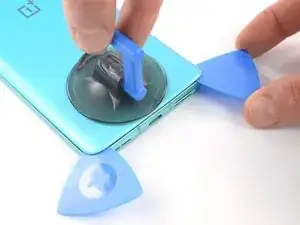
Füge ein zweites Plektrum in der linken unteren Ecke ein.
-
Schiebe das Plektrum entlang der Unterkante bis zur rechten unteren Ecke.
-
Lasse das Plektrum an seinem Platz, um zu verhindern, dass sich der Klebstoff wieder verschließt.
-
-
-
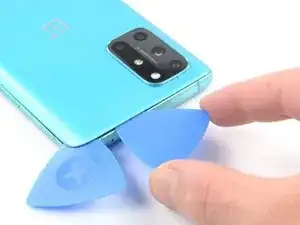
Füge ein drittes Plektrum in die Ecke rechts unten ein.
-
Schiebe das Plektrum entlang der rechten Kante bis zur oberen rechten Ecke.
-
Lasse die Plektren an ihrem Platz, um zu verhindern, dass sich der Klebstoff wieder verschließt.
-
-
-
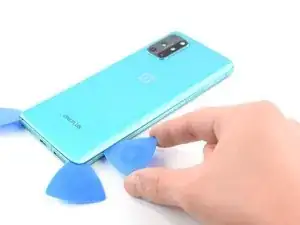
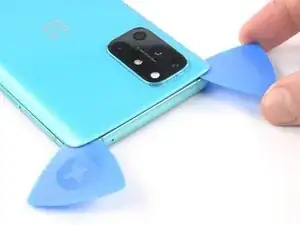
Setze ein viertes Plektrum in die Ecke rechts oben ein.
-
Schiebe es entlang der oberen Kante zur oberen linken Ecke, um den Kleber aufzutrennen.
-
Lasse die Plektren an ihrem Platz, damit sich der Kleber nicht wieder verschließt
-
-
-
Füge ein fünftes Plektrum in die obere linke Ecke ein.
-
Schiebe das Plektrum entlang der linken Kante zur unteren linken Ecke, um den restlichen Kleber aufzutrennen.
-
-
-
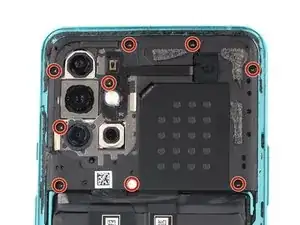
Benutze einen Kreuzschlitzschraubendreher, um die neun 3,8 mm langen Schrauben zu entfernen, mit denen die Motherboard-Abdeckung befestigt ist.
-
-
-
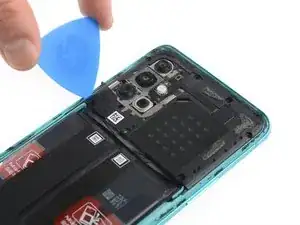
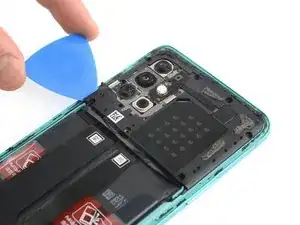
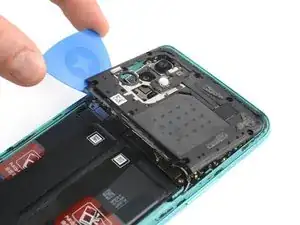
Setze die Spitze eines Plektrums unter die untere linke Ecke der Motherboard-Abdeckung.
-
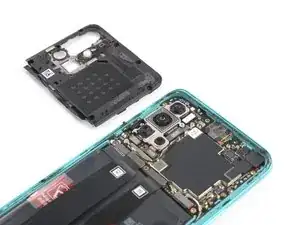
Benutze das Plektrum, um die Abdeckung zu anzuheben und die Plastikclips zu lösen, mit denen sie befestigt ist.
-
-
-
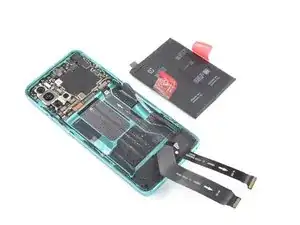
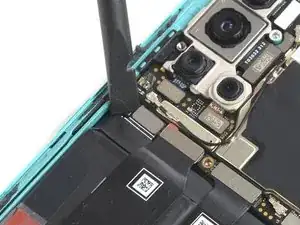
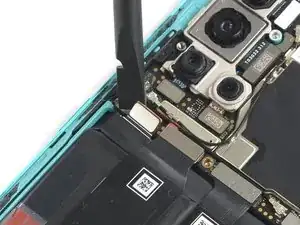
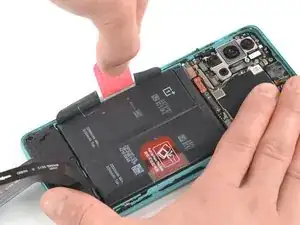
Benutze einen Spudger, um den Akku abzutrennen, indem du den Druckverbinder gerade nach oben aus seinem Anschluss hebelst.
-
-
-
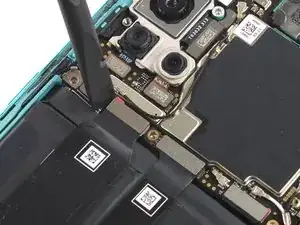
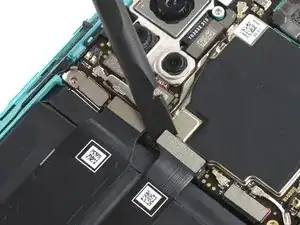
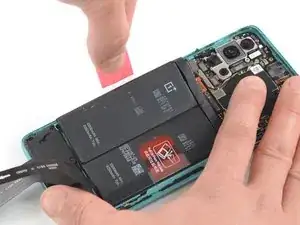
Benutze die flache Seite eines Spudgers, um die beiden Flachbandkabel abzutrennen, die über dem Akku liegen.
-
-
-
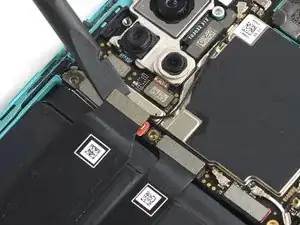
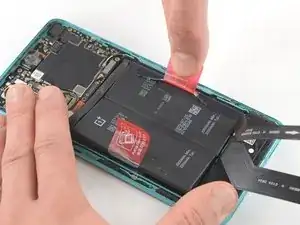
Biege die zweiFlachbandkabel zur unteren Kante des Smartphones und aus dem Weg des Akkus.
-
-
-
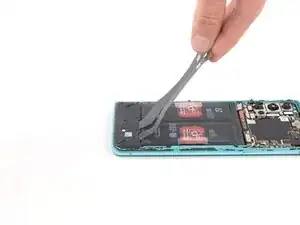
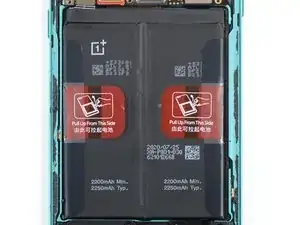
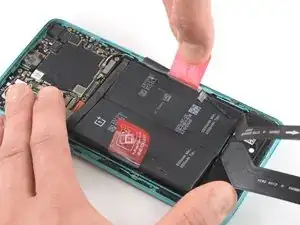
Ziehe die rote Zuglasche und den schwarzen Aufkleber von der linken Kante des Akkus ab.
-
Ziehe die Lasche mit langsamer gleichmäßiger Kraft, um den Akku vom Kleber zu lösen, mit dem er befestigt ist.
-
-
-
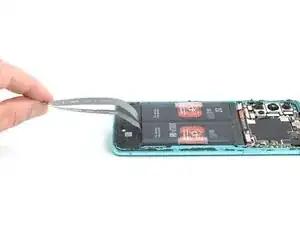
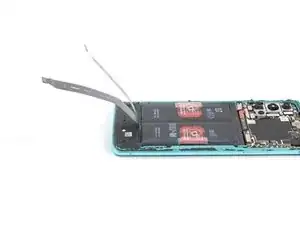
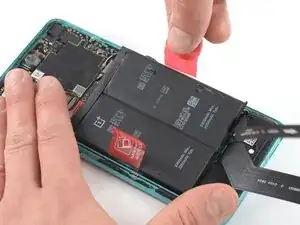
Ziehe die rote Zuglasche und den schwarzen Aufkleber von der rechten Kante des Akkus ab.
-
Ziehe die Lasche mit langsamer gleichmäßiger Kraft, um den Akku vom Kleber zu lösen, mit dem er befestigt ist.
-


Wenn möglich, schalte das Gerät an und teste deine Reparatur, bevor du den Klebstoff aufträgst und das Gerät wieder verschließt.
Befestige den neuen Akku mit vorgeschnittenen Klebestreifen oder doppelseitigem Klebeband.
Um die Klebestreifen korrekt zu platzieren, trage sie im Gerät dort auf, wo die alten Klebestreifen waren und nicht direkt auf den Akku. Drücke den neuen Akku fest in seinen Platz.
Um das Gerät wieder zusammenzubauen, folge den Anweisungen in umgekehrter Reihenfolge.
Trage neuen Kleber auf, wo es nötig ist, nachdem die relevanten Stellen mit Isopropylalkohol (>90%) gereinigt wurden.
Um eine optimale Leistung zu erzielen, solltest du deinen neu installierten Akku kalibrieren, nachdem du diese Anleitung durchgeführt hast.
Entsorge deinen Elektromüll sachgerecht.
Hat die Reparatur nicht ganz geklappt? Versuche es mit ein paar grundständigen Lösungen, ansonsten findest du in unserem Forum Hilfe bei der Fehlersuche.

15 Kommentare
This doesn't look too bad. Heat the back cover enough to cut through the adhesive, then lift off the back cover. Unscrew 9 tiny #00 phillips screws and pop off the mobo cover. Lift 3 ribbon cable connectors. Pull the battery off the adhesive. Clean off all the old adhesive from under the battery and around the edge of the back cover. Then reverse the process to reassemble. You would need a new battery, and a new back cover if you broke the original one trying to remove it. You can get a new back cover from Amazon for $20, but the reviews all said it's not Gorilla Glass, and it's far less durable and crack-resistant than the OEM cover. Finding a good quality replacement battery seems to be more difficult, I don't see even one battery for sale on Amazon that says specifically that it fits this phone.
My refurbished OP8T's battery gave up randomly one day. Plugging in any charger/any attempt to boot would just briefly showed a lightning bolt icon and would fade to black.
With that said, I completed my fix yesterday evening without any issues. I used a blow-dryer to loosen the back cover rather than the iFixit heating tool, and it worked fantastically. I removed the dead stock battery and replaced it with a 4600mAh from eBay, taking care to move the sticky pull tabs from the old battery to the new for future repairs. The battery and two removed cables snapped in with an audible click.
When reseating the motherboard cover, be aware there's a little connector that needs to line up with the board, and that will click into place.
I resealed my device with gorilla glue (but there are better, more tailored glues on Amazon). I am a little worried about water and dust getting in now that I've broken the seal, so I would be very wary of that.
In total, repairs cost about $40 and 40 minutes of my time. Great guide!
Update 10/10/2023
So exactly a year later, my OnePlus 8T has given up on me. A few weeks ago, I noticed it began randomly shutting off. The screen would "fade" to black and I'd have to hold the power button down to start it back up. Today, it turned off completely and refuses to turn back on or boot into recovery.
I'm not sure if this was due to the third-party battery giving out (Generic 4600mAh battery from eBay) or if it was caused by any range of software issues. I'll be leaving it on the charger overnight and attempting another battery swap shortly, so hopefully that works.
Michael, please let us know how the next replacement goes. I’m attempting my first replacement right now. Thanks.
A question, the 8T has a battery rated at 4400mAh, while the battery in the store is 2200mAh. is this a mistake or does the replacement battery have half the battery life of the original?
I would assume that the replacement battery in the store is actually two 2250mAh cells packaged together in a series just like the stock battery that comes in the OnePlus 8T (it physically looks like it, even though its not labeled as such).
OPPO's SuperVOOC which is rebranded as Warp Charge in the OnePlus phones depends on multiple cells in a series to charge as fast as it does without introducing extra wear. So I highly doubt that iFixit would sell a replacement that doesn't meet these specs. It's probably just not labeled correctly and should be identical to the stock in capacity, both typical and rated.
Matt B. -
The battery has two parts that are each 2200 mah. In total you get 4400 mah (2200x2) . Oneplus chose to divide its battery in half to allow faster charging.
Mo Uddin -
Your phone has 2 smaller batteries, you can see it on pictures. Your 2200 mAh battery is actually 4400 mAh.
Wie heiß ist „überhitzt“? Sind 60 °C vom Bett meines 3D-Druckers okay?
Bastian Hodapp -
Ja, 60 Grad sind auf jeden Fall in Ordnung. 80 Grad sind meines Wissens nach optimal, da dies der Schmelzpunkt, bzw. der Punkt ist, an dem viele Kleber weich werden. Alles darüber würde ich entweder nur sehr kurz anwenden, oder am Besten gar nicht.
Moritz S -