Einleitung
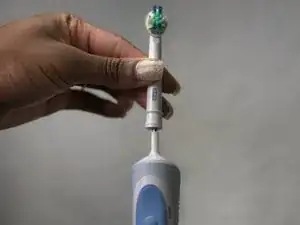
Ein eingebauter Akku gewährleistet die Arbeit der Bürsten. Wenn die Bürste keine Kraft mehr hat, oder die Ladung nicht mehr hält, ist wahrscheinlich der Akku schwach geworden und sollte ausgetauscht werden.
-
-
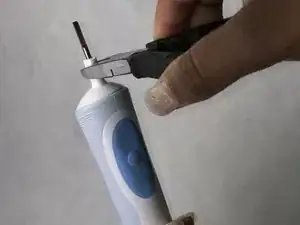
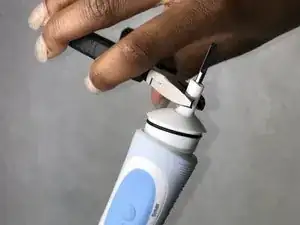
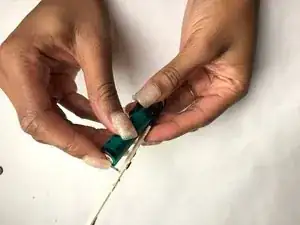
Ziehe den Bürstenkopf ab und entferne mit einer Zange die weiße Kappe. Ziehe dann die Leiterplatte heraus.
-
-
-
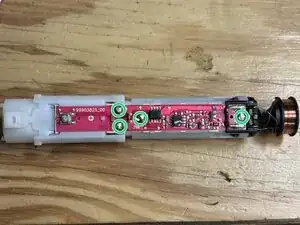
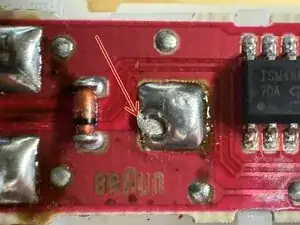
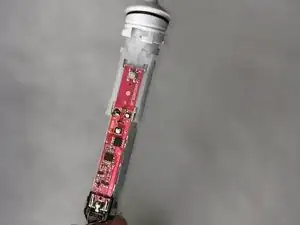
Inspiziere die vier Pads mit grünen Kreisen (Bild 1), sie sollten vollständig mit Lötzinn bedeckt sein.
-
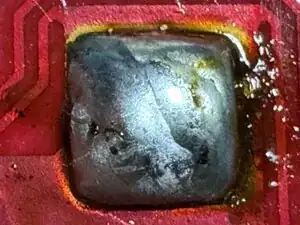
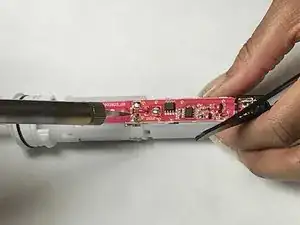
Bild 2 zeigt, dass sich auf dem mittleren Pad zu wenig Lötzinn befindet und keine gute Verbindung macht.
-
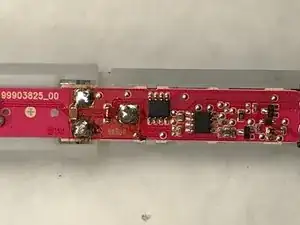
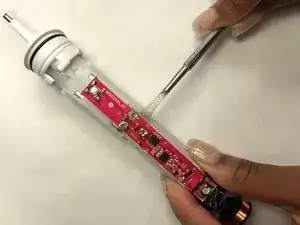
Bild 3 zeigt ein repariertes Pad. Teste die Batterie und Operation des Motors ohne den Bürstenkopf. Wenn die Zahnbürste jetzt funktioniert, muss die Batterie nicht ersetzt werden - Wenn die Batterie 1,2 und 1,5 Volt ausgibt und der Motor sich bewegt, wenn der Knopf gedrückt wird, kannst du hier aufhören und die Zahnbürste wieder zusammenbauen.
-
Wenn die Batterie weniger als 1,2 Volt ausgibt, prüfe den Motor und die Taster mit zwei Tests.
-
Berühre dazu mit einer AA-Batterie und einem Paar Kabel ein Ende der Kabel mit den Batterieenden und die anderen Kabelenden mit:
-
A) den Pads der linken Platine (um die Motorleitungen zu testen)
-
B) den Pads der rechten Platine (um die Batterieleitungen zu testen, der mittlere Pin ist positiv).
-
Wenn der Motor nicht nach Schritt 2 startet, fahre mit Schritt 3 fort.
-
-
-
Entlöte folgende vier Lötstellen:
-
Zwei Anschlüsse des Motors
-
Den positiven Akkuanschluss
-
Den negativen Akkuanschluss
-
-
-
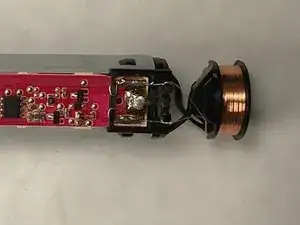
Entlöte auch den unteren Anschluss von der Ladespule. Biege den Anschluss zurück, so dass der Weg für die Platine frei wird.
-
-
-
Heble die Leiterplatte behutsam mit Kunststoffwerkzeug hoch. (Benutze Metallwerkzeug nur, wenn es garnicht anders geht).
-
-
-
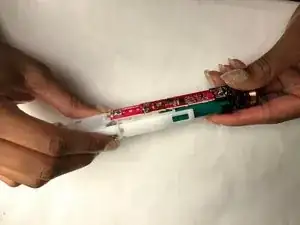
Ziehe die Baugruppe aus Platine und Akku heraus. Trenne anschließend den Akku von der Leiterplatte.
-

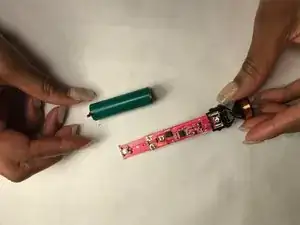
Um dein Gerät wieder zusammenbauen, folge den Schritten in umgekehrter Reihenfolge. Vergiss nicht, die Akkukontakte wieder gut zu verlöten.
10 Kommentare
This is very easy to do. I had no problems following your instructions.
Thanks.
Is this a regular rechargeable AA?
Thanks again.
The original battery is a NiCd with tabs. I just spot welded tabs onto a standard AA NiMH battery and it worked fine.
T C -
@stephen Shaw These batteries worked for me: https://www.amazon.com/dp/B00CR0R8KQ/ref...
Ruotare per estrarre
sergio_storato -
You can use the hole in the bottom of the charging base (underside) that the top fits into and catches. Just twist gentilly back and forth until it loosens, then pull up with your fingers or pliers. Note, this is not like the Braun sonic care where the bottom comes off… should Have looked at the guides first as a I cracked the bottom trying to twist off the bottom like that brush.
Aaron Giesick -
Die weiße Kappe kann nicht einfach nur abgezogen werden. Sie muss nach links gedreht werden!
Freubert -
I saw on a Youtube video you can use the center hole of the charging base instead of pliers. It fits perfectly on mine.
George Tedrick -
Don't grab it with pliers--you will break off the narrow retainer stub. Instead use a thin blade to pry up an edge of the cap, then insert a wide flat blade to pry up the core out of the handle. Plier could be used for pulling but not for twisting. This also works for the Dentiguard version from Aldis.
Kiev Kenny -
I don't believe it opens like this. Pulling on the top thing like on the picture did break mine. It's alright though because I kind of knew while I was pulling and I kept on pulling knowing it would break any second. But if you need yours, you better look for some other instruction. Would be nice to update this one as well.
Wolfgang -