Einleitung

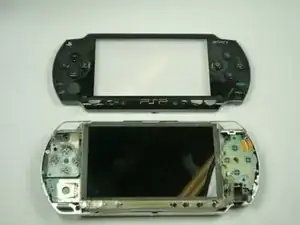
Diese Anleitung wird dir helfen, den LCD Bildschirm austauschen, falls er defekt oder beschädigt sein sollte.

  1. QacnKmgPd5vO4EVM
    • Drehe die PSP so, dass die Rückseite zu dir zeigt.

  2. KfhYCVXbuwocyXOJ
    KfhYCVXbuwocyXOJ
    ET6LQanHrAYARDNK
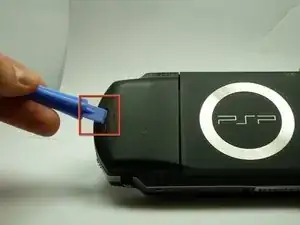
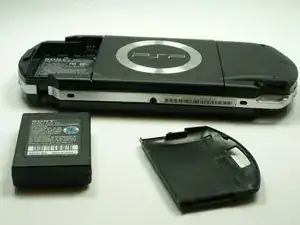
    • Suche nach dem Knopf für das Akkugehäuse auf der hinteren linken Seite der PSP.

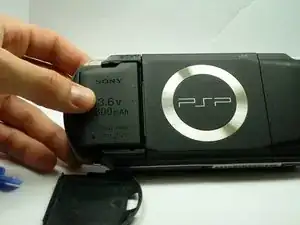
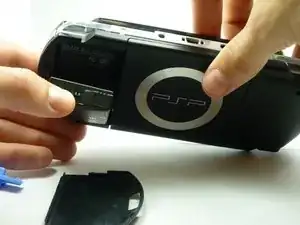
    • Drücke auf den Knopf und entferne die Akkuabdeckung.

    You are dumbbb... BRO YOUR DUMB BC U DIDNT HAVE TO USE A TOOL TO OPEN THE DOOR. USE YOUR FINGER""

    Paulo Moments -

    The battery door can be damaged dont use a tool

    Paulo Moments -

    That also happend to me it got destroyed by screwdriver

    Paulo Moments -

  3. ISXv3lrW12xLWbnR
    ISXv3lrW12xLWbnR
    2m4TOHnIVUoYXWUA
    • Entferne den Akku mit deinen Fingern nach oben weg, wie es auf dem Bild gezeigt wird.

    The use of the opening tool is completely unnecessary. There is a finger actuated opening latch button that says “PUSH” on it. Simply press down with your thumb then slide your thumb down and away, dragining the battery door with it. It will then come off. Assuming the system still has its original plastics, they may have become brittle enough that the opening tool could damage the release button or the plastic cover.

    Franklin Allen -

  4. ckGKHpFUTpAy5N3R
    ckGKHpFUTpAy5N3R
    vJp1HKCLNP1L5iB6
    • Entferne die vier markierten Schrauben mit einem #00 Kreuzschlitzschraubendreher.

    • Du musst den Garantieaufkleber ablösen, um an die untere linke Schraube zu gelangen.

    Much luck to you if you have a tiny, metal screwdriver like I did, the screws might be stuck in there and may require some force.

    Squib -

    you need to peel back the warranty sticker in order to access both the lower left and lower left screws

    Frederick zzstu Geib -

    This is a bit misleading, you should only remove the two black screws in the battery compartment. The silver ones can stay.

    Damian Cartwright -

    The two left hand screws won’t come out of mine

    XULF -

    iFixit screwdriver bits aren't thin enough to reach the two screws on the right near the memory stick slot.

    Fliggle_Slaps -

    Can't edit previous comment so here's a new one:

    Standard or older iFixit screwdriver bits aren't thin enough to reach the two screws on the right near the memory stick slot. You'll need precision bits that have longer tips to reach these deep screws.

    Fliggle_Slaps -

  5. aGllC1mxt3FxwjJx
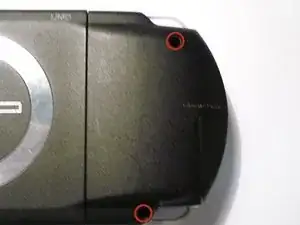
    • Entferne die Schraube auf der Unterseite der PSP. Lege sie separat von den anderen Schrauben ab.

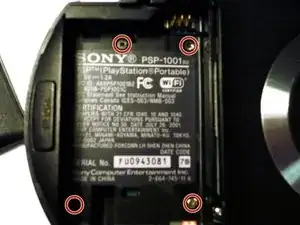
    • Entferne Schrauben von der rechten Seite der Rückseite innerhalb der Vertiefungen.

  6. Ii3a5ygvVCa2DQTW
    Ii3a5ygvVCa2DQTW
    QOKFQYHjjpjkCpkW
    • Nimm das äußere Kunststoffgehäuse vom Rest des Gerätes, wie auf dem Bild gezeigt, ab.

  7. mRetS1vLqaIMHxsm
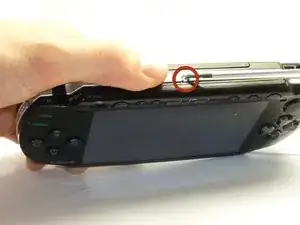
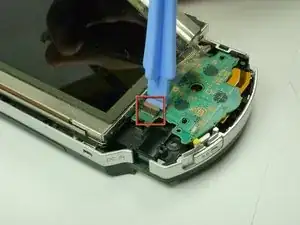
    • Die Platine der Tasten, am unteren Ende des LCD Bildschirms, wird von zwei Clips gehalten.

    • Hebele diese Clips über die Befestigungspins, indem du ein PSP Öffnungswerkzeug verwendest. Das wird die Clips öffnen.

    • Die Tastenplatine ist weiterhin mit der PSP über ein Flachkabel verbunden.

  8. XAPlWSPYTBnk4kHW
    XAPlWSPYTBnk4kHW
    y2ZMPu6hFaIMHeEZ
    CM3B1OCMvLaoaYgU
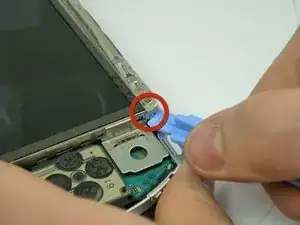
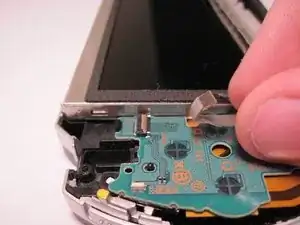
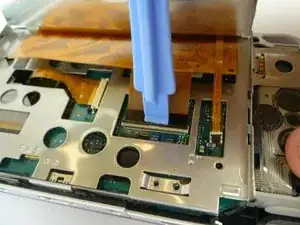
    • Das Flachkabel der Platine wird mit einer Lasche befestigt. Hebele diese Lasche auf und weg vom Flachkabel.

    • Ziehe das Kabel weg von der Lasche.

  9. D2bNuCiDSWWwWXII
    D2bNuCiDSWWwWXII
    PWVvGylIhKJX1y1B
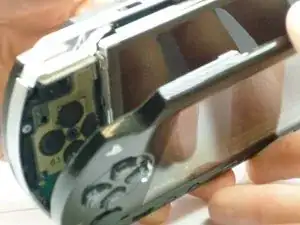
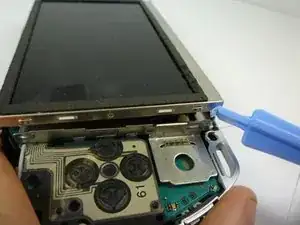
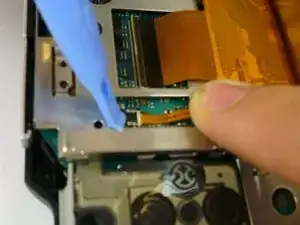
    • Der LCD Bildschirm wird vom LCD Rahmen mit ähnlichen Clips gehalten. Schiebe ein dünnes Werkzeug zwischen den Clip und den Bildschirm und beginne sie vorsichtig auseinander zu hebeln, während du beginnst den Bildschirm anzuheben.

  10. YPeEx2CAOyTrMhpe
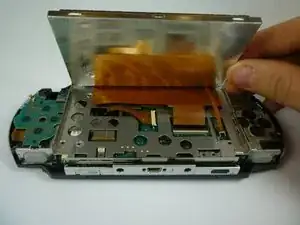
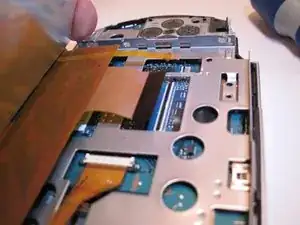
    • Der LCD Bildschirm ist noch mit Flachkabeln befestigt. Hebe den LCD Bildschirm vorsichtig ab, damit du diese nicht beschädigst.

  11. MfU6sZYZNswQWfrR
    MfU6sZYZNswQWfrR
    haRHpeyReVrZbE3Y
    OVxu3pWnw5aI5CSv
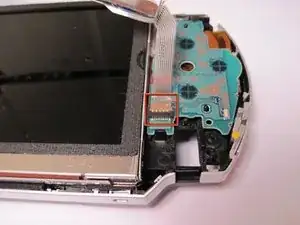
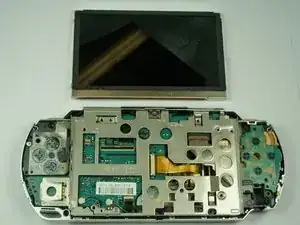
    • Das dünne Flachkabel öffnet sich zur anderen Seite als die, durch die es herein kommt. Öffne die Lasche zum Flachkabel hin. Die Lasche wird sich aufstellen und das Flachkabel lösen. Bringe dein Werkzeug hinter den schwarzen Teil des Bauteils und hebele dann das schwarze Kunststoffstück an.

    • Das breite Flachkabel öffnet von er selben Seite aus, durch die es herein kommt. Die Lasche öffnet sich zur anderen Seite als das Kabel.

    • Beide dieser Laschen sind schwarz.

    • Ziehe die Flachkabel sanft von den Laschen weg. Der LCD Bildschirm kann jetzt entfernt werden.

    • Sei beim Wiedereinbau vorsichtig in welche Richtung du die Laschen drückst. Die kleine Lasche kann sehr einfach brechen.

Henry Lee

Mitglied seit: 14/01/10

839 Reputation

8 Kommentare

I broke one of the laches....helppp!!!!

janet -

This is not easy...I tore up the outer casing trying to do this. I better see money in the mail for this

Justin Autrey -

My Sony PSP has just stop coming on

lil bao -

People!! If you weren't gifted in screws and bolts, then bring your console to a repair shop. Seriously blaming this for your Dick Fingers?

janisfranckevics -

dick fingers!!

jonathon allen -

It needs to be mentioned that the power switch is very fragile. When reassembling the front cover you need to first make sure that the small black switch on the circuit board sits in the yellow part of the switch, otherwise when you apply pressure to click the cover back in place the black switch will break off.

Isak -

Great tutorial, thanks to this I manage to fix the R button, it turns out the ribbon cable of the right section of buttons was dirty and a little bit off of place, and taking out the screen was necessary to get to that connector.

Jhosttyn Medina -

Totally helpful thank u so much, a little bit of patience and common sense job was done an I was play my psp portable the instant I put the battery cover back on it! U guys ROCK TNX AGIAN!!

Barclay Wilson -