Einleitung
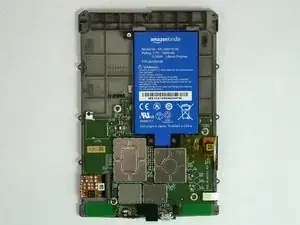
Amazons Paperwhite 3 (7. Generation der Kindle-Serie) ist mit einem 3.7 Volt Lithium Polymer Akku ausgestattet. (Modell No: MC-354775-05). Du musst für den Ausbau das Gerät auschalten. Als Werkzeuge benötigst du ein Plastiköffnungswerkzeug und einen Kreuzschlitzschrauber PH000.
-
-
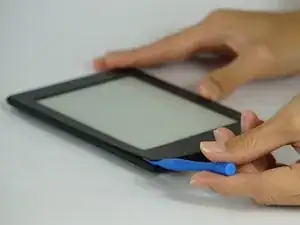
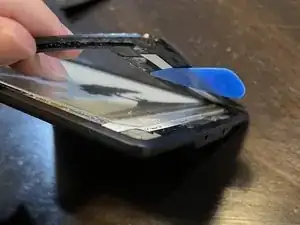
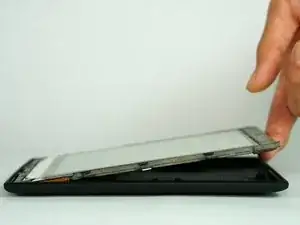
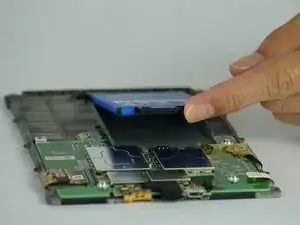
Heble die Blende mit einem Plastiköffnungswerkzeug vorsichtig ab. Beginne an den Ecken und schiebe das Werkzeug um die Kanten herum, bis du wieder am Ausgangspunkt angelangt bist.
-
-
-
Sei besonders vorsichtig, wenn du die Blende abhebelst. Das Werkzeug darf nicht unter das Display gelangen. Schaue unter die Abdeckung, du musst den Kleber an der Blende auftrennen.
-
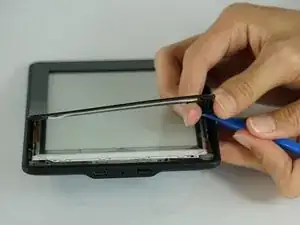
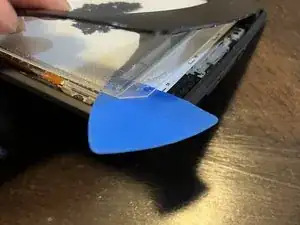
Achte darauf, dass du auf beiden Seiten der Blende mit dem Werkzeug über dem Display bleibst.
-
Beim zweiten Foto siehst du, auf welche Weise das Trennwerkzeug zwischen Blende und Display liegen muss.
-
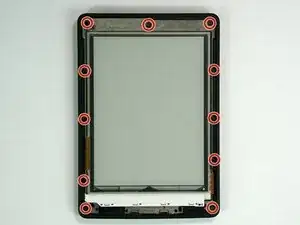
Beim dritten Foto siehst du, was falsch gehen kann. Falls das wirklich passiert, arbeitet dein Touchscreen nicht mehr richtig und das Display ist dauerhaft beschädigt.
-
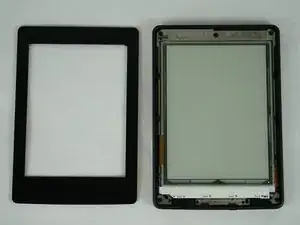


Um dein Gerät wieder zusammenzusetzen, folge den Schritten in umgekehrter Reihenfolge.

23 Kommentare
Same for 5th Generation ??
where can i buy a new battery ?
you need a taobao.
lol
kassadin -
They are sold on aliexpress and ebay but the price of battery and postage is not that different from the price of a second hand 3ed Gen Kindle. But then the second hand Kindle will probably need a new battery too so, I am going to get a battery from ebay.
eBay has that http://www.ebay.com/itm/201606870149
Be very careful along the lower left side, where the cable to the touchscreen can be easily cut with a plastic spudger.
John Kenny -
Be careful at the top of the 3G version. The wifi and cell antennas are located along here.
James Sullivan -
I can’t get my spudger in to start lifting. Any advice?
Davey -
it takes a bit of force to first insert the spudger into the crack
jookieapc -
Be careful inserting the spudger too quickly. The glue holding the screen pulled loose in two spots along the side before the bezel did and there are lines along the border of my screen now.
Nick -
I made my own version of Nick’s error: I inserted a pick too far under the bezel, and very slightly separated the screen, leaving a small shadow in a corner. Easy does it!
Other than that, battery replacement was super-easy and successful.
Brad Compton -
I couldn't get a purchase from the outside, so started from the inside of the bezel. It was secured with double sided tape. Might have been better to apply some heat before prying.
David Glover -
Used the guide to replace the battery. Could not get enough separation using the blue spudger. Used the metal spidger to get things started then switched to the blue picks. Afterthought, Warming the bezel would have helped.
Jeffry Long -