Einleitung

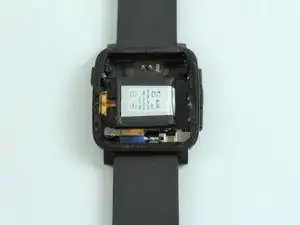
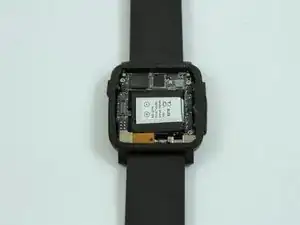
Baue den Akku aus, um ihn zu ersetzen.

  1. QFDlMnWyMMx566wu
    • Lege die Uhr auf flach auf die Arbeitsfläche.

  2. HHpc4wmtPKCUUdWC
    HHpc4wmtPKCUUdWC
    GrQhoiww2vw3lUI6
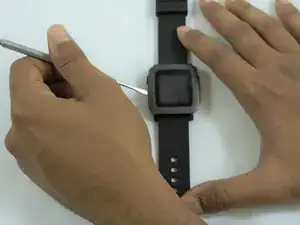
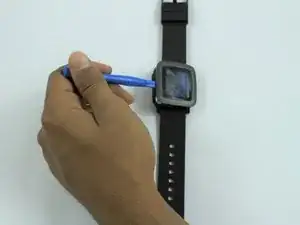
    • Ziehe die Displayabdeckung vorsichtig mit dem Metallspudger vom Gehäuse ab.

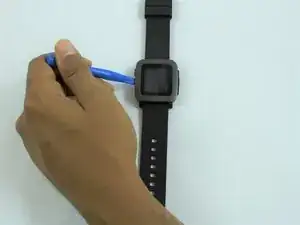
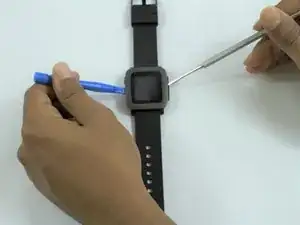
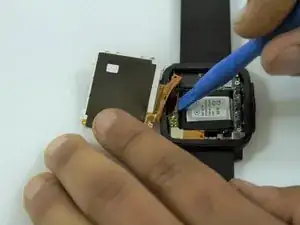
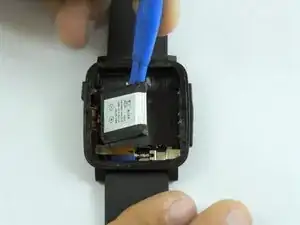
    • Ersetze den Metallspudger durch ein Kunststofföffnungswerkzeug, um die Abdeckung offen zu halten.

    Just a note whilst removing the cover/screen - on my Pebble Time Steel, the LCD seemed to actually be attached to the glass, so when the adhesive around the outside seperated, I disconnected the ribbon cable and removed both as one piece - if you can, this definitely helps keep the end result a bit tidier!

    Aadi Bhamidipati -

  3. tB3AWEYaM1t4EnJQ
    • Löse vorsichtig den Rest der Abdeckung mit dem Metallspudger.

  4. qwVbUgKwcH2iLaxT
    • Ziehe die Abdeckung vorsichtig mit dem Kunststofföffnungswerkzeug auseinander.

  5. lHSd2sGnFUhTTIIk
    • Setze einen Metallspatel wie im Bild gezeigt seitlich am Display ein.

  6. fIIKLFWOIh3ZWpKe
    • Heble das Display mit dem Spatel hoch.

  7. YWKY5jjthyZydy2s
    YWKY5jjthyZydy2s
    sJLMNgJQKcWmBrHB
    wYUuVGAEVQRYb2WN
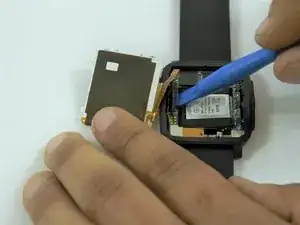
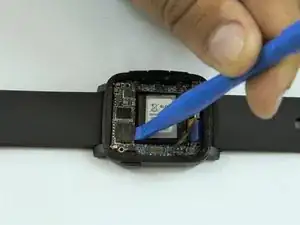
    • Setze ein Öffnungswerkzeug aus Kunststoff zwischen den Displaystecker und der Leiterplatte ein.

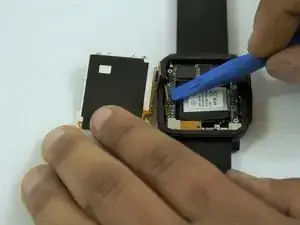
    • Trenne das Display von der Leiterplatte ab.

    There might be some yellow / brown sticky tape that covers the lower end of the ribbon cable and those 6 shiny contact pads. You can carefully pull it off when you lift up the cable.

    Henrik L -

  8. uZZKZ14CcTy4OqpG
    • Lege die Uhr flach auf die Arbeitsfläche.

  9. ClrOaGQrYYjJOZeO
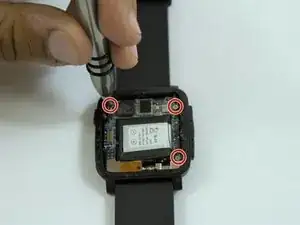
    • Finde die drei Schrauben an der Leiterplatte.

    • Nimm einen Kreuzschlitz-Schraubendreher #000 und entferne die drei Schrauben.

  10. fBTLNaGslEouwxKe
    fBTLNaGslEouwxKe
    Cit4WW1qmpsofHMZ
    v3BEVAGIxDST2Ihc
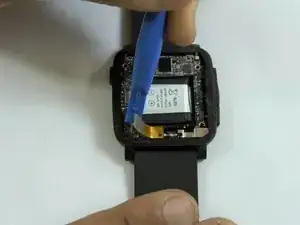
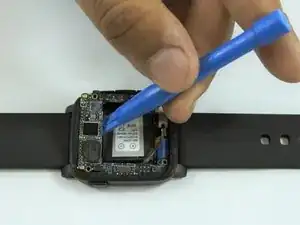
    • Trenne vorsichtig das Verbindungskabel am linken unteren Rand der Leiterplatte mit einem Öffnungswerkzeug aus Kunststoff ab.

    • Biege den Verbinder weg, um an die vierte Schraube heranzukommen.

  11. BwWY5wVZHHMWoCUW
    • Entferne die letzte Kreuzschlitzschraube #000 von der Leiterplatte.

  12. TqJFY46iTPiJRfm2
    TqJFY46iTPiJRfm2
    KTEcyfQDJcSNAq3h
    • Drehe die Uhr zur Seite und hebe die Leiterplatte mit dem Öffnungswerkzeug hoch.

    • Entferne die Leiterplatte vom Gehäuse.

  13. wyuYpxjRMPde2vNR
    • Nach dem Entfernen der Platine sieht man den Akku in der Mitte des Gehäuses.

  14. hGo6HUkjP3me33dm
    hGo6HUkjP3me33dm
    I1dXMp45XfKMHyXU
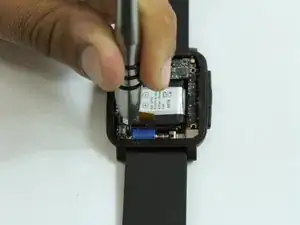
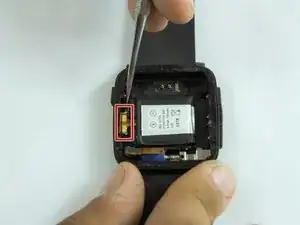
    • Finde den Akkuanschluss auf der linken Seite des Gehäuses.

    • Trennen den Draht vorsichtig mit einem Metallspudger.

  15. eCU1PKeD4XuKbArN
    eCU1PKeD4XuKbArN
    Q1tB3yu4LRSbmpnw
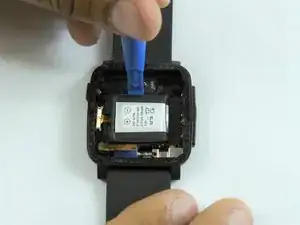
    • Verwende nach dem Abklemmen des Akkus das PLastiköffnungswerkzeug, um den Akku aus dem Gehäuse zu heben.

    • Der Akku kann am Gehäuse festgeklebt sein.

    The connector might also be glued to the case with doublesided sticky tape.

    Henrik L -

Abschluss

Um dein Gerät wieder zusammenzubauen, folge den Schritten dieser Anleitung in umgekehrter Reihenfolge.

Nicolas Hempe

Mitglied seit: 15/02/17

1468 Reputation

11 Kommentare

Where did you purchase the replacement battery?

Dimas Caparros -

Got mine on Amazon

kwojdak -

What is everyone using for sticky tape to hold the bezel/crystal on that will ensure the pebble is still waterproof?

Shannon Oswald -

Attempted this using RTV Silicon, and it is %#*@ difficult to not get it EVERYWHERE! I got some on my LCD, now I’m looking for another Pebble. Just use a little superglue on the outside and don’t figure on it being waterproof anymore - I guess.

Shannon Oswald -

There’s a lot of replacement battery on internet. Just search “150mAh P11G7T-01-S01”.

Xie Yanbo -

Amazing tutorial, i just completed it and everything went fine! I wanted to mention that i used the T-7000 glue to hold both the replacement battery and the screen back in place, hopefully restoring to some degree the water resistance feature of the watch.

Oscar Acevedo -

Failed. The spudger slipped inside and damaged the screen. Kept trying for the heck of it, removing the screws is also very difficult, as they are tiny and the screwdriver easily damages the head, to the point where they won’t turn anymore. All in all a !&&* of a job, very high likelihood of failure, more trouble than it is worth.

Massimo Boninsegni -

Attempted and failed due to screws getting stripped and not budging.

David Millar -

This is trickier than it sounds.  Add to the tool list a pair of tweezers (for placing screws), a tiny flat blade screwdriver (for prying and pressing), and a knife blade (for prying the case apart).  A pair of magnifying glasses is a help, too.  The Phillips screwdriver for the screws and plastic pry tools came with my Amazon battery: https://www.amazon.com/dp/B07XLVC6J4?psc....  Cost was around $15.

The small yellow ribbon connectors came off easily but were fussy to get back on, especially the folded one for the LED screen.  Clean any fingerprints/debris off the LED screen and the inside lens of the cover and turn the watch on before replacing the cover to make sure all the connections are in place.

I used some black silicone cement around the lip of the cover, but also ran into problems with it getting everywhere.  The top didn’t snap into place, so I clamped the top and case together while the silicone cured.  We’ll see if it stays. If not, I'll try superglue like another commenter.

Ron LaMee -

I was wondering if I would be able to do this as my DIY skills are crap, but surprisingly all went well. Take time and make sure you have the correct tools.

Michael Hirst -

Hey folks! Awesome guide, just for those who are using this to replace a battery in a Pebble Time Steel (or even a regular time), I've found there's some useful info in this reddit thread here: https://www.reddit.com/r/pebble/comments..., especially with battery sizes etc.

Aadi Bhamidipati -