Einleitung

Wenn die rechte oder linke Maustaste nicht mehr reagiert, muss vielleicht der Mikroschalter ausgetauscht werden. Diese Anleitung zeigt alle notwendigen Schritte, um einen Mikroschalter in der Razer Naga Trinity Maus zu ersetzen.

  1. 6upNCxhUNlRnNAoc
    6upNCxhUNlRnNAoc
    sWTAShWRBvq4UCtY
    • Entferne die abnehmbare Seitenplatte.

  2. orOjsRmCvWlyCppb
    orOjsRmCvWlyCppb
    tbQ2dVkNYFde3p4x
    • Entferne die Mausfüße mit einem Plektrum.

    Be aware that it’s possible to peel the feet from the glue layer.

    SteepPoppy0 -

  3. InHdBApOF6SDgVAH
    • Nimm einen JIS #1 Schraubendreher und entferne die sechs 6 mm langen Schrauben.

  4. 1RpIKkEgpOPBNYnZ
    1RpIKkEgpOPBNYnZ
    MXDm6KNnWSVQ3aUh
    • Trenne das Oberteil der Maus mit einem Plektrum vom Unterteil ab.

    • Achte darauf, dass der Stecker am Flachbandkabel nicht zu stark belastet wird.

  5. KQU2EAEMltumNpre
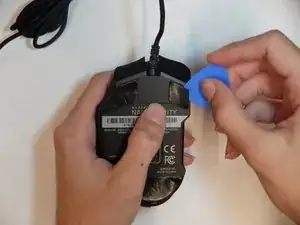
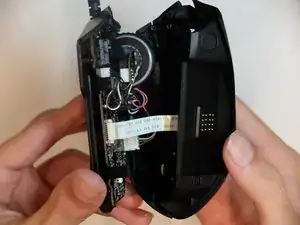
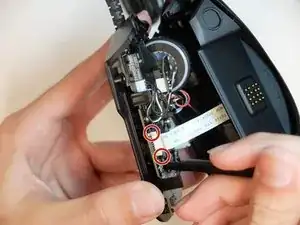
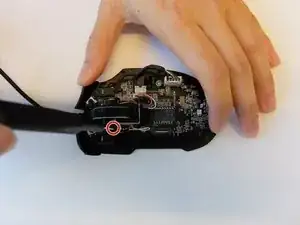
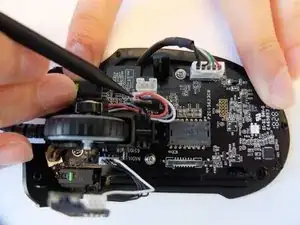
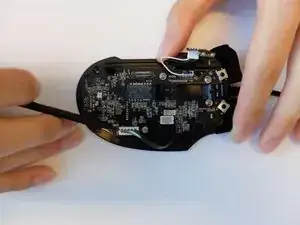
    • Entriegle die Clips am Stecker des Flachbandkabels auf der Hauptplatine mit einem Spudger.

  6. 6tHqsjrGrtlWIs1n
    • Entferne das seitliche Gehäuseteil mit einem Plektrum.

  7. OVlMdXPLNtxWfxCt
    OVlMdXPLNtxWfxCt
    iYUABYcFqnBNGgIZ
    • Trenne den Stecker am dreiadrigen Kabel für die LEDs auf dem Gehäuseoberteil ab.

  8. rEFmSDOWvoYcBsX2
    rEFmSDOWvoYcBsX2
    JPqLhLnu52A4mfUS
    • Entferne die einzelne schwarze 4 mm lange Kreuzschlitzschraube #000, welche die Platine für die Steuerung der Scrollrad-LED befestigt.

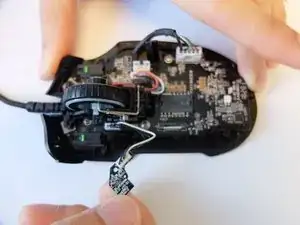
    • Ziehe die Platine nach oben heraus.

  9. IPcFBwCxgCLRaABn
    • Heble die Rückmeldeleiste des Scrollrads mit dem Haken eines Hellebardenspudgers aus ihren Halteclips heraus.

  10. HFciQvN1vVaYRpjI
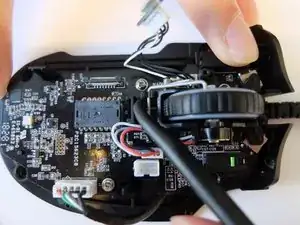
    • Halte die Feder an der Rückmeldeleiste des Scrollrads mit einer gewinkelten Pinzette nach unten gedrückt und entferne die Leiste vom Scrollrad.

  11. VOFIM5k5QViPmVI2
    VOFIM5k5QViPmVI2
    RRMJoNFEJEeOXwDP
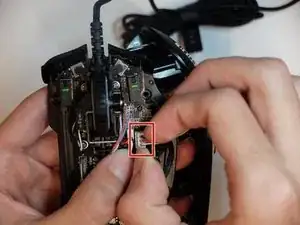
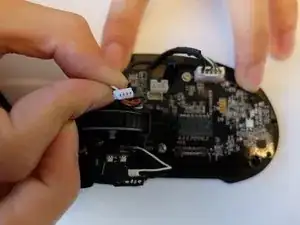
    • Hebe den Stecker am dreiadrigen Kabel des optischen Encoders für das Scrollrad wackelnd hoch und trenne ihn ab.

  12. 6EFrmrAGOsMooQqG
    6EFrmrAGOsMooQqG
    5ONH1UFdD5veLTCN
    pEXOuLPUImFMcRUp
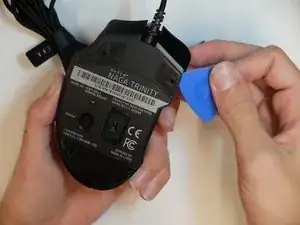
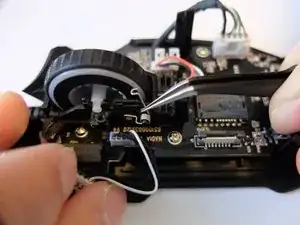
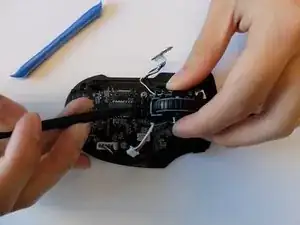
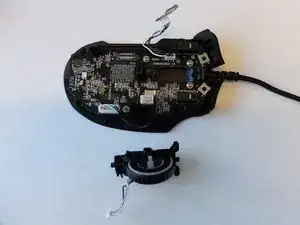
    • Heble die schwarze Halterung für das Scrollrad mit einem Öffnungswerkzeug nach hinten, bis die Halterung herauskommt.

    You don't have to remove that part, if you're careful you can leave the mouse wheel attatched to the mainboard because it's pretty fiddly to get the feather inside again.

    Andreas -

  13. B2jtaifIVNtOL2xj
    B2jtaifIVNtOL2xj
    rIUPG2Rxq1UOTthw
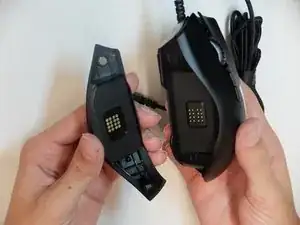
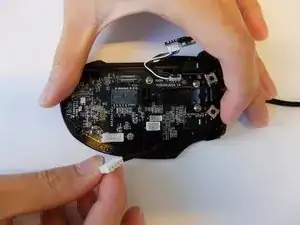
    • Trenne den fünfpoligen Stecker am Kabel zum USB-A-Anschluss mit einem Spudger von der Hauptplatine ab

  14. fvnCrSEgLYVI2tVd
    fvnCrSEgLYVI2tVd
    rwq2uCwjMxiM5ogj
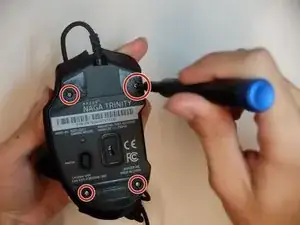
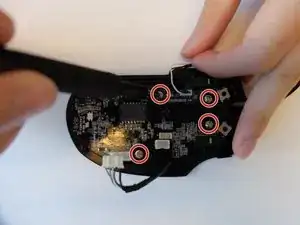
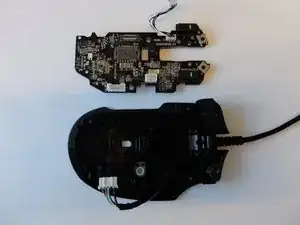
    • Entferne die vier 3 mm langen JIS-Schrauben #1, mit denen die Hauptplatine befestigt ist.

  15. UYFsRPLRwIQBpONc
    UYFsRPLRwIQBpONc
    rGmO1HKWcpFVoLfV
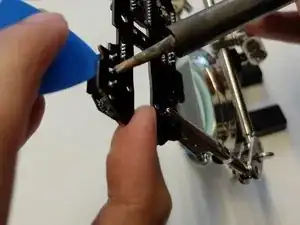
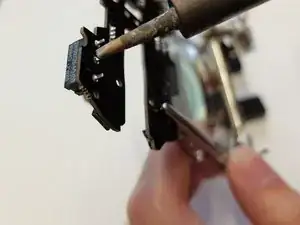
    • Erhitze die Lötstellen, mit denen der Mikroschalter befestigt ist, mit einem Lötkolben.

    • Arbeite dich entlang der Lötstellen und heble gleichzeitig den Schalter ab.

  16. qIhLwQOSXjnGjORM
    qIhLwQOSXjnGjORM
    pPEhkOGkW3YevBs5
    wSUTW6v6BT3D5ATT
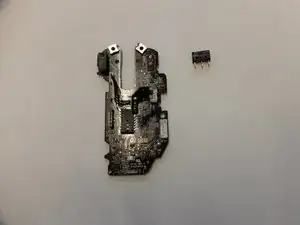
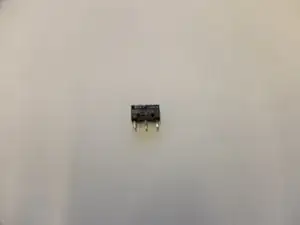
    • Entferne den OMRON D2FC-F-K(50M) Mikroschalter und ersetze ihn.

    • Löte die drei Kontakte des Mikroschalters wieder fest.

    • Wackle am Mikroschalter und prüfe, ob er gut festsitzt.

    I replaced my microswitch following this but it still double clicks, help!

    Brendon Weber -

Abschluss

Um dein Gerät wieder zusammenzubauen, folge den Schritten in umgekehrter Reihenfolge.

Zackary Tempert

Mitglied seit: 16/09/19

241 Reputation

14 Kommentare

dont bother. It took me 2 hours to get it replace and left click still dident work even when i heared it click. Just work some over time at work and buy a new

incognito666z -

If the switch is still clicking and you tried replacing it, the issue surely is somewhere else.

You should look if there are other parts inside that look “

Andreas -

I was in contact with Razer support for about a week now before getting the usual response “sorry I checked, we don’t have any replacement parts” and basically told me to go &&^& myself and buy a new one.

I spent more than 100€ on this thing yet whenever I ask support ANYTHING it always boils down to this. This is the third time with three different Razer devices and I always get the same answer.

I’ll try this fix here and if that doesn’t work, this was surely the last time Razer got a single cent out of me.

Andreas -

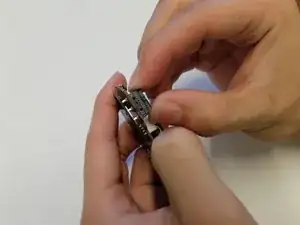
If you're not afraid of working with very small parts you can also try fixing the switch itself. You have to bend a small metal lip and that should fix the issue.

Here is a guide on how to do it, fixed my mouse with that one just half an hour ago.

https://www.youtube.com/watch?v=eDoXMJyi...

Andreas -

30-60 minutes? The author is liar! Took me 4 hours to complete just the step 15 “desolder the faulty switch” :D. For some reason I could not suck out all of the molten solder and it was always stuck somewhere. Really pain in the a**. Other parts of the guide made opening the mouse, disassembly and assembly rather very easy process. Soldering in new part as well. Transplantation is now complete and the patient survived. Thanks for the guide

Jan -

you needed a solder-sucker syringe. or some wick. if it works at all, you did well for your first shot at it. lol soldering takes a lot of patience. welding is much easier to pick up in my opinion. at least as far as the physical act of manipulating the metal. solder is more like a 2 year on mountain dew.

my question is: are these switches made in tactile, linear, et cetera like keyboard switches? i noticed an asus mouse with swappable mouse switches recently. i haven’t found where to but the different switches yet though. but i want some more tactile solderable mouse switches for my naga pro. mine hasn’t actually started malfunctioning or anything. i just really dislike the stock mushy-butt switches enough that i’m willing to take the risk. apparently razer doesn’t honor their warranty agreements anyway. just playing. that really isn’t true. i’ve never had a bad experience with razer outside of how hideous all their peripherals look and these mushy switches that actually work fine.

Joseph Iscariot -

There isn’t much information here on how to solder, but using solder wick to remove old solder, and using a flux pen to solder will really help. It also helps to have a nice solder station like a Hakko FX888D or similar). Lots of Youtube videos on how to solder; it’s not covered here but instead assumes that you already know how.

Todd Douglass -

I want to thank the author Zackary Tempert for this tech guide with the clear and detailed instructions. I’m just about to start my repair and am thankful to have this guide. As the author states, this is an advanced level repair; as such, it may not be applicable for a newbie. At the very least, one would have to know how to solder and how to follow detailed instructions.

Todd Douglass -

So, the soldering pads/vias around the switches were tight as !&&* on my board. Both, soldering wick and desoldering gun/pump didn’t stand a chance. I ended up using a hot-air station and slowly “walking” the switch out. If you don’t have a hot-air to heat all 3 pins simultanously, i guess you can take a shortcut sawing the switch off with a dremel and desoldering them one-by-one afterwards.

In the end it took me maybe 1,5 hours of work overall and the mouse works as good as new.

Take you time, be patient, be careful with all the plastic stuff and everything will work out fine. The skills that are needed in this repair are very basic, the parts you are handling are big, so i wouldn’t call the repair “difficult”, just needs patience, a little bit of experience and a couple of tools of at least mediocre quality.

Alexey Puninskiy -

I would personally consider it difficult if you have no idea what you are doing, it took me over 6 hours but I have never soldered before and was just winging it. It worked out in the end at least.

Alden -

This guide was extremely helpful, but be VERY CAREFUL during step 12 when bending back the bracket. As it broke off and I had to try and superglue it back in place. Hopefully it will set and I won't have to buy a mouse for parts from ebay.

Alden -

Side note, be careful when doing this repair because somehow I must of damaged the optical encoder as my scroll wheel now will not work.

Alden -

Worked great in less than 45 minutes. Thanks

David Goodwin -

I am just thinking of converting this mouse into a macro pad.

Masa Sjö -