Einleitung

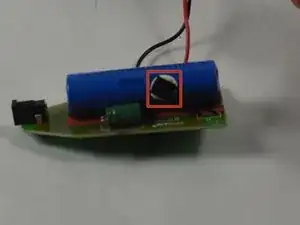
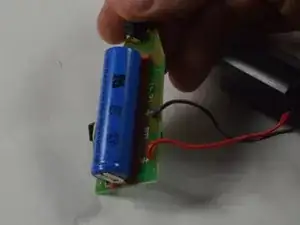
Im Akku wird die Ladung gehalten und erlaubt dem Motor zu funktionieren. Der Akku ist mit dem Motor durch das Motherboard verbunden.

  1. xRl5PKnXaESwS1h3
    xRl5PKnXaESwS1h3
    MhiIFhUTLXeAkEBp
    hYDD3n3BAbIRCAdc
    • Drücke den schwarzen Knopf unter dem Scherkopf und entferne ihn.

  2. UC13XFImjEAUJDgq
    UC13XFImjEAUJDgq
    nZZkjKVtXZrkvI1Y
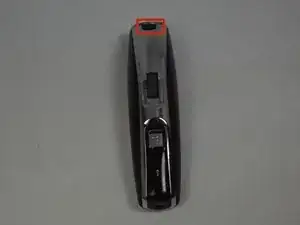
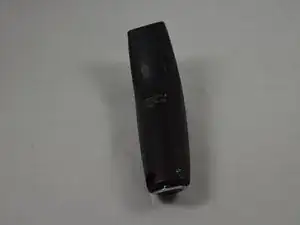
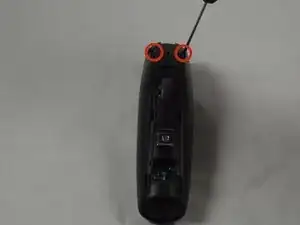
    • Lege das Gerät mit der Rückabdeckung nach oben auf die Arbeitsfläche.

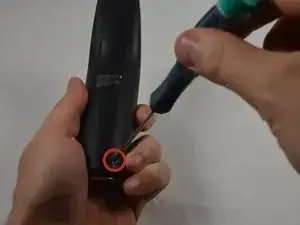
    • Entferne die beiden 11,0 mm langen Kreuzschlitzschrauben #00 unten an der Rückabdeckung.

    What do you do if the screws strip? they are really cheap

    Nadir Khan -

    Where does one get the actual battery replacement from?

    Evan Dispenza -

    You must use a very small blade Phillips screwdriver. A #0 will be too big. Significant downward pressure is also needed to break the screw loose and prevent stripping the screw. It feels like they are glued in. The battery is available in many places and is a 14500 type rated at 750mAh with a 4mm tab on the positive side and a 2.5mm tab on the negative side.

    bill -

  3. T1IemrVQytthsX6H
    T1IemrVQytthsX6H
    HQ2uQxabTJPKMseN
    o1jyeEV4AT5GAnyn
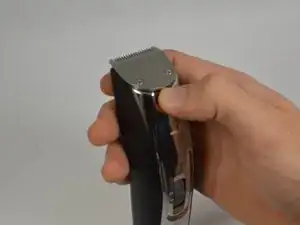
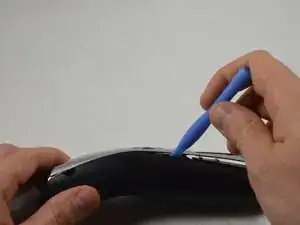
    • Heble die verchromte vordere Kunststoffabdeckung mit einem Kunststoffwerkzeug vom Gehäuse ab.

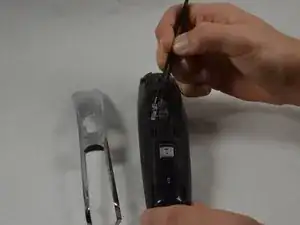
    • Entferne das kleine durchsichtige Kunststoffteil über der Anzeige für das Zoomrad.

    there is double face tape at each end of the chromed plastic piece along with the tabs that need to be unhooked when prying off. So be tender and do not use brute force. Also, the clear plastic piece will likely just fall out so be aware.

    bill -

  4. OfXLJpmSjDCgcmPC
    OfXLJpmSjDCgcmPC
    rKaXxKICWHBQojQH
    • Entferne die beiden 16,0 mm langen Kreuzschlitzschrauben #00 von der vorderen Abdeckung.

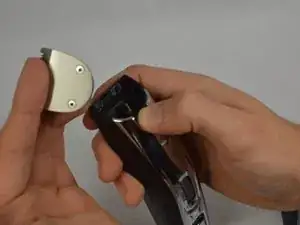
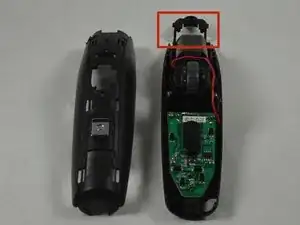
    • Heble die beiden Gehäusehälften mit einem Kunststoffwerkzeug auseinander.

    If you happen to lose the two springs, you can cut off 2x10mm of a spring from a pen :P

    Merry trimming and a happy new beard !

    Mads Larsen -

    I bought a set of Draper screwdrivers specifically for this. Can’t shift any of the screws. Ideas?

    Clive Deeks -

    The screws holding the body together seem to be of poor quality and possible glued in place, I only managed to remove one with quite a high quality screwdriver and had to drill out the others. Taking this apart takes longer than 15 mins on it’s own leave alone doing repairs.

    michaeldavidrowe -

    On a MB4045 model, I can confirm that the screws are glued into the plastic and cannot be unscrewed. I had to Dremel out the heads and dremeled a fair bit of plastic in the process. These trimmer model are designed for planned obsolescence. Shameful. The whole disassembly took me 1hr +

    After Burner -

  5. sLMUE3sRdFA5pEDs
    sLMUE3sRdFA5pEDs
    QrHbvpVvWKWrnLo4
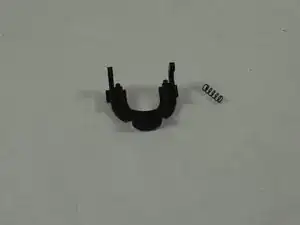
    • Entferne die Taste des Scherkopfs und die beiden Federn, die zwischen den Gehäusehälften befestigt sind.

    • Die Taste des Scherkopfs befindet sich zwischen den beiden Gehäusehälften und die beiden Federn können herausfallen, wenn die Hälften voneinander getrennt werden.

  6. hRdxthDr3gsPif1D
    hRdxthDr3gsPif1D
    cncrjw1USPNDFvBd
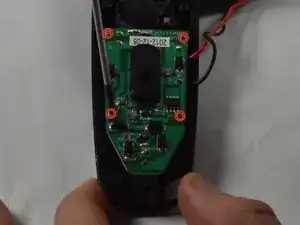
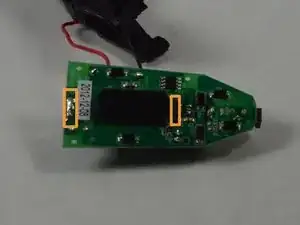
    • Entferne die vier 9,0mm PH00 Kreuzschlitzschraubem vom Motherboard.

    • Benutze ein Kunstofföffnungswerkzeug, um das Motherboard vom Gehäuse zu entfernen.

    • Diese Schritte können mit dem Remington MB4040 Zoom Rad Ersatz komplettiert werden. Du musst lediglich das Zoom Rad adjustieren, bis es das Motherboard nicht mehr überdeckt.

  7. eAR6quVVDpWJjSZa
    eAR6quVVDpWJjSZa
    RqpBBjsUhEcJP3aw
    YXklZdQSJi5hGJG5
    • Entferne den Thermoschalter vom Akku, indem du einen Spudger benutzt, um ihn vom Klebstoff zu hebeln.

    • Entferne den Akku, indem du ihn vom Motherboard entlötest.

    • Lötlaschen halten den Akku auf dem Motherboard.

    Thx! But how do you get the thermal switch back again? It seems I can’t just put it back by itself. Can you glue it back or something?

    Simon Klintefors -

    Ideally you should use a “thermal conductive glue”. You can search online for it. For me this was a non-critical fix so I just used a small amount of fabric glue which will stay flexible so I can take it off again next time, if there is a next time.

    Trevor Hayes -

Abschluss

Um dein Gerät wieder zusammenzubauen, befolge diese Schritte in der umgekehrten Reihenfolge.

Cameron Carnahan

Mitglied seit: 20/01/15

1082 Reputation

14 Kommentare

Great work - but help on where to source the battery would be good too :)

Matt Purnell -

It's available as a generic - it's a '14500' Li-Ion battery, 3.7V - typically 750-800mAh. Dimensions: 50mm x 14mm (diameter).

Matt Purnell -

I have seen two types of these batteries: protected and unprotected. Which type do we need?

Amaury C -

You did everyrhing except the most important part to me

How did you unsolder the battery, and solder the new battery?

I was going to buy the tools from the local store but realized i don't know how to appropriately unsolder/solder battery tabs.

Non the less you are the only one who made such explanation, thank you.

Rakan -

If you happen to lose the two springs, you can cut off 2 pieces from the spring of a pen :P

Merry Trimming & A Happy New Beard !

Mads Larsen -

The connectors to the battery were in my case spot welded not soldered which created some problems. Soldered both connectors from the circuit board together with the battery. Successfully drilled away the welding points, and then used the now rather demolished connectors again. Soldered the new battery. Not beautiful but it works.

Per Rindstedt -

Thanks, excellent clear instructions. A challenge to do without this guide. Worked for me.

Russell -

Use 3 times only,but not charged

nutakkiprasad.123 -

What new battery do you recommend?

hanejpc -

Veery Good! thx, mate

wmbenard -

Didn’t have a soldering iron. I pried the battery tabs off the battery and used conductive tape to secure them as a workaround. Not ideal but seems to be holding so far

Travis Petersheim -

Thanks! The guide worked a treat on my MB4045. Having a second person hold the board and battery during the soldering helped immensely. For my MB4045 I used the A14500HD10FT (version A) battery from ecoluxshopdirect.co.uk. Lets hope this lasts for another 5+ years. Thanks again to all who contributed to this guide!

Malte -

Agreed, guide worked well for 4045. Had to adjust width of tab to fit into the negative hole on the board. I ended up folding it and that worked. The positive tab on the stock battery required some wiggling as it was like it had been folded down onto the PCB

Mike Steel -

I did this but I put the new battery backwards and fried the chip. The plastic body of the chip melted some and I can't read what it was to see if I can get a replacement.are there any markings or anything to identify the microchip?

Dan Warren -