Einleitung

Diese Anleitung zeigt, wie der Fingerabdrucksensor im Samsung Galaxy Note9 ausgetauscht werden kann.

  1. imr3TvrFDDQ2Smgb
    • Schalte das Gerät aus, bevor du mit der Demontage beginnst.

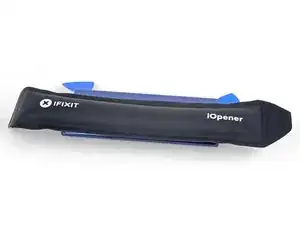
    • Benutze einen Föhn, Heißluftgebläse oder einen erhitzten iOpener und erhitze damit die rechte Kante der Rückseite des Geräts für ca. eine Minute, um den Klebstoff darunter zu lösen.

    If using an iOpener it will need to be fully heated and set on for at least 5 minutes. You’ll know the phone is hot enough when its almost too hot to touch.

    Spencer Barron -

    Just came here to say exactly that. The instructions should be amended to state that: "Get it fully hot and leave it there for at least three minutes solid."

    Mister Fixer -

  2. wK5AZqwWYVFHhdpM
    wK5AZqwWYVFHhdpM
    AiS2h1pqRmiTyrnX
    ijSfEkEAirfgkjyB
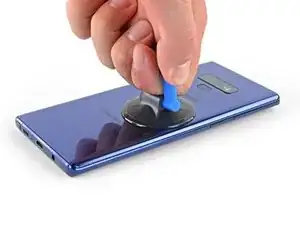
    • Setze einen Saugheber auf die Rückseite auf.

    • Hebe die Rückseite mit dem Saugheber soweit hoch, dass eine Lücke zwischen der Rückseite und dem Rahmen des Gerätes entsteht.

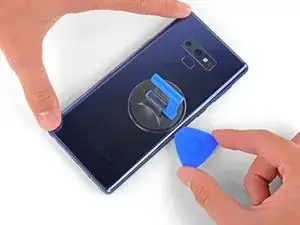
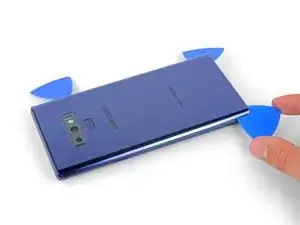
    • Schiebe nun ein Plektrum in den Spalt.

    • Wenn das Glas stark gesplittert ist, klebe es mit Paketklebeband ab, um eine Fläche zu schaffen, auf der der Saugheber halten kann.

    • Wenn der Kleber sich nicht lösen lässt, erhitze die Stelle stärker. Ziehe auf keinen Fall zu stark am Glas, da dieses sonst brechen kann.

    It takes so much heat that it is concerning that damage might be caused to the internal parts. It is difficult to heat the glue, pull the case apart and insert the pick at same time. May need some more pointers to handle these situations first, to prevent possible damage. Also what about the glue that is heated and then cooled before opening? Does it run inside and cause greater adhesion after it cools? Another thing, the handling may cause the phone to turn back on while working to separate. Don't know that that is of concern.

    Lou Smith -

    Angle the pick up very slightly so the point goes up into the curve of the glass, not down towards the workings of the phone

    Dean Lee -

  3. phWdatcXskIOnRO3
    • Beachte, dass an der Oberkante und rund um die Kamera mehr Klebstoff ist, als am restlichen Gerät.

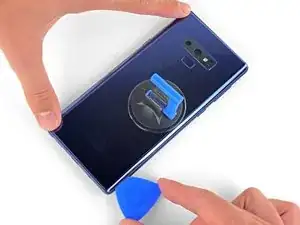
    • Durchtrenne den Kleber sehr vorsichtig in der Nähe des Fingerabdrucksensors, da sonst das Flachbandkabel im Inneren beschädigt werden könnte.

    • Wenn der Kleber zäh wird, dann wende nicht mehr Kraft an, sondern erwärme ihn nochmals.

    It's extremely easy to crack the back glass when nearing and rounding the corners. It's probably a good idea to soften the adhesive with heat as you go.

    Aaron Peterson -

    Step 5 is NOT "cut through the adhesive", that's steps 5-10. Step 5 is "Begin the careful process of cutting through the adhesive, starting at the right side where you already softened it. Proceed carefully, slowly, and warmly through the following steps."

    Aaron Peterson -

    These comments are spot-on. I never break a phone, and I cracked the back glass following the instructions without seeing these comments first. Heat the back much more than you think you need and go super, super slow.

    Mister Fixer -

    The bottom inner adhesive layer reaches higher than what you see in the diagram above, so you will have to insert the pick deeper at the bottom and the sides along the bottom to separate the inner adhesive area. Just don't force the corners of the covers upward too much to keep from cracking the glass.

    Drizzt -

  4. YpkbXvVWUIR4Afeb
    YpkbXvVWUIR4Afeb
    FaUbUKoZe6HurIby
    5vZLASPFVpEgMyLC
    • Beginne in der Mitte und durchtrenne den Klebstoff mit dem Plektrum. Schiebe es mehrfach hoch und runter.

    • Schiebe das Plektrum auf keinen Fall mehr als die Hälfte in das Gerät, wenn du in der Nähe des Fingerabdrucksensors oder der Kameras schneidest. Sonst könnten innere Komponenten beschädigt werden.

  5. OFSZgLGgXARkwaWJ
    OFSZgLGgXARkwaWJ
    E6TEFVlXsPNDGGHi
    FFeOmLNySIi2VTct
    • Sei besonders vorsichtig, wenn du in der Nähe der Ecke arbeitest, dort ist das Glas besonders empfindlich. Wenn der Kleber zäh wird, dann erwärme ihn nochmals.

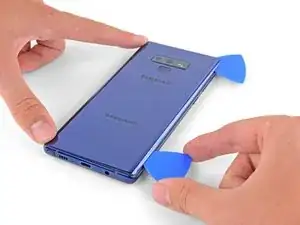
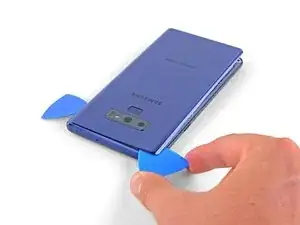
    • Lasse ein Plektrum in der oberen rechten Ecke stecken.

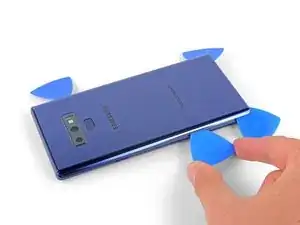
    • Verwende ein weiteres Plektrum, um den Klebstoff an der unteren rechten Ecke zu lösen.

    • Lasse das Plektrum im Smartphone stecken.

    There seems to be a lot of glue at the bottom, I broke the glass as I was cutting past the charging port - not sure if it was already fractured or just not enough heat (I used Sellotape so it didn't break up into pieces!)

    I think LOTS of heat & patience is the key!

    Be very careful around the corners and bottom (probably top too, but I didn't have a problem there). Make sure you've cut in far enough down the side first (go in about 1cm) but less round the corners and work in slowly.

    Dean Lee -

  6. 2jDIRHRfM2FgHNFR
    • Verwende einen Föhn, ein Heißluftgebläse oder einen iOpener um den Klebstoff an der linken Rückseite aufzuweichen. Erhitze die Stelle für ca. drei Minuten.

    If using an iOpener it will need to be fully heated and set on for at least 5 minutes. You’ll know the phone is hot enough when its almost too hot to touch.

    Spencer Barron -

  7. 1mtB1lSGkZWyMSrM
    1mtB1lSGkZWyMSrM
    4K246ldIYZVMViQv
    FFMXuXrVm2DpNhZ6
    • Sei besonders vorsichtig an den Ecken, dort ist das Glas besonders empfindlich.

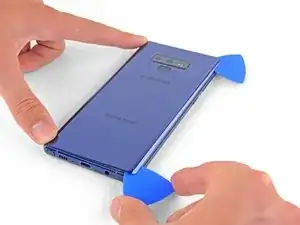
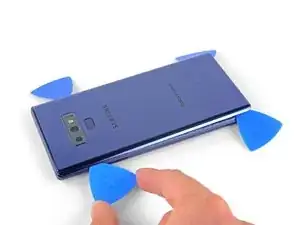
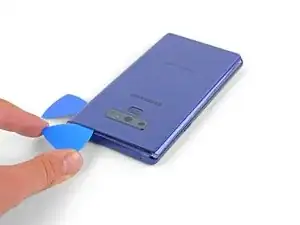
    • Schiebe ein Plektrum in die untere linke Ecke der Rückseite.

    • Mit einem weiteren Plektrum schneide den Klebstoff an der linken Kante der Rückabdeckung entlang.

    • Schiebe das Plektrum auf keinen Fall mehr als die Hälfte in das Gerät, wenn du den Klebstoff in der Nähe des Fingerabdrucksensors löst, da du sonst das Flachbandkabel beschädigen könntest.

    • Es ist in Ordnung, wenn Plektren herausfallen, wenn sich die Rückseite zunehmend löst.

    Aside from the left edge where the fingerprint sensor cable is, you may have to insert the pick up to 2cm on the sides and top, and a little further along the bottom, and swipe sideways to separate the inner adhesive areas. If one side doesn't separate fully, just apply heat, insert the pick deeper into the phone, and swipe sideways until the back cover detaches. There isn't a need to apply much vertical force, especially on the corners, since the cover will just pop up once all the adhesive has been sliced by the pick.

    Drizzt -

  8. nNSpwZdhgreWl3rh
    nNSpwZdhgreWl3rh
    DrwI6NpI44hU5bGQ
    6tniPN2RFyvbFgLv
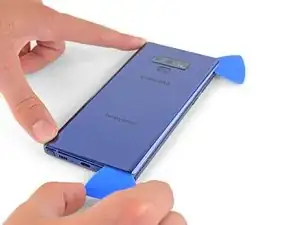
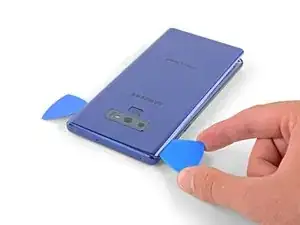
    • Schneide mit den eingesteckten Plektrum vorsichtig an der oberen linken Ecke des Geräts den Klebstoff durch.

    • Letztenendes schneide das letzte Stück Klebstoff mit einem Plektrum durch.

    • Verwende wenn nötig einen Föhn, iOpener oder ein Heißluftgebläse, um den Kleber nochmals aufzuweichen.

    Be VERY patient as you slide the opening picks around the periphery of the glass, and use heat very liberally. Make sure the smooth, clear aspect of the iOpener is against the glass, not the rough black portion.

    David Gitlitz -

  9. CFGPd5CUmuDGj14k
    CFGPd5CUmuDGj14k
    XadxJ3X5cMDYZdsS
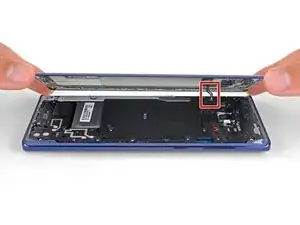
    • Hebe die rechte Seite der Rückseite zuerst hoch.

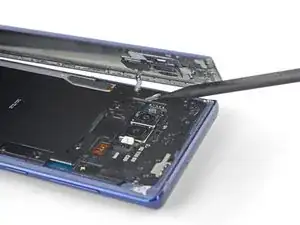
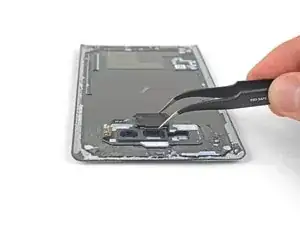
    • Kippe die Rückseite an der linken Seite hoch, sodass du das Flachbandkabel des Fingerabdrucksensors sehen kannst.

    • Ziehe das Flachbandkabel noch nicht heraus.

    • Die Abdeckung des Fingerabdrucksensors kann am Mittelrahmen angeklebt bleiben.

    Thought I'd done something wrong here as there wasn't a cable attached to the back - the fingerprint reader hadn't come away with the back, but had stayed with the phone.

    Dean Lee -

    Exactly the same experience. Made life a little easier.

    Mister Fixer -

    Happened to me as well.

    David Gitlitz -

  10. EOB5BnuPwLiWhRJy
    EOB5BnuPwLiWhRJy
    pvUG6RHyuIevnBsT
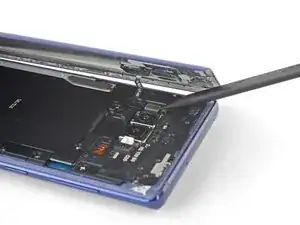
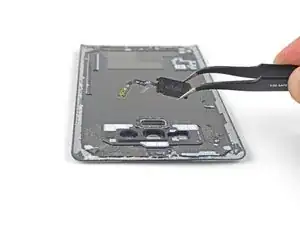
    • Benutze die Spitze des Spudgers, um das Flachbandkabel des Fingerabdrucksensors nach oben aus seinem Anschluss zu hebeln.

    On my phone the fingerprint sensor did not come off with the back cover but stayed on the phone!

    Dean Lee -

  11. fxtTpIwKVs1XBASZ
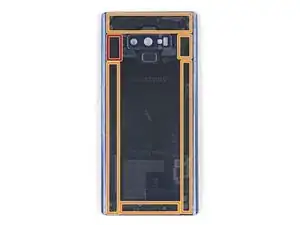
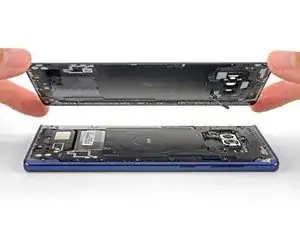
    • Entferne die Rückseite.

    • Um die neue Rückseite wieder zu montieren:

    • Nimm eine Pinzette und entferne jegliche Rückstände des Klebers vom Gehäuse des Geräts. Säubere dann die Flächen mit hochkonzentriertem Isopropylalkohol (mind. 90%) und einem fusselfreien Tuch, um die Oberfläche für den neuen Kleber vorzubereiten.

    • Schalte das Gerät ein und teste alle Funktionen, bevor du die Rückseite wieder verklebst.

    • Trage vorsichtig den neuen Kleber auf die abgetrennte Rückseite des Geräts auf. Richte nun eine Glaskante am Rahmen des Geräts aus und drücke die Rückseite in das Gehäuse.

    I am installing a new backplate (this is my first repair; I was CERTAIN that I would crack the back glass, and I was NOT wrong) but I’m not sure how tweezers are meant to remove gooey adhesive! I simply used the blue plastic pry tool as a scraper and gently rolled up the goo. Maybe the glue is different because I have a refurbished phone? That may also explain why I had so much trouble with Step 1. Hope that this helps!

    Christopher Yarlott -

    Use tweezers remove any inner adhesive strips that may have started peeling off when the back cover is removed, or adhesive clumps. If an adhesive starts to peel off, use tweezers to pull the strip off completely, and then replace only that removed adhesive strip. Actually, the iFixIt inner adhesive strips don't seem to have the white non-stick areas that are on the original adhesive strips. Thus, it seems ok to keep the original inner adhesive strips if still attached to the phone.

    The outer adhesive border is like a good, not a strip, and should be replaced. Using isopropyl alcohol to rub off only the edge adhesive on the phone and back cover works well.

    After adding a new outer adhesive and reattaching the back cover, you have one try to align and replace the cover. The cover might not attach flush onto the phone with no side gaps, due to the outer adhesive strip placement. It is probably sufficient if the outer adhesive seals all the way around the back cover border.

    Drizzt -

    While testing the phone after battery replacement, but before reattaching the back cover, if a thermal warning (triangular thermometer icon) appears during charging that prevents charging over 50%, remove the charging cable and use a lightly warmed iOpener or heat gun on the battery to warm it slightly. Once the battery is warmed up a little, reattach the charging cable, and the error should go away. Battery charging can be resumed. This assumes no hardware was damaged during battery replacement.

    Drizzt -

  12. K3BAoyO4SGOtLkfi
    • Erwärme den Fingerabdrucksensor von außen mit einem Heißluftgebläse, einem Haartrockner oder einem heißen iOpener, um den Kleber darunter aufzuweichen.

  13. UcuRNeWJBUtqAbdH
    UcuRNeWJBUtqAbdH
    U46LMDZ2Sx2L2Wxq
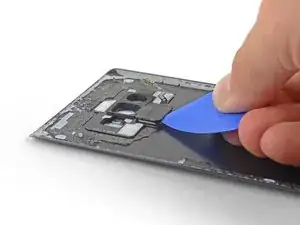
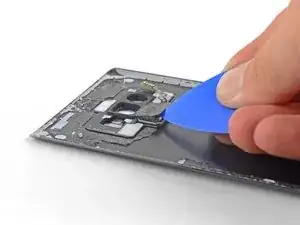
    • Setze ein Plektrum unter die Rückseite des Fingerabdrucksensors ein.

    • Verdrehe das Plektrum, so dass sich der Fingerabdrucksenso von der Rückseite ablöst.

  14. 1SwNcGFKMgStUKV3
    1SwNcGFKMgStUKV3
    3QZRvivr5Xl6OBRI
    • Entferne den Fingerabdrucksensor.

    • So wird der Fingerabdrucksensor wieder eingebaut:

    • Nimm eine Pinzette und ziehe soviel wie möglich vom Kleber ab. Entferne die verbliebenen Klebstoffreste mit 90%igem Isopropylalkohol und einem fusselfreien Tuch.

    • Wenn du einen alten Fingerabdrucksensor wiederverwenden willst, dann ersetze den originalen Kleber durch vorgestanzte Klebestreifen.

    The fingerprint sensor I had was much to tight to connect it before the rear glass. After experimenting with the finest tweezers, trying to secure the connector was not possible. Instead I removed the sensor from the glass, secured the connector to the port then lowered the glass over the sensor. Because the sensor body is closer to midline I had enough clearance to make fine adjustments with a pin in order to align it with the rear glass cutout. Other than reversing those steps the rest of this guide was excellent. Good work and successful repair.

    Ev Conger -

Abschluss

Um dein Gerät wieder zusammenzubauen, folge den Schritten dieser Anleitung in umgekehrter Reihenfolge.

Entsorge deinen Elektromüll fachgerecht.

Lief die Reparatur nicht wie geplant? In unserem Forum findest du Hilfe bei der Fehlersuche.

Vergleiche dein Ersatzteil mit dem Originalteil - möglicherweise musst du fehlende Bauteile übertragen oder Schutzfolien am Neuteil abziehen, bevor du es einbauen kannst.

Sam Omiotek

Mitglied seit: 25/02/19

87355 Reputation

Ein Kommentar

Comments from people using this guide should be incorporated into the instructions as a new version. Heating up the glue is paramount to avoiding broken back glass, and the fingerprint sensor is likely not to be attached to the back case, so people should move carefully but not get thrown off if it doesn't come up attached to the back.

Mister Fixer -