Einleitung

Diese Anleitung zeigt, wie der Lautsprecher im Sega Game Gear ausgetauscht wird.

  1. GE4hFNKZvRP6LuIs
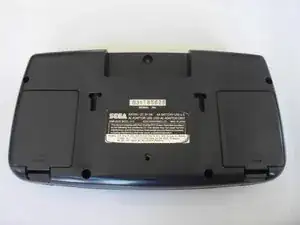
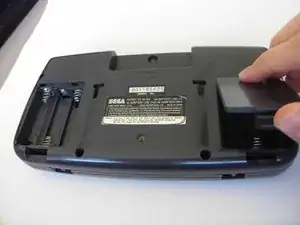
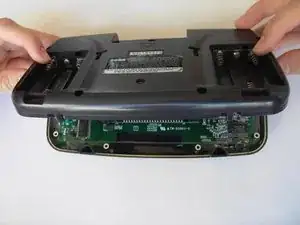
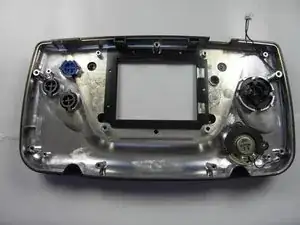
    • Lege den Game Gear mit der Unterseite nach oben auf die Arbeitsfläche. Die beiden Batteriefachdeckel sind links und rechts zu sehen.

  2. wk6apkXh6aBe4Fko
    • Drücke die Laschen an den Deckeln ein und löse die Deckel ab.

    • Entferne die Batterien.

  3. ZwWPJlkOVdRUkrHt
    • Entferne folgende Schrauben:

    • Sechs Kreuzschlitzschrauben

    • Eine 4,5 mm Gamebit-Schraube.

    It says remove 7 Philips screws, the picture shows 6 but one is incorrect.

    The thread below the label has no screw, but there is another one in the other battery compartment.

    The hole below the label is for a security bolt when stores put them on display.

    rs.beast -

    The screw hole in the bottom center is for the PowerBack. Also there are not 7 screws there are only 6

    Electrohacker -

  4. qlQqEHOHMsAt4FhO
    • Nimm alle Schrauben mit einer Pinzette heraus.

  5. MObZFuW56bTkQXfc
    MObZFuW56bTkQXfc
    ZREuCW4S2LlsMYJq
    • Klappe die Bodenplatte vorsichtig über die Oberkante auf.

    • Ziehe die Bodenplatte noch nicht ganz weg, sie ist noch mit Kabeln am Gerät angeschlossen.

  6. InIEN2SBlf6QdGoL
    InIEN2SBlf6QdGoL
    XAkFtNnNMUEqTGp2
    YPTXrRwwN3ol62RE
    • Ziehe vorsichtig die beiden weißen Kabelstecker im Oberteil ab.

    Il faut aussi débrancher le connecteur du haut parleur (2 broches, en haut à droite).

    Arnaud Melun -

    There is a third cable on the right side of the top half in this picture which is the speaker. Unplug that too.

    Electrohacker -

  7. M4DRKso6Go6Ih3CS
    • Drehe die acht Kreuzschlitzschrauben von der Hauptplatine ab.

    There are 2 additional screws to remove from the motherboard to the left and right of the cartridge port's shiny metal shield's screws on my Sega Game Gear with the RED GREEN and BLUE colors on the front.

    Karl Dusenbery -

  8. R2O5DEtAI1Q6DxgM
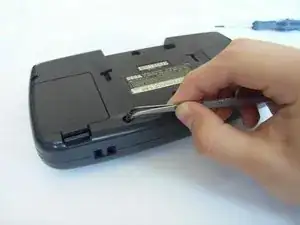
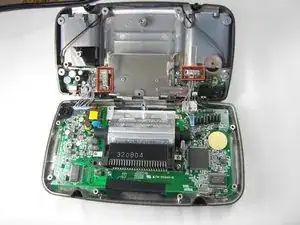
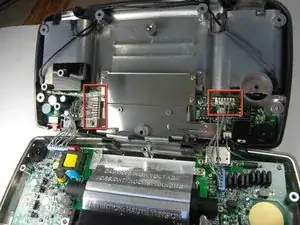
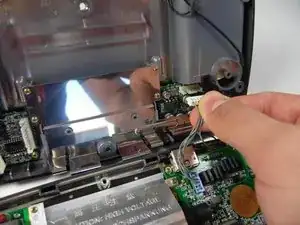
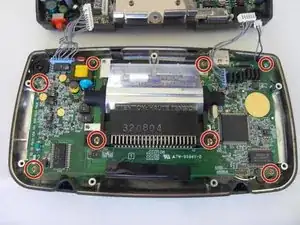
    • Die Hauptplatine wird mit einer runden Befestigung in der oberen linken Ecke des Gehäuses festgehalten. Ziehe sie darunter heraus.

  9. fo3BOBkK5PVTK6uk
    fo3BOBkK5PVTK6uk
    PEJsMhUushhVbp24
    • Wenn der Kunststoff abbricht, mit dem der Lautsprecher befestigt ist, kann der Lautsprecher nicht mehr festgehalten werden.

    • Die Kunststoffhalter sind mit dem Gehäuse verschmolzen. Heble mit großer Vorsicht.

    Recommendations for the prying off process? It looks like a soldering iron was taken to the points to loosen the plastic but I'm not sure

    Navy Vet 2015 -

    I found that poking around the orange/redish posts with a hobby knife worked really well. Poke a small hole where the black plastic meets the red plastic and continue doing this around the post. Once you have done that it might help to go around the post a second time pressing more firmly as to push the knife just a little further. Use your finger or plastic prying tool to pry up each side. I wouldn't recommend just taking a prying tool to each post without breaking the connection between the posts and the retaining plate as you will potentially break the plate that holds the speaker in place. This is very easy to do but it is time consuming if you're concerned with keeping everything in as close to "new" condition as possible.

    Navy Vet 2015 -

Abschluss

Um dein Gerät wieder zusammenzubauen, folge den Schritten in umgekehrter Reihenfolge.

Lauren Thurston

Mitglied seit: 15/04/10

469 Reputation

0 Kommentare