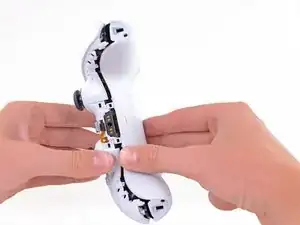
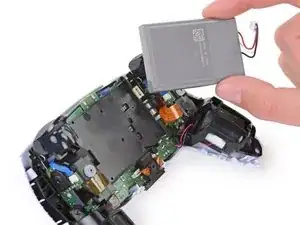
Einleitung
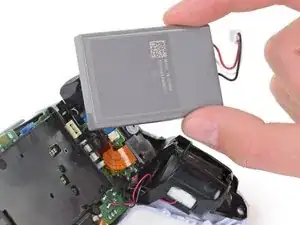
Folge dieser Anleitung, um den Akku im DualSense Controller für die Sony PlayStation 5 zu ersetzen.
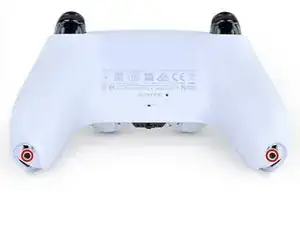
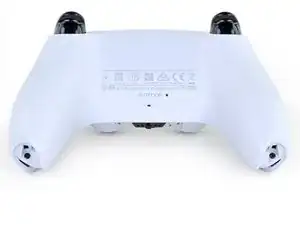
Bitte beachten: Diese Anleitung ist nur für DualSense Controller mit einer FCC ID Endung mit 1. Prüfe die Rückseite deines Controllers, um deine Modelnummer zu verifizieren. Falls deine mit A endet, wird es Unterschiede im internen Design geben, allerdings kannst du diese Anleitung trotzdem nutzen.
Falls dein Akku aufgebläht ist, musst du entsprechende Vorsichtsmaßnahmen treffen.
Nach Abschluss dieser Anleitung solltest du deinen neu eingebauten Akku kalibrieren.
-
-
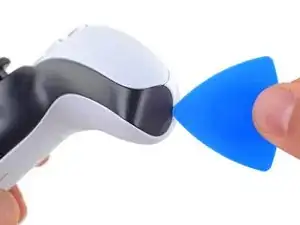
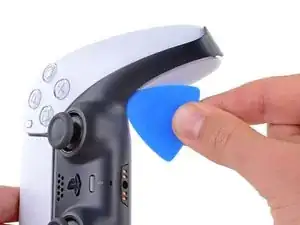
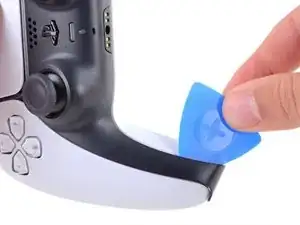
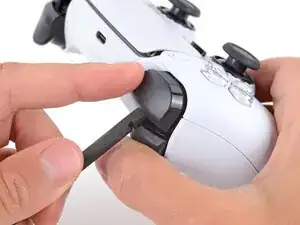
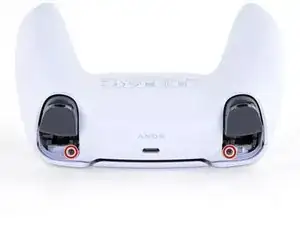
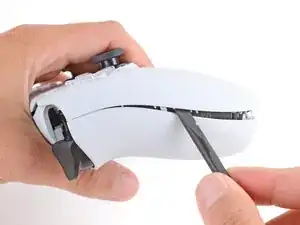
Stecke ein Plektrum unter die untere rechte Ecke der Abdeckung, um die Clips zu lösen, mit denen sie befestigt ist.
-
-
-
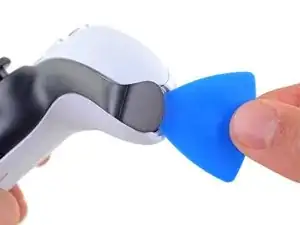
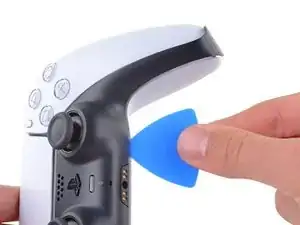
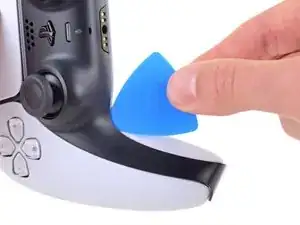
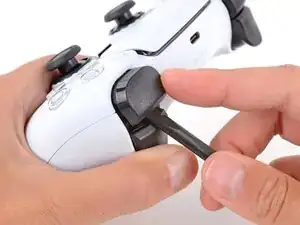
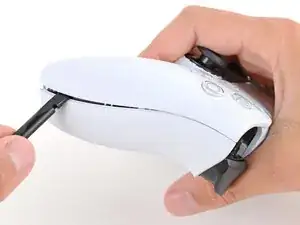
Schiebe das Plektrum an der unteren rechten Kante entlang, um die Clips zu lösen, die die Abdeckung festhalten.
-
-
-
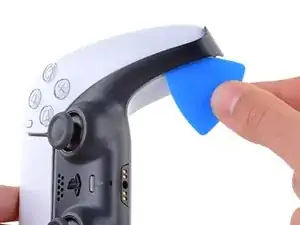
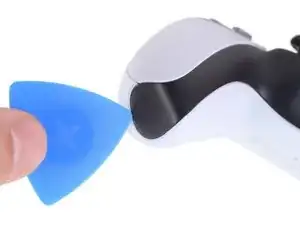
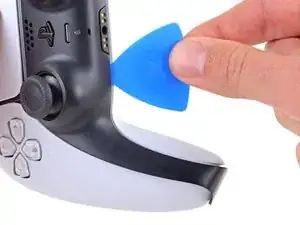
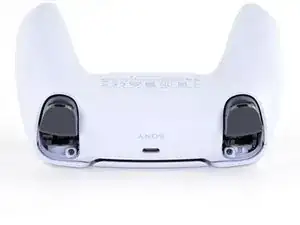
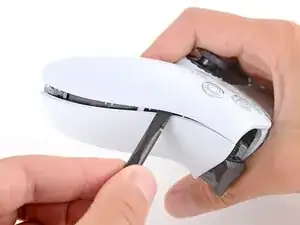
Stecke ein Plektrum unter die untere linke Ecke der Abdeckung, um die Clips zu lösen, mit denen sie befestigt ist.
-
-
-
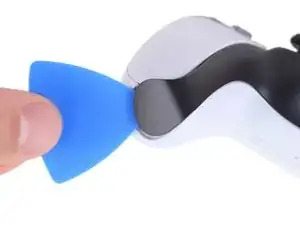
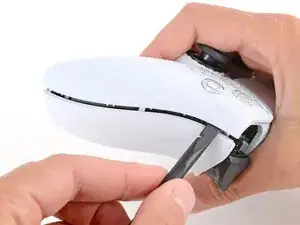
Schiebe das Plektrum an der unteren linken Kante entlang, um die Clips zu lösen, die die Abdeckung festhalten.
-
-
-
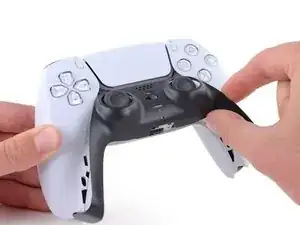
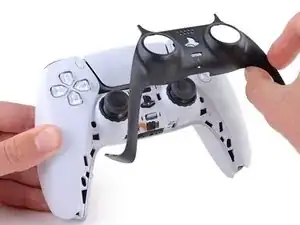
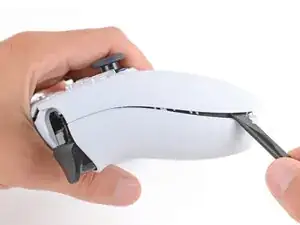
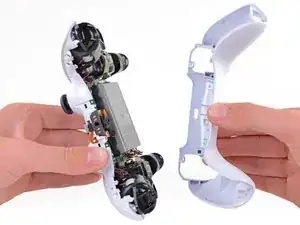
Hebe die Abdeckung mit deinen Fingern an der unteren Kante an, um die restlichen Clips zu lösen.
-
Hebe die Abdeckung über die Joysticks, um sie zu entfernen.
-
-
-
Fasse den Kontroller mit einer Hand und halte den linken Auslöser mit dem Daumen gedrückt.
-
Setze das flache Ende des Spudgers mit der anderen Hand zwischen die L1 und L2 Tasten ein.
-
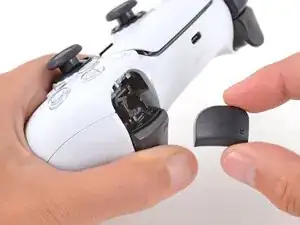
Heble die L1 Taste mit dem Spudger behutsam vom Kontroller weg, halte dabei den Finger darüber, damit die Taste nicht davonspringen kann.
-
-
-
Entferne die beiden 6,4 mm Kreuzschlitzschrauben, die die unteren Enden des Gehäuseunterteils fixieren.
-
-
-
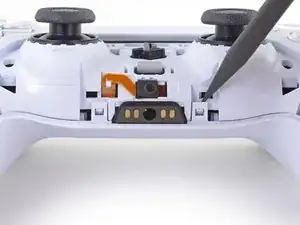
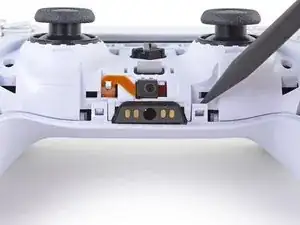
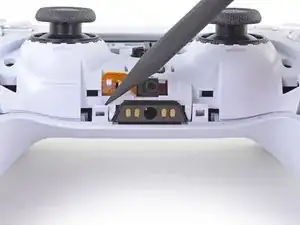
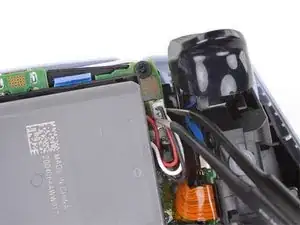
Löse die beiden Clips links und rechts von der Kopfhörerbuchse mit der Spitze des Spudgers.
-
-
-
Entferne die beiden 6,4 mm Kreuzschlitzschrauben, die die unteren Enden des Gehäuseunterteils fixieren.
-
-
-
Löse die beiden Clips links und rechts von der Kopfhörerbuchse mit der Spitze des Spudgers.
-


Um dein Gerät wieder zusammenzubauen, folge den Schritten dieser Anleitung in umgekehrter Reihenfolge.
Entsorge deinen Elektromüll fachgerecht.
Lief die Reparatur nicht wie geplant? Probiere zunächst einige grundsätzliche Lösungen oder frage in unserem Forum nach Hilfe bei der Fehlersuche.

14 Kommentare
Is there a better battery that can be used rather than the standard battery? This controller dies so fast that I don’t bother disconnecting it ever. I’m pretty sure that’s bad, but It’s frustrating having it die midgame in my second game.
Yes. You can purchase a 2000mah battery replacement. It’s not much of a difference, but lowering your led settings and controller vibration also works wonders for prolonging the battery life.
Any chance you could figure out why the %#*@ thing won't work USB powered with no battery? I shouldn't have to keep replacing a battery when I don't actually want to play wireless.
NoLife -