Einleitung

Wenn die Ohrmuscheln deines Sony WH-1000XM4 nicht mehr festsitzen wollen, bedeutet das, dass das Drehgelenk deines Kopfhörers kaputt ist und ersetzt werden muss. In dieser Anleitung erfährst du, wie du das Drehgelenk des Sony WH-1000XM4 austauschen kannst. Bevor du beginnst, schalte den Kopfhörer aus und trenne ihn von jeder externen Stromquelle.

Die Schritte für die rechte und die linke Seite sind getrennt aufgeführt, die rechte Seite von Schritt 1-12, für die linke Seite springe zu Schritt 13, gemeinsame Schritte von 19-25.

  1. SllkgGuJoPHEEAga
    SllkgGuJoPHEEAga
    WpXM4gVl3a3QdEL2
    niF6b1ftuU2PYwGV
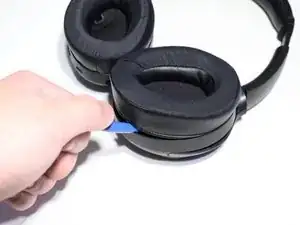
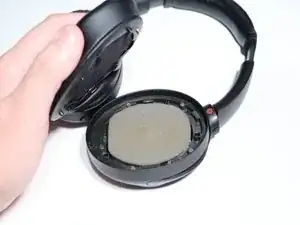
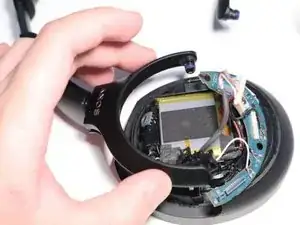
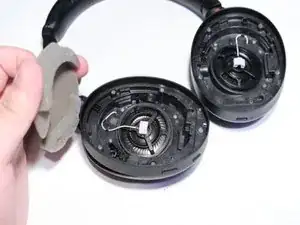
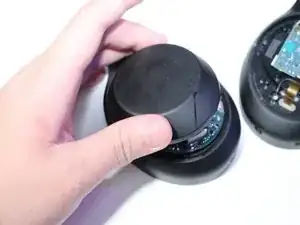
    • Heble mit einem Opening Tool (Öffnungswerkzeug) das rechte Ohrmpolster ab und entferne den darunter liegenden Schaumstoff.

  2. tifXoqaIjCDImVSg
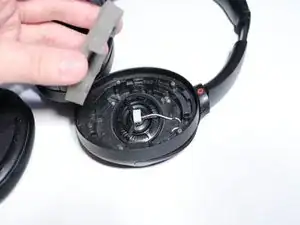
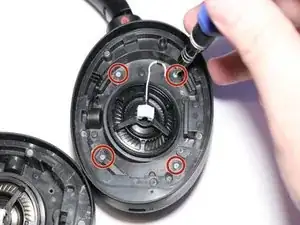
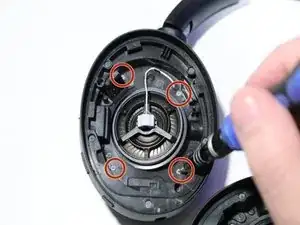
    • Entferne die vier silbernen Kreuzschlitzschrauben #000 an der rechten Seite des Kopfhörers.

  3. WRdkLNC5vdKhkSwa
    WRdkLNC5vdKhkSwa
    v5lDnUPMUKBMcvua
    • Drehe die Kopfhörer um.

    • Hebe die rechte Kopfhörerabdeckung an und Klappe sie zur Seite.

    • Entferne die Abdeckung noch nicht ganz, sie ist noch mit einem Kabel verbunden.

  4. p5yTbFTT2PB4Vo5Z
    p5yTbFTT2PB4Vo5Z
    1JdWQYvlJxB5wY6Z
    • Löse das Flachbandkabel, das die Rückplatte mit der rechten Ohrmuschel verbindet.

  5. jEJdwTyNWCV3Gm3h
    jEJdwTyNWCV3Gm3h
    RjpfRtmOUgJNW4pl
    • Löse das gelbe Thermosensor-Flachbandkabel vom Motherboard.

  6. 6QwRxokMbllqGDaa
    6QwRxokMbllqGDaa
    1DSdM2WNHgRMOSXT
    • Trenne das weiße Flachbandkabel ab.

  7. aSncDUYKDpUBjXyM
    aSncDUYKDpUBjXyM
    BF4jTTOGvw5HC5yn
    • Löse das Data/Pwr-Kabel mit einem Opening Tool (Öffnungswerkzeug) vom Motherboard.

  8. xaAERQaW15ZoBjqx
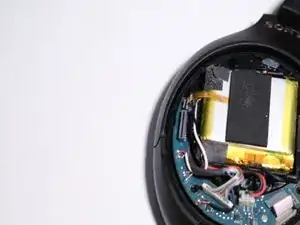
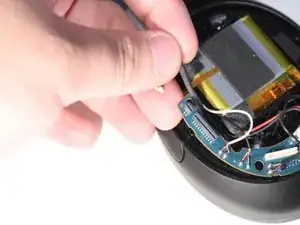
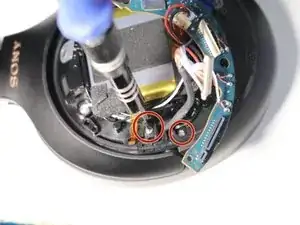
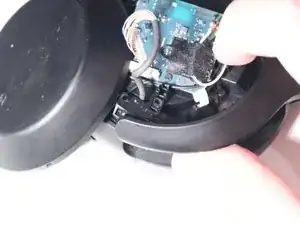
    • Entferne die beiden Schrauben des Motherboards mit einem Kreuzschlitzschraubendreher #000.

  9. koxNcctnt3PgqU4n
    koxNcctnt3PgqU4n
    sgyGUSDqDGpNMuET
    bGY5jhGSQyY4OnQL
    • Bring das Data/Pwr-Kabel von hinter dem Motherboard nach vorne.

  10. aSMdwmlZEZsKBqCT
    • Entferne den Data/Pwr-Stecker von der Platine.

  11. 6TSVBUUgYBoDcqZr
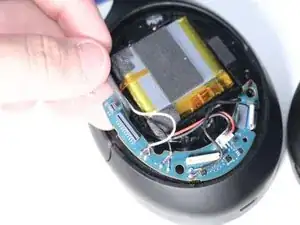
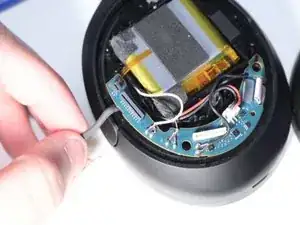
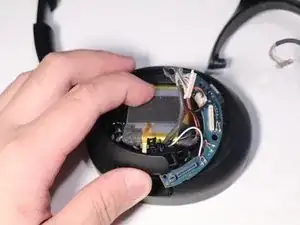
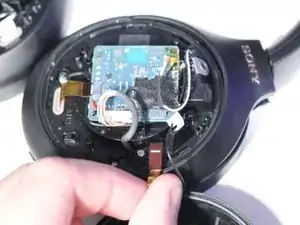
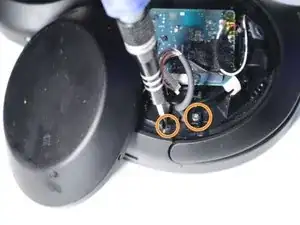
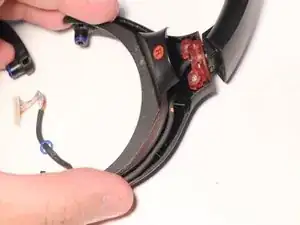
    • Schwenke das Motherboard in der rechten Hörmuschel zur Seite und entferne die beiden Schrauben des Gelenks mit einem Kreuzschlitzschraubendreher #000.

  12. MU1K44xU4kAsDQmq
    MU1K44xU4kAsDQmq
    GdkyeWGtCJgMGNL2
    • Hebe das Gelenk der rechten Hörmuschel an und drücke es heraus.

  13. bLcPxFLLBlkqhFx4
    bLcPxFLLBlkqhFx4
    6MjXKAYYvVsQNcQj
    • Heble mit einem Opening Tool (Öffnungswerkzeug) das linke Ohrpolster ab und entferne den darunter liegenden Schaumstoff.

  14. vyCMT4jllRgAqySE
    vyCMT4jllRgAqySE
    K1fHe3QHVNjqBFgg
    • Entferne die vier silbernen Schrauben an der linken Seite des Kopfhörers mit einem Kreuzschlitzschraubendreher #000.

  15. 2OuAEXtDoqrKRrRs
    2OuAEXtDoqrKRrRs
    mGrv6syu23uWZ36L
    • Drehe die Kopfhörer um.

    • Hebe die linke Kopfhörerabdeckung an und klappe sie zur Seite.

  16. ngRGQxYlVRAM45Ky
    ngRGQxYlVRAM45Ky
    BWdI22abUEtJJyhT
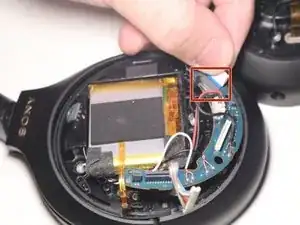
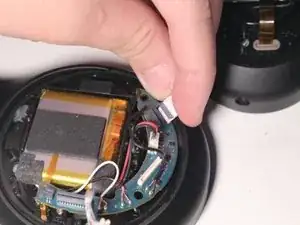
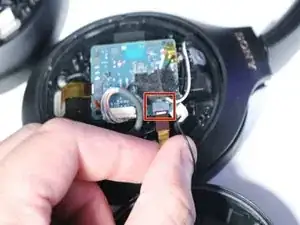
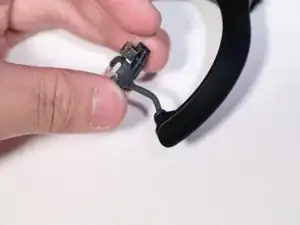
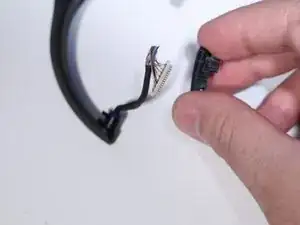
    • Löse an der linken Hörmuschel das Flachbandkabel, das den NFC von der Rückwand mit der Hauptplatine verbindet.

    Missed removal of data/pwr cable

    Jan Stein -

    When putting the PWR cable back, keep track of the blue wire. You can see it in the picture.

    Matthew Ellis -

  17. DoK6mxiFQXhQAQKY
    • Entferne die beiden Kreuzschlitzschrauben #000 an der linken Seite des Kopfhörers.

  18. 25GgnasfHkyDAdGf
    25GgnasfHkyDAdGf
    Gx2VEQp1AFVq2HGA
    • Hebe das Gelenk der linken Hörmuschel an und drücke es heraus.

  19. VVBYvrSDAuF4Jkw1
    VVBYvrSDAuF4Jkw1
    jNW6phW3XXugmem6
    • Löse das schwarze Gelenkstück vom Data/Pwr-Kabel.

  20. nKiQBYr1XI2aYouo
    nKiQBYr1XI2aYouo
    st2TRWieUNJXG4NC
    • Entferne den Gummiring mit einem Schraubendreher.

  21. stVedFGabvO1yuID
    stVedFGabvO1yuID
    OoC4QUKcndRqAleN
    • Nutze ein Opening Tool (Öffnungswerkzeug), um die Abdeckung zu entfernen.

  22. JFRlokxHMBhoRcmV
    • Hebe das Data/Pwr-Kabel an.

  23. GldQVFeNdEACPBcO
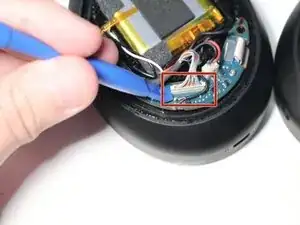
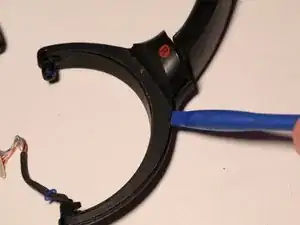
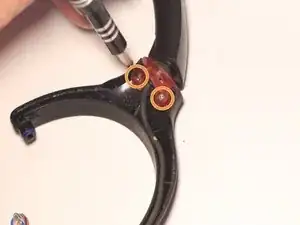
    • Entferne die beiden Schrauben des Drehgelenks mit einem Kreuzschlitzschraubendreher #000.

  24. 6L2NoloxfUPWNZsu
    6L2NoloxfUPWNZsu
    kDKxZkbhncECjYFt
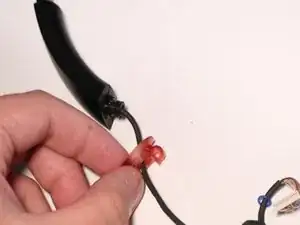
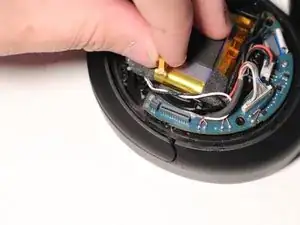
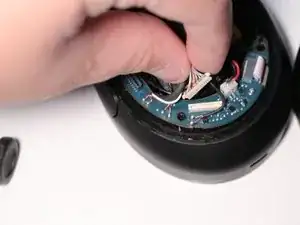
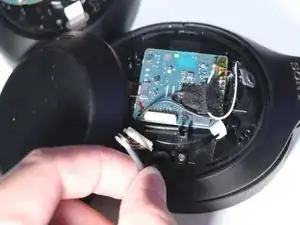
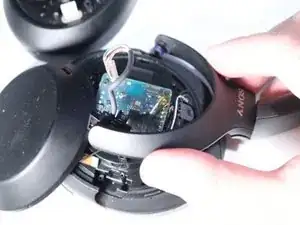
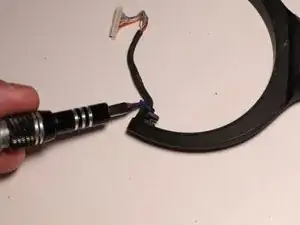
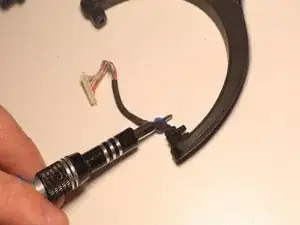
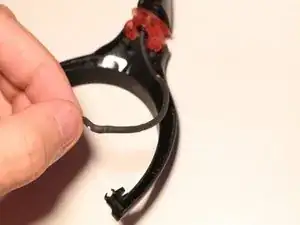
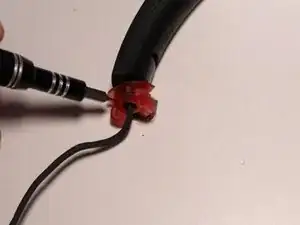
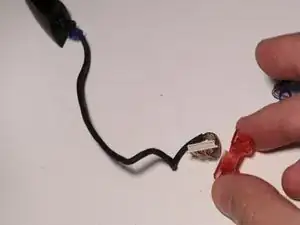
    • Drücke das Metallstück mit einem Spudger aus dem Drehgelenk heraus.

    • Ziehe das Metallstück heraus.

  25. ucNJLOxXqdoWmN6E
    ucNJLOxXqdoWmN6E
    YXsGYRTMxrys1e6F
    • Entferne das alte Drehgelenk.

    What if when right cup broke off the metal bit fell out and two tiny pieces of black plastic? Does that mean my xm-4's are not repairable?

    Winfred -

    I am in a similar situation to Winfred. The metal bit and some (broken) black plastic fell out when mine broke. I still have the metal bit and after dismantling, I can see the broken plastic is just the little hinge swivel highlighted in this guide (and not the larger hinge swivel arm, or the upper headband assembly). I think the vast majority of cases will be the same.

    Every single piece is available for almost nothing on alibaba (including the metal bit, in case you lost that). There are also plenty of photos there, which I found useful.

    Anonymous Anonymous -

Abschluss

Um dein Gerät wieder zusammenzubauen, folge dieser Anleitung in umgekehrter Reihenfolge

Jian Mejia

Mitglied seit: 23/08/23

643 Reputation

12 Kommentare

really helpful, thank you! my swivel snapped. I started from Step 18 and removed the cover halfway. re-inserted the swivel then locked the metal bit back. i don't have the replacement piece and it will snap again if twisted too far, but this works for now. thanks!!

jianne -

Here are a few suggestions:

1) Do a google search for 'sony headphones wh1000xm4 replacement plastics'

2) SONY Replacement Parts Website (what they offer) I found at this site.

3) Joe's SONY WH-1000XM4 Repair Parts I found at this site.

- The individual part you needed is offered along with a replacement metal clip.⏎

4) Check eBay - Currently (2/9/24) I see the part you need along with the two piece that attaches from the swivel joint to the speaker for about $11.99 USD

sonnyhung -

I hear a creaking sound on my left earcup and have tried everything to remove it (tape, lube, opening the sides up) but to no avail. Should I do this guide and check if the creaking is in the hinge part? Thanks.

EJ Vinuya (EJ) -

I think you should because mine were making that sound for a while before they broke

Maria Demina -

ok, got it all off!.....how do i put on a replacement?

elizabeth “liz” Lopez -

i got the headphone part off of encompass (sony's official part store)

elizabeth “liz” Lopez -

wish there was a "how to put it all back together" part to this guide.

elizabeth “liz” Lopez -

Hi Liz! It's easy to miss and I almost did. Look at the very end of the instructions and it says to go in reverse back through to put it together again. Don't give up as they say and save your $350 pair of headphones. I hope I helped! I'm going to try if they respond to tell me if in my case my phones are not repairable. I wish there was a way to contact the instructor direct.

Winfred -

Does Sony fix it? I don't trust myself doing all of that. I suppose if they do they charge a big fee, right? Has anyone gone that route, asking Sony to fix it? Such an expensive pair of headphones and mine broke very easily. I use them every day and always handle with care. Such cheap plastic but I like the performance. So now as backup I'm using my 1975 still in perfect condition Pioneer SE-20A headphones that will last another 50 or so years because the swivel and padded structure is all stainless steal. I also have to think... no such thing as noise cancelling headphones in those days, but a very expensive pair of headphones are rendered useless breaking like this. Some basic should-be product construction designs are sadly of the past. Planned obsolescence by Sony.

Winfred -

I hope you see this note as I need to fix my headphones ASAP. What a great series of excellent photos and visual instructions, plus a tools list and easy to buy! I haven't tried it yet but I'm hoping you see my note as I use my xm-4's every day. I'm holding on buying all the tools and part until you let me know if in my case my xm-4's are repairable or not. Too bad such expensive headphones break so easily. I'm low budget and your instructions give me confidence to repair this! THANK YOU!!

Winfred -

I hope others see this, but I repaired my Sony xm-4's today with two pieces of the semi-hard plastic I cut off of a plastic piece I found. I cut the pieces about 1/4 inch wide and 2 inches long. I pulled hard as I wound the tape and being careful not to get tape where the phone cup closely externally fits into the two prong armature they pivot horizontally on. There was no answer to my previous comments so I needing my phones did that an hour ago and so far it works. I'll have to figure out some kind of carrying case now as they won't fit into the original case because the cup now taped won't pivot on the vertical axis. The original padding makes up, with my anatomy, for the cup not pivoting. I'm also going to buy the much more comfortable "Wicked" brand of pad that is breathable and thicker

https://www.amazon.com/WC-Cushions-Repla...

I just might make a double layer cardboard box cut to fit and carry them in that. My reason is no answers about if the black plastic pieces and "U" shaped steel part that fell out in my case means they are not repairable per the instructions given here. Any advice is appreciated very much. I hope I helped in some small way.

Winfred -

I can't thank you enough. With this guide, I was able to fix my WH-1000XM4 relatively easily thanks to the toolset I bought previously from here. Awesome!

Lars Schinkel -