
Einleitung
Diese Anleitung zeigt, wie am SteelSeries Arctis 7 der USB-Anschluss auf USB-C aufgerüstet wird.
Die Datenkontakte bleiben erhalten, der Kopfhörer kann unverändert weiter betrieben werden, z.B. an einem PC via USB.
Hinweis: Es wird kleine Beschädigungen am Headset geben, da der Anschluss aufgeweitet werden muss, damit der etwas größere USB-C-Anschluss passt.
Ein anderer Nutzer (Kireobat) hat dies bereits in einer anderen Anleitung beschrieben.
Ersatzteile
-
-
Entferne die Ohrpolster.
-
Entferne die Torx T6H Schrauben
-
Hebe den Lautsprecher vorsichtig seitlich ab, achte dabei auf die Kabel.
-
-
-
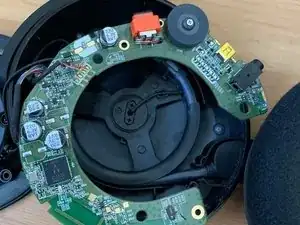
Nimm die Leiterplatte heraus.
-
Es geht leichter, wenn du dabei am Lautstärkeregler drückst.
-
-
-
-
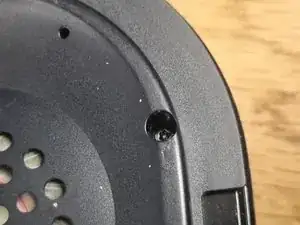
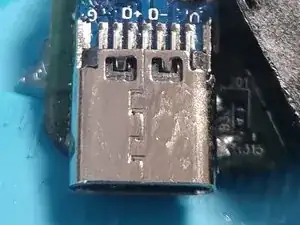
Entlöte den Micro-USB-Anschluss und reinige die Lötstellen.
-
Hier war der Anschluss ausgebrochen und wurde gleich repariert.
-
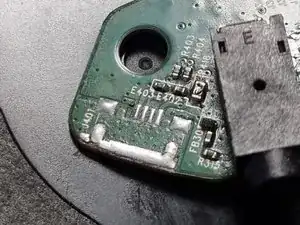
Die Anschlüsse von rechts nach links:
-
VCC
-
D-
-
D+
-
ID
-
GND
-
-
-
Um den USB-C-Anschluss als slave zu konfigurieren, musst du einen 5,1 kOhm-Widerstand zwischen R1 und GND einfügen.
-
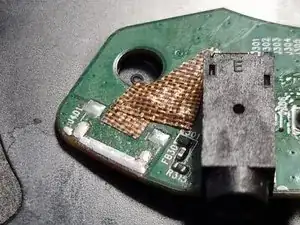
Überdecke die offenen Lötstellen mit Kaptonband.
-
-
-
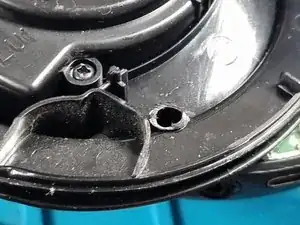
Schneide den Kunsstoff am unteren Schraubenloch in der oberen und unteren Gehäusehälfte ab, um Platz für den USB-C-Anschluss zu schaffen.
-
Hinweis: Dadurch könnte das Headset nicht mehr ganz so stabil sein. Ich habe keine Nachteile bemerkt.
-
-
-
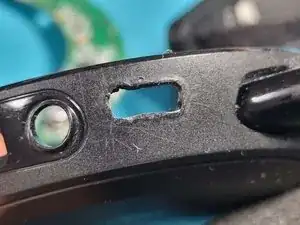
Vergrößere die Öffnung am USB-Anschluss mit einem Lötkolben.
-
Du kannst den Vorgang besser kontrollieren, wenn du dabei die Temperatur des Lötkolbens niedriger einstellst.
-
-
-
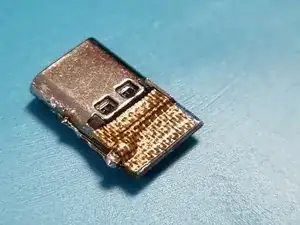
Reinige den USB-C-Anschluss mit Isopropylalkohol.
-
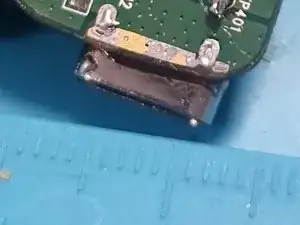
Positionire den Anschluss so, dass er etwa 2,5 mm über die Leiterplatte übersteht.
-
Erwärme den Anschluss vor dem Löten bereits etwas mit einem Lötkolben oder einem Heißluftgebläse. Er kann dann besser verlötet werden, da er durch die große Masse viel Wärme aufnimmt.
-
Schmelze etwas Lötzinn auf die GND-Kontakt. Kontrolliere, ob sie voll bedeckt sind und gut erhitzt.
-
Lege die Platine auf die GND-Kontakte. Erwärme nochmals.
-
-
-
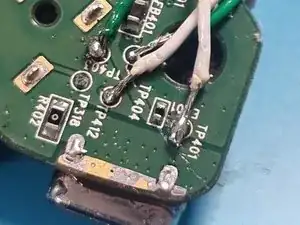
Löte Anschlussdrähte zwischen folgende Kontakte:
-
TP401 an VCC
-
TP403 an D+
-
TP404 an D-
-
TP412 an GND
-
Kontrolliere nochmals, ob die Lötstellen gut sind und keine Kurzschlüsse bestehen.
-
-
-
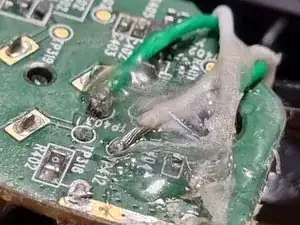
Löte die Kabel wie beschrieben an der USB-C-Platine an.
-
Wenn du willst, kannst du die Kabel mit Heißleim sichern.
-
-
-
Positionier die Platine im Gehäuse. Drücke die Anschlüsse in die Öffnungen.
-
Richte die Schraubenlöcher passend aus.
-
Schließe das Headset und ziehe die Schrauben fest.
-
Glückwunsch, du hast es geschafft!
-


Um dein Gerät wieder zusammenzubauen, folge den Schritten in umgekehrter Reihenfolge

2 Kommentare
Hey does this provide data and charging or only charging?
Yes it does provide data and charging as you also solder the datapins to the USB C port.
So it is being recognized by the software.