
Einleitung
Dies ist eine Anleitung zum Ersetzen der SSD in einem Microsoft Surface Laptop Studio. Ein Ersatz kann Sinn machen, wenn dein Computer langsamer Dateien öffnet. Eine beschädigte SSD kann außerdem zum Datenverlust führen. Dies ist eine einfache Anleitung. Es werden nur wenige Werkzeuge benötigt. Es sollte nur 15-20 Minuten dauern.
Ersatzteile
-
-
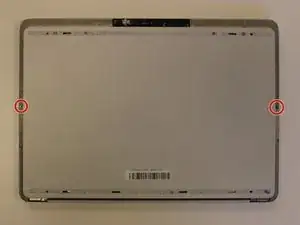
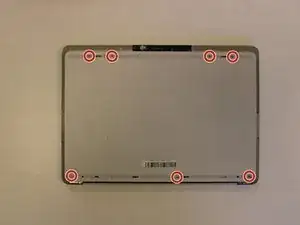
Entferne die sieben Schrauben, mit denen die Unterseite des Geräts befestigt ist, mit einem T3 Torx Schraubendreher.
-


Um dein Gerät zu wieder zusammenzubauen, folge den Anweisungen in umgekehrter Reihenfolge.
4 Kommentare
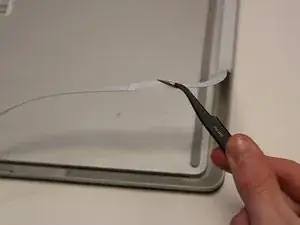
Is this strip tape or it metal? Is there replacements for it? I habe been trying to find it but I can only find tape as an alternative to this part.
I tried the SSD upgrade with two different WD products (1TB black and 1TB blue) and with both I had problems: Random blue screens and after some time, computed could not find the SSD anymore. Looks like it has something to do with drive consuming too much power but I am not sure. I am now back on original 256 GB SSD, since I can't find what is causing compatibility issues.
Try this, it will help.
Is this strip tape or it metal? Is there replacements for it? I habe been trying to find it but I can only find tape as an alternative to this part.
Luis Ruiz -
It appears to be thin plastic with an aluminum coating on the outside. It's easy to remove by poking into the corner by the hinge with a set of tweezers-- the tweezers will pass right through.
Michael Montalban -
Ok and how do you reattach it when you're done? I mean is it glued on or how does that work?
Rika -