
Einleitung
Einfacher Austausch des analogen Joysticks des Controllers. Durch eine übermässige Benutzung des Joysticks kann es passieren, dass dieser Stick anfängt zu driften. Der schwierigste Teil dieser Reparatur wird die Demontage des Controllers sein, da sie einen Torx T8h Schraubendreher erfordert. Stelle sicher, dass du einen zur Hand hast, bevor du mit dieser Reparatur beginnst.
-
-
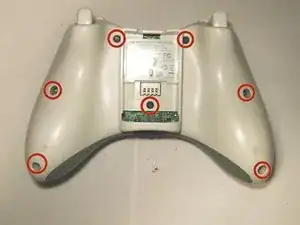
Entferne die sieben 9,3 mm T8 Torx Sicherheitsschrauben, die beide Gehäusehälften zusammenhalten.
-
Setze ein Öffnungswerkzeug aus Kunststoff in die linke Kante zwischen dem vorderen und hinteren Gehäuseteil ein. Drehe das Werkzeug zur Vorderseite des Gerätes hin, bis sich die Teile voneinander trennen.
-
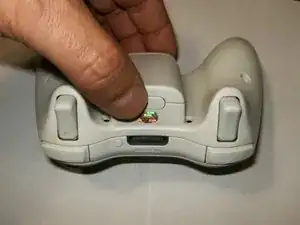
Fasse den Controller am Akkufach und an der Kopfhörerbuchse an. Hebe das Akkufach von der Kopfhörerbuchse ab, so dass sich das vordere vom hinteren Gehäuseteil löst.
-
-
-
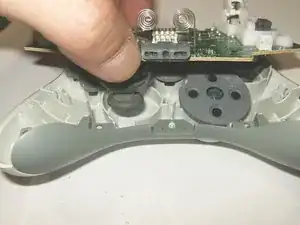
Kippe das untere Gehäuse leicht in Richtung der Trigger-Tasten, um es vom oberen Gehäuse abzunehmen.
-
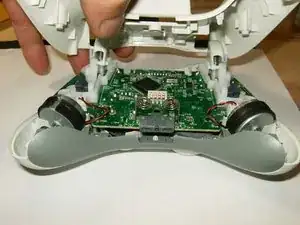
Hier ist eine Ansicht des Inneren des Controllers. Beachte die unterschiedlichen Gegengewichte der Vibrationsmotoren.
-
Trenne den Stecker vom linken Motor (der Controller ist umgedreht positioniert; der linke Controller wird also rechts angezeigt usw.).
-
-
-
Trenne den Stecker vom rechten Motor.
-
Beide Motoren sind getrennt. Achte beim Wiederzusammenbauen auf die Position der Motoren im Gehäuse.
-
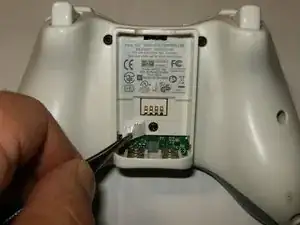
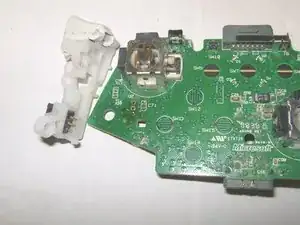
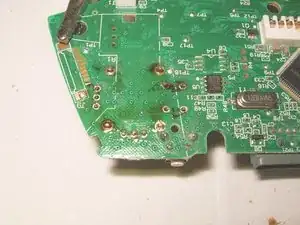
Entferne die Steuerplatine.
-
-
-
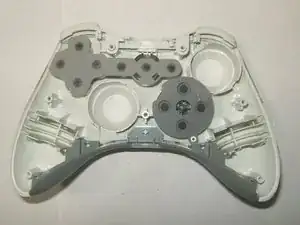
Achte beim Wiederzusammenbauen auf die Position der Gummimembranen im vorderen Gehäuse.
-
Um die Abdeckungen der Analog-Sticks zu entfernen, ziehe sie einfach von den Befestigungsstiften ab.
-
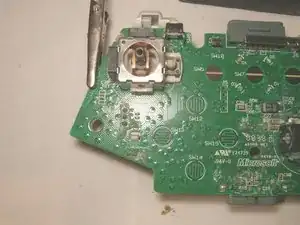
Ansicht des linken Analog-Sticks, der entfernt werden soll.
-
-
-
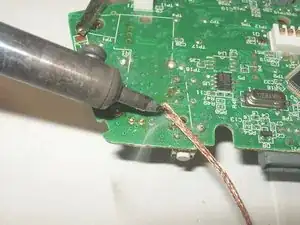
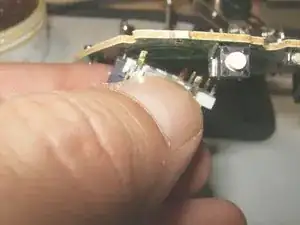
Um den linken Analog-Stick zu entfernen, muss zuerst der linke Trigger-Knopf entfernt werden. Löse die drei Lötpunkte. Verwende Entlötgewebe und etwas Flussmittel, um das Lötzinn zu entfernen.
-
Der Lötpunkt des linken Trigger-Knopfs ist entlötet.
-
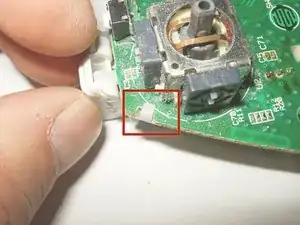
Es gibt 2 Schnappverbindungen, die das linke Trigger-Stück an Ort und Stelle halten. Entferne diese. Es kann etwas Kraft erfordern, aber drücke einfach die Schnappverbindung nach unten und zur Seite.
-
-
-
Beim Entfernen des linken Triggers stelle sicher, dass die Lötpunkte vollständig entlötet sind. Ziehe den Trigger vorsichtig nach unten.
-
Der linke Trigger wurde entfernt.
-
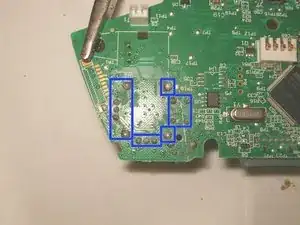
Nachdem der linke Trigger entfernt wurde, drehe die Steuerplatine einfach um und finde die 14 Lötverbindungen.
-
-
-
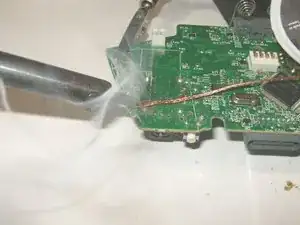
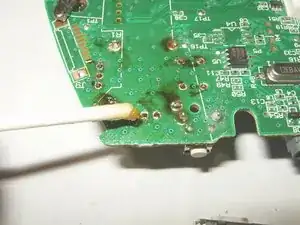
Verwende Entlötgewebe und etwas Flussmittel, um das Lötzinn zu entfernen.
-
Stelle sicher, dass keine anderen Komponenten entlötet oder durch die Hitze beschädigt werden.
-
Hier sind alle Lötpunkte entlötet.
-
-
-
Ziehe den 3D-Analogstick vorsichtig ab, um sicherzustellen, dass alle Lötverbindungen gelöst sind.
-
Entferne den Analogstick.
-
Setze den neuen 3D-Analogstick ein. Achte darauf, dass er bündig an der Platine anliegt.
-
-
-
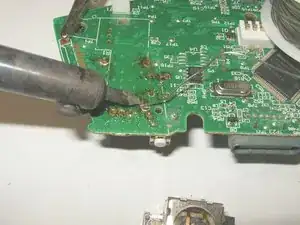
Trage etwas Flussmittel auf die Lötstellen und den Fuß des Joysticks auf.
-
Löte die Anschlüsse fest.
-
Alle Anschlüsse sind verlötet. Die schwarzen Reste ist das Flussmittel. Du kannst es nach Abschluss der Lötarbeiten mit Isopropylalkohol entfernen.
-
-
-
Das Bild zeigt die Platine mit den neuen Joysticks und dem frisch verlöteten linken Auslöser.
-


Um dein Gerät wieder zusammenzubauen, befolge diese Anweisungen in umgekehrter Reihenfolge.

14 Kommentare
My controller left stick is physically okew..but in gaming it is moving on downwards...
How can I fix this,I don't knew to do this repairing!:(
Nice work, excellenté!
I would like to note, you can unscrew the security screws with a 00 Flat head screwdriver. I just did it now and got all the screws out. Just gotta find the sweet spot, but it works.
What does .Ove mean
Dariel Rebollar -
No idea :-) but it’s fixed
oldturkey03 -