Einleitung

Werkzeuge

  1. VxOwpyxUrEorvQOL
    • Löse die verschiedenen Stromversorgungskabel hinter der Festplatte.

    Didn’t seem any reason for the fiddly de-routing of the cables so I just left them which caused no problems.

    nijafe -

  2. UnvWIAWmwrph3vQU
    UnvWIAWmwrph3vQU
    DM21QkjNXSAL6AmR
    MrTHDNNUaZVeirsu
    • In manchen Modellen kann ein Wärmesensor auf der Festplatte liegen. Sollte deine Hauptplatine keine Sensorbefestigung haben, wie auf dem roten Kästchen auf der ersten Seite dargestellt, kannst du diesen Schritt überspringen.

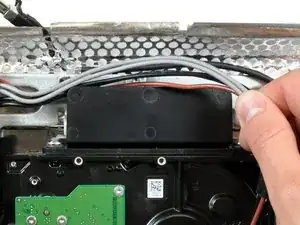
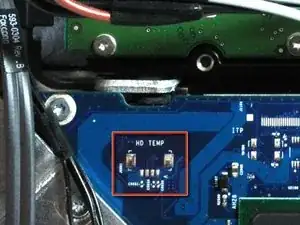
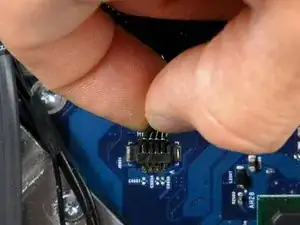
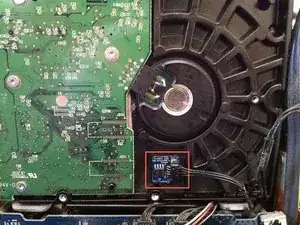
    • Ziehe den Stecker des Wärmesensors der Festplatte aus seinem Anschluss auf der Hauptplatine.

    • Ziehe an diesen Stecker parallel zur Oberfläche der Hauptplatine in Richtung der oberen Ecke des iMac.

    • Benutze einen Spudger, um den Wärmesensor mit dem Klebstoff von der Festplatte abzuhebeln und bringe ihn wieder auf der selben Stelle der Austauschfestplatte an.

    There was a thermal sensor attached to the HD. You can peel it off and glue it on the new HD and attach the connector back again.

    map -

    I think there is no need to mess whit the connector. just peel it off and glue it on. the connector is very week.

    thanks for ever ifixit!

    sebalancea -

    My thermal sensor was magnetised. I just pulled it off my old HD and put it on my new one. It sticks perfectly to the metal casing.

    Cloudsurfer -

    There was a thermal sensor attached to my previous HD but not to the new one. But without this sensor, the iMac was down :-( (logic board ?)

    I was forced to re-install the old HD with the temp sensor on.

    Except this point, related to my iMac, thanks ifixit for this great manual

    Jerome -

    I found it easier to take the sensor off the Hard Drive, not the logic board. The stickiness holding it place on the old drive was sticky enough to hold it in place on the new drive.

    Leif -

    Just in case anyone wants to know why this is an issue. 😊

    The sensor on the hard drive is there to send a signal to the logic board so it knows the hard drive isn’t running too hot.

    Apple moved this sensor into the hard drive on some later models of the iMac. Removing these drives and replacing them with a standard non-Apple certified drive causes the logic board to not get a temperature sensor reading which in turn causes the panicked logic board to ramp up the Fan to the highest possible speed.

    The iMac normally boots but with the fan on max. speed makes a lot of noise. There are external sensors available for this case so you can add whatever hard drive you like.

    Ricardo Santos -

  3. 2dVFIrEmGGnSNU6b
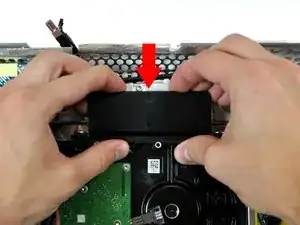
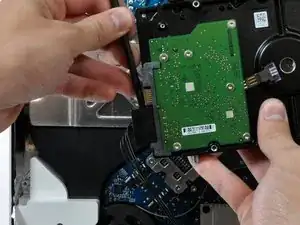
    • Drücke die Festplattenhalterung nach unten, um sie von dem hinteren Gehäuse zu lösen. Drehe dann die Oberseite der Festplatte zu dir hin.

    • Der Druck auf die Oberseite der Festplattenhalterung nach unten, den es benötigt, um die Halterung vom hinteren Gehäuse zu entfernen, muss ausreichend stark sein. Wir empfehlen deshalb, dass du deinen iMac auf einen Tisch legst, damit du ihn nicht versehentlich umwirfst.

    • Solltest du Probleme beim Lösen der Festplattenhalterung haben, kann die Halterung von der Festplatte entfernt werden, indem du die zwei T8 oder T10 Schrauben, mit denen die Halterung an der Festplatte befestigt ist, löst.

    I was applying a considerable amount of force and was not getting anywhere and I was afraid it was going to suddenly release and the resulting jerk would break something else. I noticed that all I was trying to do is get a plastic tap to go past a metal plate. There was plenty of room with no other components around so I stuck a medium screw driver behind the plastic latch and applied a small amount of pressure and it unlatched very nicely. I pried on one side and then the other to release it on both sides. For me this method worked a lot better.

    flyingmonkey1 -

    When I was trying to remove this bracket, it broke right off!! do you think i could super glue it back together, or order a new one? or does it even need one?

    danielle -

    The drive bracket wasn't moving until i placed my fingers exactly as shown in the picture and firmly applied force. Then it moved easily.

    Clinton -

    I also struggled trying to get the bracket loose by pressing down. I finally took FlyingMonkey's suggestion about the screwdriver and it came right off.

    Rachael Whitaker -

    I too was afraid I would break the bracket. I removed the screws that held the bracket to the hard drive. This allowed the hard drive and bracket to come right out.

    Roscoville -

    Never managed to get it off. But Lucky to have a screwdriver with a pull out flexible end which made unscrewing the T8 screws on the bracket the easiest option.

    Then lift drive up at bracket side, leaving bracket in place.

    nijafe -

  4. RH6fCALZWrjeJLHo
    RH6fCALZWrjeJLHo
    Ym5gvcGmFqu6F1WH
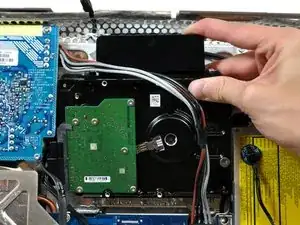
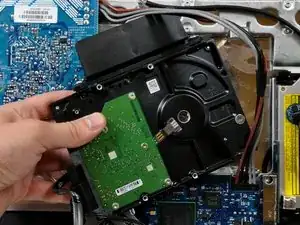
    • Hebe die Festplatte aus den unteren Pins und ziehe sie aus dem hinteren Gehäuse heraus. Achte auf die Netzkabel, die sich verfangen könnten.

    • Wenn du deine Festplatte wieder neu installierst, solltest du darauf achten, dass du die beiden Gummiüberzüge nicht aus ihren Haltelöchern im Gehäuse herausdrückst. Um sie wieder herauszuholen, müsstest du die Hauptplatine entfernen.

  5. 1oSbjVHP3qWsSrbP
    1oSbjVHP3qWsSrbP
    TDdN5WegEA2mPmcm
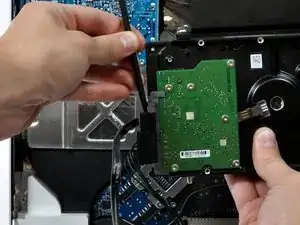
    • Setze einen Spudger zwischen die SATA Stecker und drehe ihn, um den Stecker von der Festplatte zu trennen.

    • Trenne beide SATA Stecker ab.

    I really didn't need a spudger to pull the cables off.

    Cloudsurfer -

Abschluss

Um dein Gerät wieder zusammenzubauen, befolge diese Anweisungen in der umgekehrten Reihenfolge.

Walter Galan

702835 Reputation

0 Kommentare