Einleitung
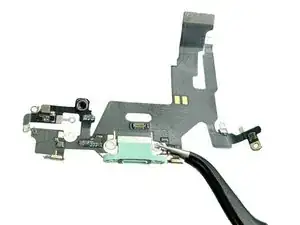
Wenn es dir nicht gelungen ist, den Lightning-Anschluss mit Hilfe [link|https://www.ifixit.com/dieser Anleitung/How+to+Clean+your+iPhone%27s+Lightning+Port/164631|erfolgreich zu reinigen, dann folge dieser Anleitung, um die Lightning Connector Einheit auszutauschen. In dieser Anleitung erfährst du, wie du die Lightning-Connector Einheit in deinem iPhone 11 tauscht um Lade- und Verbindungsprobleme zu beheben.
Abschluss
Um dein Gerät wieder zusammenzubauen, folge den Schritten in umgekehrter Reihenfolge.
I would rather have a picture and written step by step, he doesn’t say some parts what is called
Dulce Vidal -
Me too. I would appreciate knowing the size and type of all screws and standoffs and where they go.
I most likely mixed up a few of them and now the screen stays black.
Kim Mace -
First, DISCONNECT the battery before ANY connections, and the battery should be the last thing you re-connect. And you DO NOT need to remove the logic board.
Gregg Stanley -
Just completed this repair. Wow it’s tricky but as echoed above, I would try and disconnect battery first although design of the iPhone 11 makes it very difficult to do this. Also, definitely don’t remove logic board and you don’t have to remove the battery either. Removing battery possibly makes it very slightly easier but if you take your time it’s not necessary. Good luck
richarddillon -