Einleitung

Diese Anleitung zeigt, wie der Lautsprecher im iPhone 16 ausgetauscht wird.

Wenn der Ton deines iPhones rauscht oder knistert und das nicht an einem Software-Fehler liegt, muss vielleicht der Lautsprecher ausgetauscht werden.

Um die Reparatur abzuschließen, benötigst du neuen Kleber für die Glasrückseite.

  1. 5pJ3VKVOSrCZZpPi
    5pJ3VKVOSrCZZpPi
    QdsLWROIU22ytkpX
    • Entlade den Akku auf unter 25%. Ein geladener Lithium-Ionen-Akku ist ein Sicherheitsrisiko.

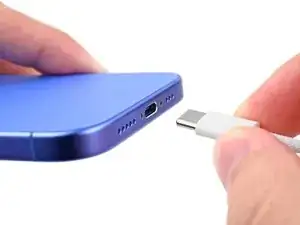
    • Trenne alle Kabel vom Smartphone ab.

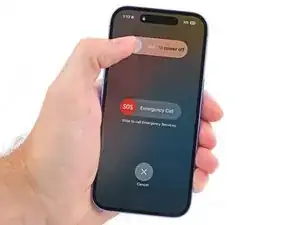
    • Halte die Einschalttaste und die beiden Lautstärketasten gedrückt. Wische dann am Display zum Ausschalten nach rechts.

  2. xKXG1PAUjnVT3Ytk
    xKXG1PAUjnVT3Ytk
    Rty6gBTj2f5HkMOL
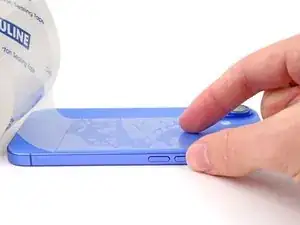
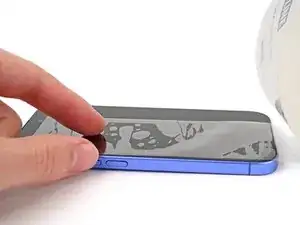
    • Wenn dein Display stark gesplittert ist, dann überkleben es mit überlappenden Streifen Paketband. So bist du geschützt und die Demontage geht leichter.

    • Achte darauf, dass am unteren Rand des Displays eine glatte Fläche entsteht, die groß genug für einen Saugheber ist.

  3. FqeUZCsnVQWJs54Z
    FqeUZCsnVQWJs54Z
    XLKiwVtYaS1XhT1P
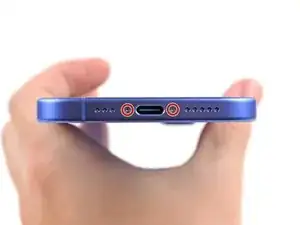
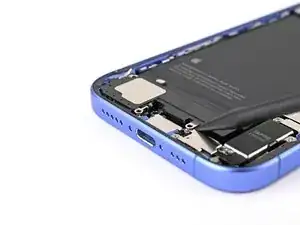
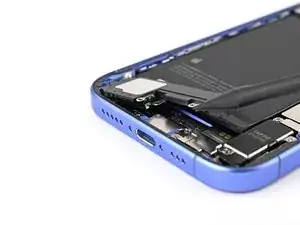
    • Nimm einen P2 Pentalobe Schraubendreher und entferne die beiden 7,7 mm langen Schrauben links und rechts von der Ladebuchse.

  4. 6UPwoloGBO4tmVoS
    6UPwoloGBO4tmVoS
    BmSYPJmOy6dbHipF
    3EOdQPAGOmiuhoKU
    • Wenn du ein Plektrum zu tief einschiebst, kann das Gerät beschädigt werden. Dieser Schritt zeigt, wie du eine Marke am Plektrum anbringen kannst, damit das nicht passiert.

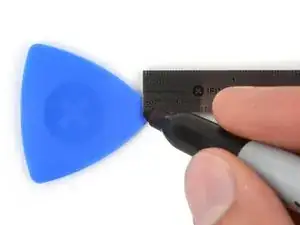
    • Zeichne mit einem Permanentmarker 3 mm von der Spitze des Plektrums entfernt einen Strich.

    • Du kannst die anderen Ecken ebenfalls mit Strichen in verschiedenen Abständen markieren.

    • Du kannst auch eine Münze so mit einem Klebeband auf das Plektrum kleben, dass sie einen Abstand von 3 mm zur Spitze hat.

    Got to step 2 and realized the fix kit doesn't include an opening pick! Looks like a guitar pick, and I have those lying around. Is that expected? Looks like the pick is used in many steps below. There's a little blue crowbar that isn't mentioned in the instructions. Perhaps that replaces the opening pick?

    Sloan Looney -

    Hi! I can't see which guide you were using when writing this comment. Can you reply here with which guide and fix kit you used?

    Clay Eickemeyer -

    I see you posted this in Meta. I hope it's resolved soon! In the meantime, a guitar pick may work well enough for your repair.

    Clay Eickemeyer -

    what fix kit?

    Meow Purr -

    My fix kit didn't include an opening pick either

    WILLIAM HARRIS -

    Make sure you check inside the black boxes after emptying them. My pick was stuck inside one of the boxes.

    AndyF -

    My AliExpress refurbished screen came with a pick that has a coin-like circle that pops out, so no modification was necessary

    Gijs Leegwater -

    the picture shows 3 cm but the description says 3 mm's. Which one is it?

    John Pena -

    That is a misunderstanding. It is a ruler with a scale for cm, it shows 0.3 cm, i.e. 3 mm.

    VauWeh -

    Oh, come ON!

    Big Ed -

    It will ALWAYS be millimeters on a phone, but this step is ridiculous, skip it!

    Leif DeWolf -

    @leifdewolf I wouldn't skip it for a first repair.

    Gabriel-Science -

    It's not an Ifixit KIT if it doesn't include everything. You'll need to order the opening pic separately. Or head to Walmart like myself and look for guitar pics. Hopefully, this will work just as well.

    Jaleeljb97@icloud.com -

    No pick in mine as well. It’s really not clear that you have to order this separately when ordering an IPhone SE 202/2022 screen repair kit. Is this the case?

    Jackson Castiglione -

    Frustrated, I ordered a compact package where everything was encapsulated. Useless suction tools could not separate the screen. If it is unable to decouple the screen, then why sucking suction tools you have provided.

    Shourob Datta -

    For my kit the triangle pick was stuck inside the box with the screen not with the other tools maybe it's also there for you

    Henry Scheibehenne -

    Y’all are getting far, FAR too detailed with some of this stuff…. Measuring and marking the pick that you won’t actually use to open the device?!? lol that’s kinda funny. Just heat it up, grab a spudger, and the back just pops right off! The iFixit tech need to stick to the KISS method more often, you know KEEP IT SIMPLE STUPID!!! Like l, for reals, I’ve been doing this stuff for YEARS and using iFixit guides regularly and this is just ridiculous at this point!

    Leif DeWolf -

    Will the phone still work if the sensor assembly on the back of the screen is damaged?

    Mutshidzi Rambau -

    I don't have a pick, but how much better are these picks than an old credit card for opening an iPhone 13 mini?

    mike eng -

    The pick in my iFixIt kit was packed with the battery, not with the rest of the toolkit.

    Tony Houlihan -

  5. YZm5gqZHTU5xYHSl
    YZm5gqZHTU5xYHSl
    JyavvCuDPHyNX6dQ
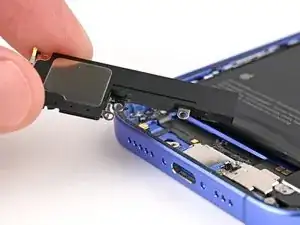
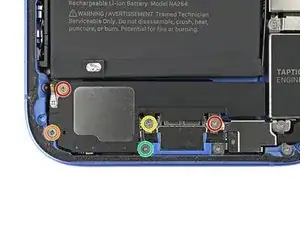
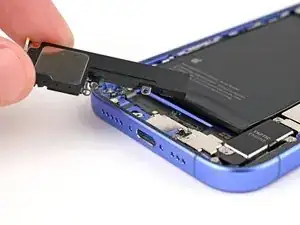
    • Entferne die fünf Schrauben, mit denen der Lautsprecher befestigt ist:

    • Zwei 1,5 mm lange Kreuzschlitzschrauben

    • Eine 2,0 mm lange Kreuzschlitzschraube

    • Eine 2,9 mm lange Kreuzschlitzschraube

    • Eine 1,2 mm lange Y000 Tri-Point Schraube

  6. TFthxSlpQxf2KEYd
    TFthxSlpQxf2KEYd
    SO4scOWUFKwFKCKD
    ntxlVhbByGmS5Ut2
    • Hebe den Lautsprecher mit der Spudgerspitze vom Rahmen ab.

    • Entferne den Lautsprecher.

Abschluss

Um dein Gerät wieder zusammenzubauen, folge den Schritten in umgekehrter Reihenfolge.

Entsorge deinen Elektromüll sachgerecht.

Hat die Reparatur nicht ganz geklappt? Versuche es mit ein paar grundsätzlichen Lösungen, ansonsten findest du in unserem iPhone 16 Forum Hilfe bei der Fehlersuche.

Alex Diaz-Kokaisl

Mitglied seit: 16/01/22

168562 Reputation

0 Kommentare