
Einleitung
Diese Anleitung wird nur für historische Zwecke beibehalten. Verwenden Sie die aktualisierte Version der Anleitung, um Ihre Reparatur durchzuführen. Sie können hier die aktualisierte Version dieser Anleitung finden.
-
-
Entferne die beiden 3,4 mm P2 Pentalobe Schrauben an der Unterseite des iPhones neben dem Lightning-Anschluss.
-
-
-
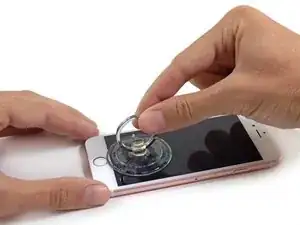
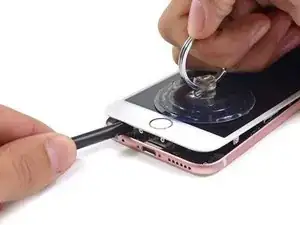
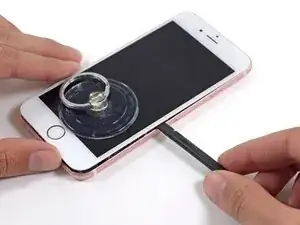
Halte das iPhone mit einer Hand fest und ziehe am Saugnapf, um das Front Panel vom hinteren Gehäuse zu trennen.
-
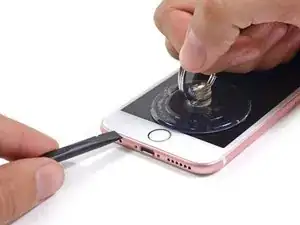
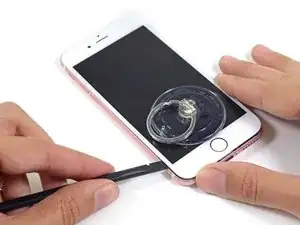
Sobald sich eine kleine Lücke zwischen dem Display und dem Rückgehäuse geöffnet hat, platziere den flachen Teil eines Spudgers darin, direkt über der Kopfhörer-Buchse.
-
-
-
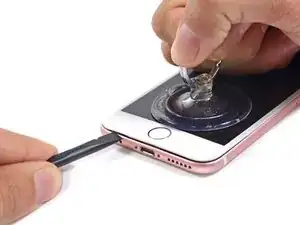
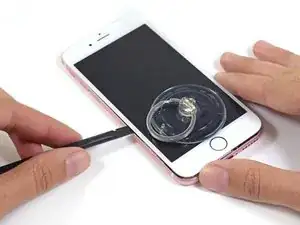
Drehe den Spudger hochkant, um die Lücke zwischen Display-Einheit und dem Rest des iPhones zu vergrößern und vom Kleber zu befreien.
-
-
-
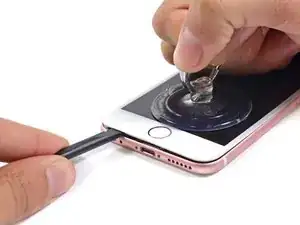
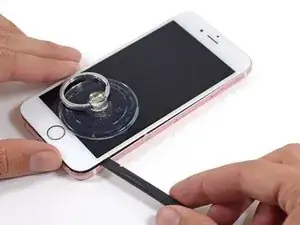
Fahre mit dem Spudger auf der linken Seite in Richtung obere Hälfte des iPhones, um den Kleber zu trennen und die Klammern zu lösen.
-
-
-
Fahre mit dem Rand eines Spudgers an der linken Seiten des Telefons entlang und löse dadurch den Kleber.
-
-
-
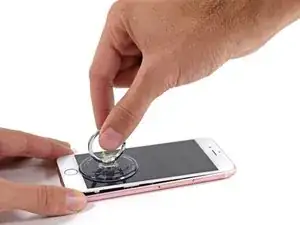
Nutze den Saugnapf, um das Display zu öffnen, dadurch sollte auch der letzte festsitzende Kleber entfernt werden.
-
-
-
Entferne die beiden folgenden Kreuzschlitzschrauben von der Kabelabdeckung des Akkuanschlusses:
-
Eine 3,0 mm Kreuzschlitzschraube #00
-
Eine 2,3 mm Kreuzschlitzschraube #00
-
-
-
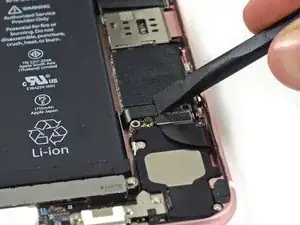
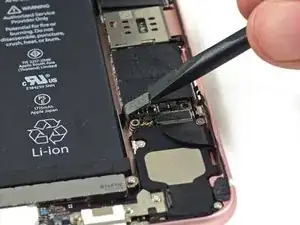
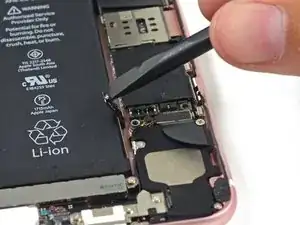
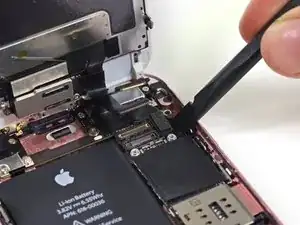
Heble den Akkustecker mit dem flachen Ende eines Spudgers vorsichtig von seinem Anschluss auf dem Logic Board.
-
Drücke den Akkustecker vom Logic Board weg, so dass es während der Reparatur nicht zu einer unbeabsichtigten Verbindung mit dem Anschluss kommt.
-
-
-
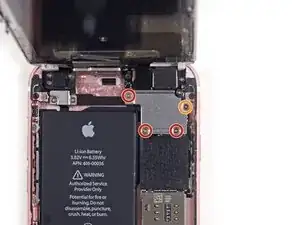
Halte das Front Panel in einem Winkel von 90° geöffnet und entferne die folgenden fünf Kreuzschlitzschrauben, mit dem die Klemme des Front Panel Kabels befestigt ist:
-
Drei 1,3 mm Schrauben
-
Eine 3,0 mm Schraube
-
-
-
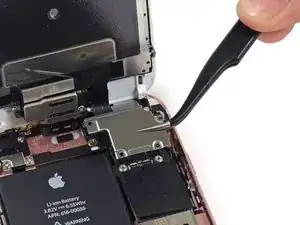
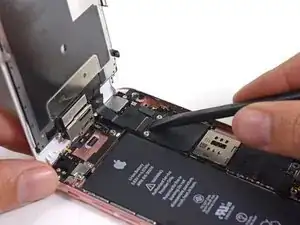
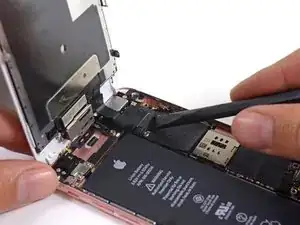
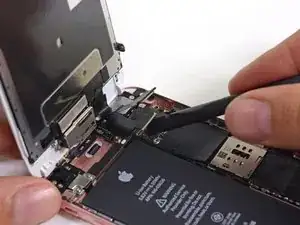
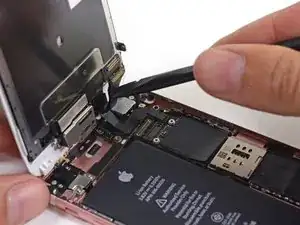
Verwende die flache Seite eines Spudgers, um die Frontkamera und den Sensorenkabelstecker zu trennen.
-


Arbeite die Schritte in umgekehrter Reihenfolge ab, um dein Gerät wieder zusammenzubauen.

21 Kommentare
while technically correct, this guide is not complete in the sense that a new tech cannot follow it step-by-step to successfully complete a screen replacement. You should include the steps necessary to move the parts over from the old screen. Yes you can buy screen replacements with small parts but most repair operations don't do that as it isn't that hard to move them and much less expensive.
There are many small parts involved in moving from one screen to another. There are also a few steps that require prying a flex from the frame that is taped down. Having the additional steps in this guide that point out exactly where each small parts go and how to successfully pull the flex off without tearing it would be a huge improvement to this guide (and all the other screen replacement guides as they all have the same gap)
thanks - this is a great site and my techs use it for training every day.
The demo ends before it does what is stated in the heading (Display Replacement.) This demo is for Front Panel Assembly Replacement.
PJL500 -
As stated in the intro, this is just the full front panel assembly guide. We'll be posting more thorough screen replacement guides in the future. Stay tuned ;)
When will you be selling the 6S replacement screen. I only see on for the 6 and it says not compatible with the 6S.
Additionally is it possible to replace just the glass and not all the other parts?
dougross -
That is what i am curious about as well!!!
just cracked the glass in the bottom left corner of my 6s Plus.
brink28 -
You do know that without replacing the adhesive the 6s' force touch can stop working entirely.
Plus you do not need to disconnect the battery if the iPhone is off. There is a component next to the battery connector that if damaged during the disconnection of the battery you could kill your iPhone.
Hi Brayden,
So I assume you're saying you can replace Just the Glass as long as you use the adhesive to glue down the replacement glass, does this mean you can use an iPhone 6 glass? Your feedback will be greatly appreciated,
Sincerely,
Jason.
Jason -
Hey Jason
If you damaged the display glass, you would need to find a way of moving over the 3D Touch sensor to the new display.
Even if you manage to replace the display without damaging the 3D Touch sensor then you will have to replace the Adhesive that holds the display panel to the main body of the iPhone. Otherwise you could have a non-functioning 3D touch.
Regards
Brayden