
Einleitung
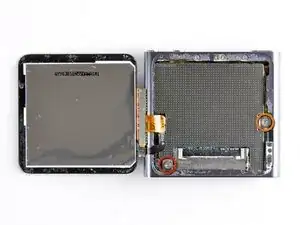
Benutze diese Anleitung, um die Front Panel Einheit deines Nano auszutauschen. Eine neue Front Panel Einheit beinhaltet ein neues Front Panel aus Glas, einen Touchscreen sowie ein LCD. Das LCD kann nicht vom Touchscreen abgelöst werden.
-
-
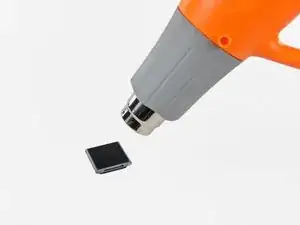
Nimm einen Haartrockner oder ein Heißluftgebläse und erwärme damit den den Kleber, mit dem der Rand der Frontpanel-Baugruppe am äußeren Gehäuse befestigt ist.
-
-
-
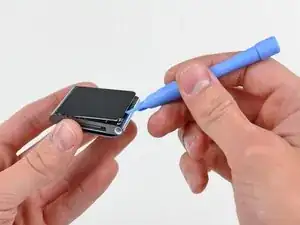
Heble die Frontpanel-Baugruppe - solange sie noch warm ist - mit der Kante eines Öffnungswerkzeugs von der Seite mit dem Kopfhöreranschluss vom Nano ab.
-
Fahre fort, die Frontpanel-Baugruppe am Rand vom äußeren Gehäuse abzuheben. Achte darauf, dass das Displaykabel an der linken Seitenkante nicht beschädigt wird.
-
-
-
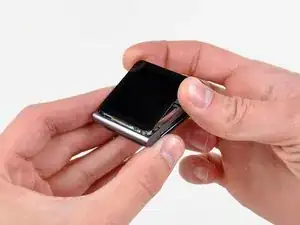
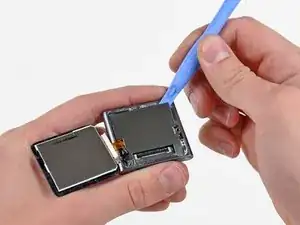
Hebe die Frontpanel-Baugruppe an der Seite mit dem Kopfhöreranschluss hoch.
-
Ziehe die Frontpanel-Baugruppe leicht von der linken Seite weg, um das Displaykabel freizugeben.
-
-
-
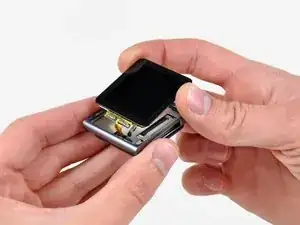
Lege die Frontpanel-Baugruppe neben den Nano.
-
Entferne folgende zwei Schrauben:
-
Eine 2,3 mm lange Kreuzschlitzschraube
-
Eine 2,6 mm lange Kreuzschlitz-Schulterschraube
-
-
-
Heble die Metallabschirmung mit einem Öffnungswerkzeug von der oberen rechten Ecke her aus dem Nano heraus.
-
Entferne die Metallabschirmung vom Nano.
-
-
-
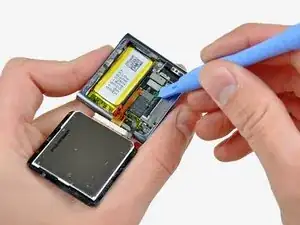
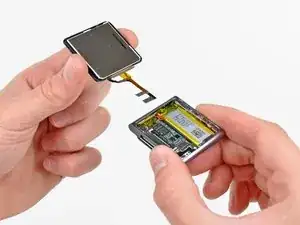
Heble die Stecker am Displaydatenkabel und am Touchscreenkabel mit einem Öffnungswerkzeug aus ihren Anschlüssen auf dem Logic Board hoch und trenne sie ab.
-
-
-
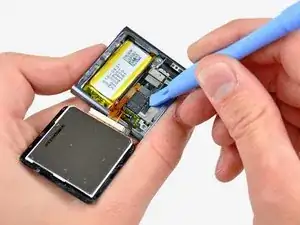
Entferne die Frontpanel-Baugruppe, achte dabei darauf, dass sich die beiden Kabel nicht verfangen.
-

Um den iPod Nano wieder zusammenzubauen, folge den Schritten dieser Anleitung in umgekehrter Reihenfolge.

10 Kommentare
Don't forget to include in your repair the adhesive to hold the new screen on. It does not come with the new display. I as unable to find it at iFixit's site but was able to get it here for $10 incl p&p: http://www.badgizmorepair.com/product/ip...
By the time I paid for the screen, opening tool and glue it turned out to be more economical and less hassle to take it to the Apple store (albeit less satisfying than doing it yourself). I suggest you forego the opening tool if you have a good flat blade jewelers screwdriver. A fine temporary fix for not having the correct screen glue is a piece of packing tape. It leaves the iPod open to the elements though, so I highly recommend the correct glue in order to avoid water leaking in around the edge of the screen.
You will also need a very small jewellers or electronics screwdriver for the two screws. I just managed it with an oversized flathead driver.
Hi, i already unmount the display, but i need the adhesive strips for paste the ne one. The link you suggested it's down, is it possible to have a new one where i can find this adhesive?
Thanks
Its diffucult to place the display data cable when reverse step 3. Any tips?
Akela66 -
Do I need new adhesive to reassemble?
David Wallin -
Make sure to not break this cable even if your backlight is out, there can be internal corrosion that prevents the backlight from working. It may still work with the old display.
Matthew Borgholthaus -