Einleitung

Dies ist nur eine grundständige Anleitung, um den Akku vom Rückgehäuse abzulösen.

  1. smfOLc6Iw1nMcIFL
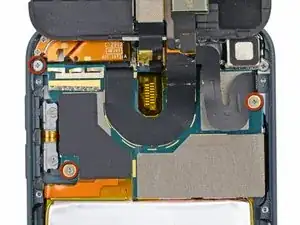
    • Entferne die drei 1,6 mm Kreuzschlitzschrauben #000, mit denen das Logic Board am Rückgehäuse befestigt ist.

    Hi, the MPN on that WiFi flex confirms this is not an iPod Touch 6th gen, it is 5th Gen. I am trying to source a 6th Gen WiFi Flex.

    Ricky Pohlman -

  2. DNBptMRXPLGdbc3U
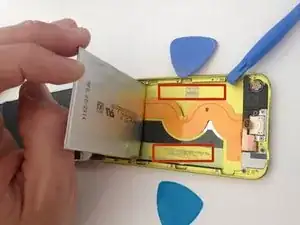
    • Der Akku ist mit zwei Klebestreifen befestigt.

    • Drehe den iPod um und erhitze die RÜCKSEITE des iPod Aluminiumgehäuses mit einem Fön oder einem Heißluftgebläse. Erhitze nicht den Akku.

    • Das Aluminium-Gehäuse muss nicht heiß werden, du solltest alle erwärmten Teile immer problemlos anfassen können.

    Instead of a heat gun or hair dryer, I used a rice sock (http://www.wikihow.com/Make-a-Rice-Sock) to apply heat evenly across the entire back of the case while the case still sat upright for me to work on getting the battery loose. It was a lot easier than trying to heat the back of the case, then flip the case over and work feverishly before it cooled.

    Eric -

    I'm sure this works, but it doesn't seem like the proper way to do this. I didn't like the feeling of prying on a flimsy battery at all. That's not practical. Instead get some molybdenum wire start it underneath the corners, then wrap the ends of the wire on like 2 pencils then tape them so u dont have to wrap the wire around your fingers because it will hurt lol. then apply heat, i went about 130 degrees is what my infrared gun said. I used a geat gun on low and a good distance away. Then just work the wire down the adhesive obviously lol. This worked out very easily for me and I felt safe and more confident about what I was doing. Good luck.

    taylor craig -

    First of all, one of the strips is accessible with a pair of angled tweezers (bottom right of device). Second, where can we get replacement adhesive strips for the battery?

    Ian Bogue -

    If you really don’t want to remove the battery, you may lift the mainboard slightly instead and disonnect display, back camera flexes and antenna connector. Then gently pull back camera module out of the seat. This gives you enough room to connect new display and back camera flexes. Back cam module would be hanging while you connect everything that got disconnected. Screw back the mainboard and push camera module to its seat.

    Slava Belkov -

    Removing the battery is absolutely unnecessary. Its very likely the battery would be damaged during the removal… Similar to Slava up above, just lift the freaking motherboard up, disconnect the cables, and install the new display, easy.

    Conrad -

  3. 5EZPQfvQNDxuKVrv
    5EZPQfvQNDxuKVrv
    VTJe4GUuiSk5CRRC
    • Auf jeder Seite des Akkus befinden sich drei Kerben. In den nächsten Schritten wirst du diese Kerben nutzen, um den Akku nach und nach aus dem Rückgehäuse zu hebeln.

    • Der Akku ist mit sehr viel Kleber befestigt, du musst daher langsam und sorgfältig arbeiten, um zu vermeiden, dass der Akku in irgendeiner Form beschädigt wird.

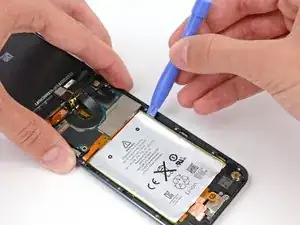
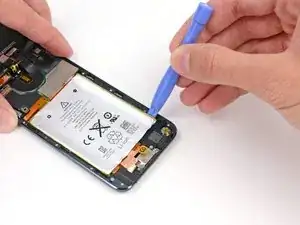
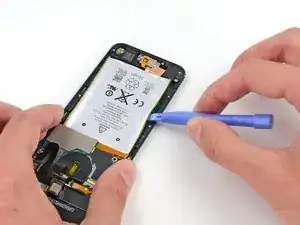
    • Setze ein Kunststoff-Öffnungswerkzeug in die oberer rechte Kerbe und heble vorsichtig am Akku.

    • Versuche an diesem Punkt nicht, den gesamten Akku herauszuhebeln. Löse nur nacheinander den Kleber an jedem der Hebelpunkte.

  4. BVCuXxHoZC5CLVUA
    BVCuXxHoZC5CLVUA
    tCG5cZKiDQFDoat2
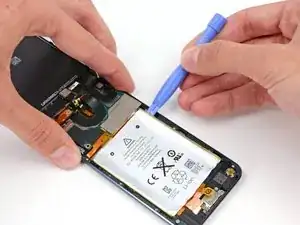
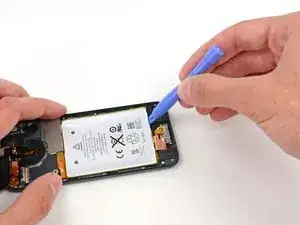
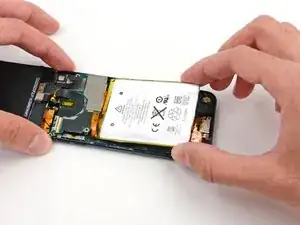
    • Mache an der unteren rechten Kerbe weiter. Setze das Kunststoff-Öffnungswerkzeug in die Kerbe und heble vorsichtig an der Seite des Akkus.

  5. DxfMBArClCbEpWOn
    DxfMBArClCbEpWOn
    MJk5dHvtrWYZQMKP
    • Hebel den Akku weiter an der Unterkante hoch.

    • Wenn du an der Unterkante hebelst, vermeide es, zu stark gegen den Lautsprecher oder die Kopfhörerbuchse zu drücken.

  6. qoajNaoATRCxOBx1
    qoajNaoATRCxOBx1
    pRQ2yExWXFWeOrEh
    • Heble dann an der linken Seite.

    • Möglicherweise musst du abwechselnd an den Seiten und der Unterseite des Akku hebeln und dabei jeweils ein kleines Stückchen abhebeln, bis der Akku vollständig vom Klebstoff befreit ist.

  7. gcHWYZefXHQW4qmp
    gcHWYZefXHQW4qmp
    OYHfhEVnFxuEajMj
    YFu1IqKh16cu2GPk
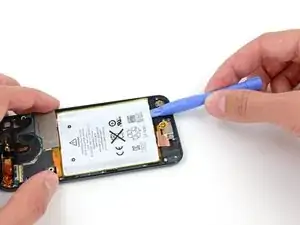
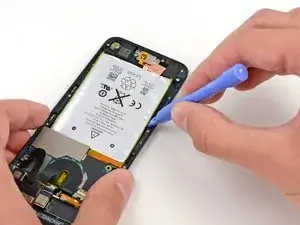
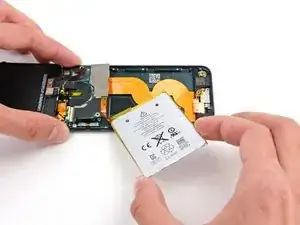
    • Sobald der ganze Kleber abgelöst ist, kannst du den Akku von der Unterkante her zur linken Seite hin aus dem Rückgehäuse heraus drehen.

    • Achte darauf, ihn nicht schwungvoll herauszuziehen, da er am Logic Board festgelötet ist.

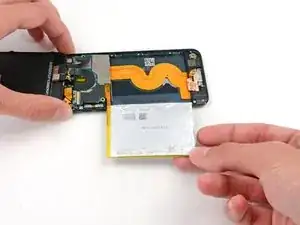
    • Klappe den Akku um, damit sein Kabel flach liegt, und lege ihn ab.

Abschluss

Um dein Gerät wieder zusammenzubauen, folge den Schritten dieser Anleitung in umgekehrter Reihenfolge.

Andrew Optimus Goldheart

Mitglied seit: 17/10/09

509891 Reputation

3 Kommentare

You skipped steps.

Nick -

This isn't even half of the procedure - the battery isn't even completely removed, much less replaced! Helpful but nowhere near complete.

Paul Pearah -

Yeah, you might have skipped the most critical steps, like glass and bezel removal, desoldering, soldering etc..

dominic benavente -