
Einleitung
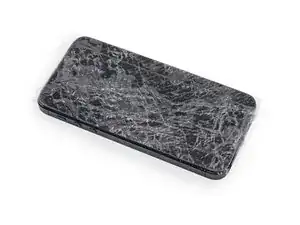
Benutze diese Anleitung, um die Metall-Abschirmplatte zu entfernen, und Zugang zu den internen Komponenten des iPods zu erhalten.
-
-
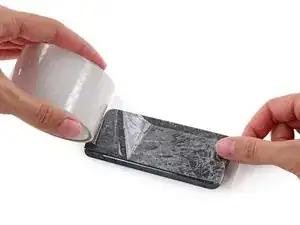
Wenn dein Display gesprungen ist, klebe das Display mit Klebeband ab, um zu vermeiden, dass das Display weiter bricht und du dich möglicherweise daran verletzt.
-
Klebe mehrere überlappende Schichten durchsichtigen Klebebands auf das Display des iPods bis das ganze Display bedeckt ist.
-
-
-
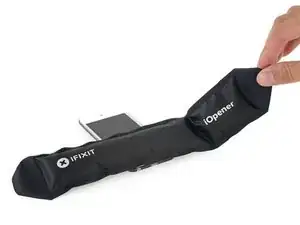
Verwende einen Fön oder bereite einen iOpener vor und lege diesen für ca. eine Minute auf das unteren Ende des iPods, damit sich der Kleber an dieser Stelle löst.
-
Das untere Ende des Displays (nahe dem Homebutton) ist mit starkem Kleber mit dem Gehäuse verklebt.
-
Möglicherweise musst du das Display während der folgenden Arbeitsschritte nochmals aufwärmen, damit der Kleber weiterhin warm und flexibel bleibt.
-
-
-
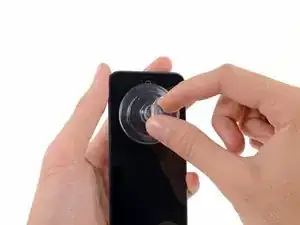
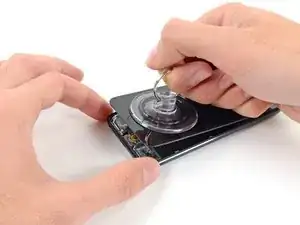
Setze einen Saugheber mittig auf das untere Ende des Displays, wobei sich der Rand des Saughebers über dem Homebutton befinden sollte.
-
Drücke den Saugheber gut auf das Display und achte darauf, dass dieser gut hält.
-
-
-
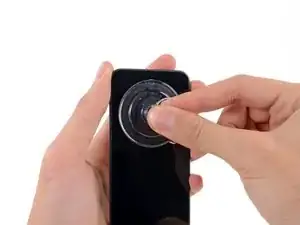
Drücke den iPod auf einen Tisch oder eine Bank.
-
Hebe den Saugheber an und ziehe diesen in Richtung oberes Ende des iPods. Sei geduldig und ziehe gleichmäßig fest, bis sich der Kleber löst und das Display sich von dem Gehäuse trennt.
-
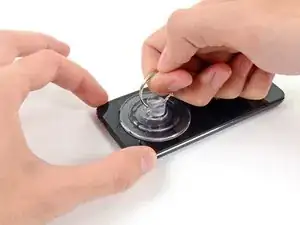
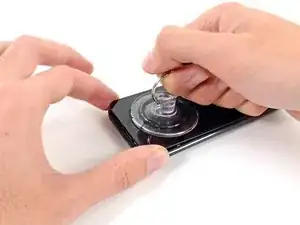
Möglicherweise musst du erneut etwas Hitze verwenden, um den Kleber lösen (vor allem in kälteren Regionen). Wenn der Kleber wie Käsefäden von einer Pizza herunterhängt, kannst du ein dünnes Rasiermesser verwenden, um den Kleber abzutrennen.
-
-
-
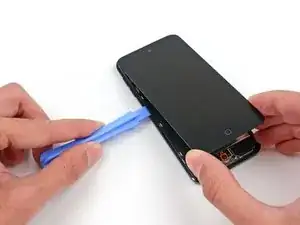
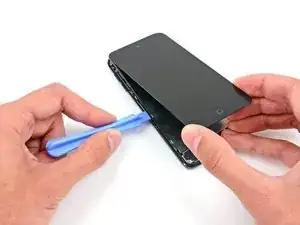
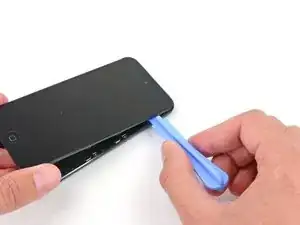
Fange oben rechts am Gerät an und setze dort ein Kunststoff-Öffnungswerkzeug in den Spalt zwischen Kunststoffrahmen und Aluminium-Rückgehäuse ein.
-
Schiebe das Werkzeug in diesem Spalt nach unten und löse den Rahmen vom Gehäuse.
-
-
-
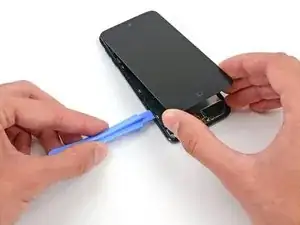
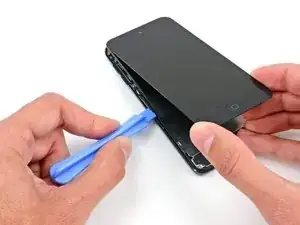
Setze das Kunststoff-Öffnungswerkzeug zwischen dem Rahmen und dem Rückgehäuse hinter dem ersten Clip ein.
-
Bewege das Werkzeug hin und her, um den Spalt hinter dem Clip zu vergrößern und ihn vom Rückgehäuse abzulösen.
-
Das wird den Clip eventuell nicht gleich lösen, wiederhole daher diesen Vorgang mehrfach bei jedem Clip.
-
-
-
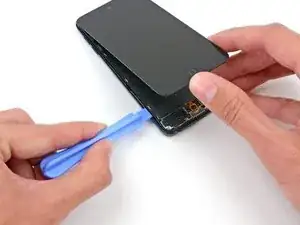
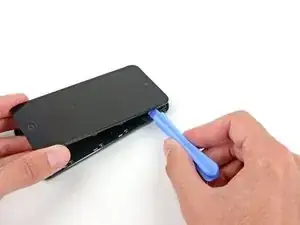
Gehe nun zur linken Seite des Gerätes über und setze ein Kunststoff-Öffnungswerkzeug nahe an der Oberseite in den Spalt zwischen dem Kunststoffrahmen und dem Aluminium-Rückgehäuse
-
Schiebe das Werkzeug in diesem Spalt nach unten, um den Rahmen vom Gehäuse zu lösen.
-
-
-
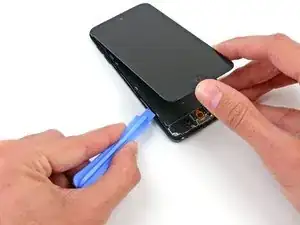
Setze das Kunststoff-Öffnungswerkzeug zwischen dem Rahmen und dem Rückgehäuse hinter dem ersten Clip ein.
-
Bewege das Werkzeug hin und her, um den Spalt hinter dem Clip zu vergrößern und ihn vom Rückgehäuse abzulösen.
-
-
-
Wiederhole diese Vorgehensweise bei den beiden nächsten Clips auf dieser Seite.
-
Setze das Kunststoff-Öffnungswerkzeug zwischen dem Rahmen und dem Rückgehäuse hinter dem zweiten Clip ein.
-
Bewege das Werkzeug hin und her, um den Clip vom Rückgehäuse abzulösen.
-
-
-
Benutze die gleiche Vorgehensweise und löse den letzten Clip, mit dem der Kunststoff-Rahmen am Rückgehäuse befestigt ist.
-
-
-
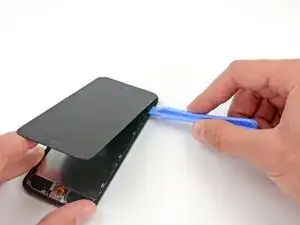
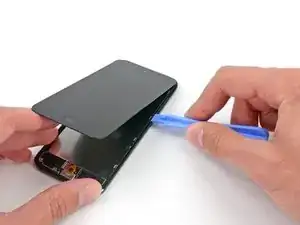
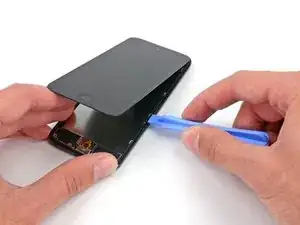
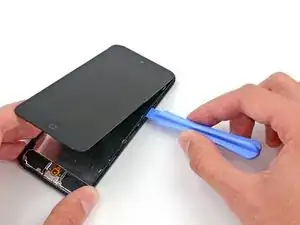
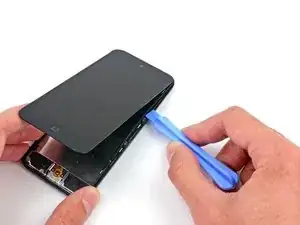
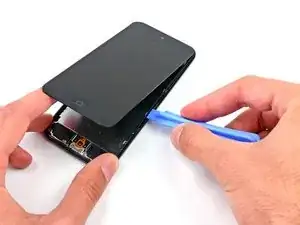
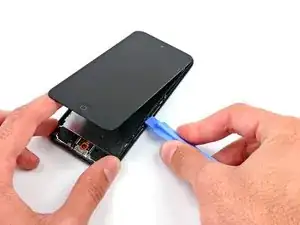
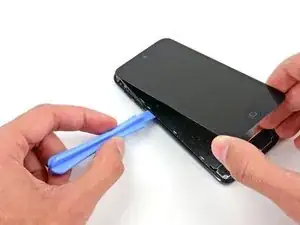
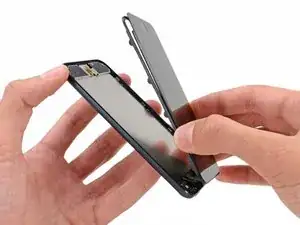
Setze das Kunststoff-Öffnungswerkzeug zwischen der Displayeinheit und dem Rückgehäuse nahe an der Oberseite des iPods ein.
-
Verdrehe das Öffnungswerkzeug leicht, um das Frontpanel vom Rückgehäuse abzuhebeln.
-
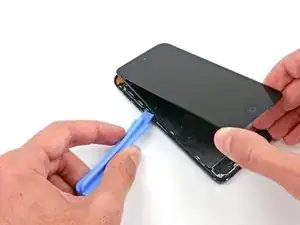
Löse die Displayeinheit vom iPod ab.
-
-
-
Wenn dein iPod eine schwarze Home Button Baugruppe hat, und nicht eine orangefarbene wie hier, kannst du diesen Schritt überspringen. Der Home Button ist nicht an der LCD-Platte befestigt und muss daher nicht entfernt werden, um diese Reparatur abzuschließen.
-
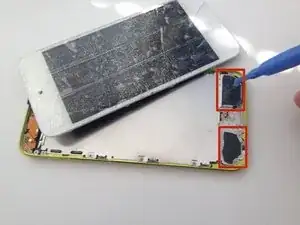
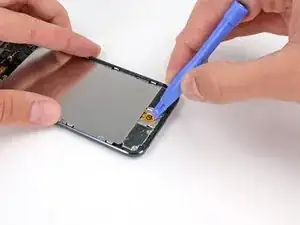
Benutze ein Kunststoff-Öffnungswerkzeug, um den Home Button Schalter von der LCD-Platte hochzuhebeln.
-
Eventuell musst du den Kleber auf der Rückseite des Home Buttons mithilfe eines Heißluftgebläses oder eines Föns etwas erwärmen, um ihn zu lösen. Benutze dazu immer die niedrigste Stufe.
-
-
-
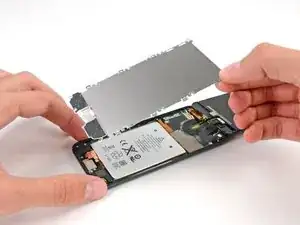
Entferne die folgenden Schrauben, mit denen die LCD-Platte am Rückgehäuse befestigt ist:
-
Zwei 1,2 mm Kreuzschlitzschrauben #000
-
Neun 1,6 mm Kreuzschlitzschrauben #000
-
Eine 2,3 mm Kreuzschlitzschraube #000
-


Um dein Gerät wieder zusammenzubauen, folge den Schritten dieser Anleitungen umgekehrter Reihenfolge.
Any repair guides for front camera?
ipod touch 5th generation front camera freezes then returns to rear camera. This happened after replacing battery. Any ideas? Tried hard reset & restoring. Nothing worked.
Libby -