Einleitung

Hast du dich jemals gefragt was ein Trackpad magisch macht? Diese Frage stellt sich ab jetzt nicht mehr. Sei dabei, wenn wir in den tiefen Abgrund von Apples Ozean aus magischen Peripheriegeräten abtauchen, um das mysteriöse Magic Trackpad zu erforschen.

Checke auch unser magisches Teardown Video auf Vimeo aus!

  1. OKmGSYS4qHZ1h1NL
    OKmGSYS4qHZ1h1NL
    aymTVRXpMKswPC1I
    GVN63EHHKauKCXIB
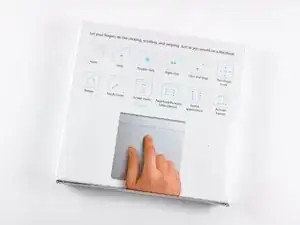
    • Das Magic Trackpad ist das erste eigenständige Desktop Trackpad, welches alle Gesten, inklusive Click, Scroll, Swipe und rotieren, alle per Fingertip steuerbar, unterstützt.

    • Voraussetzungen:

    • Mac Desktop oder Laptop.

    • Bluetoothverbindung.

    • Mac OS X 10.6.4 oder neuer.

    • Und natürlich, Akkus! (Das Apple Akkuladegerät ist nicht im Lieferumfang enthalten).

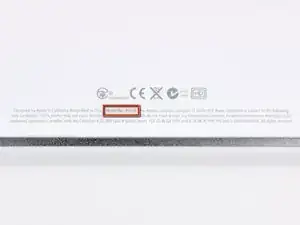
    • Wie Gerüchte bestätigten hat das Magic Trackpad die Modellnummer A1339.

  2. YImFsxtyZH5jNLCo
    YImFsxtyZH5jNLCo
    LRAJxDZ3qYXYF2eu
    UkuKYuHt5Q6uGKya
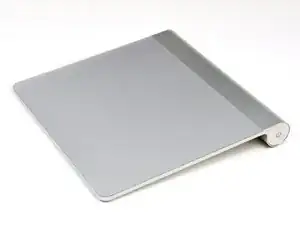
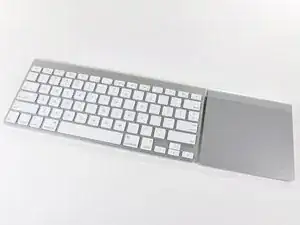
    • Das Magic Trackpad ist um 80 % größer, als das Trackpad in den aktuellen MacBook Pro Modellen.

    • Es hat dasselbe Aluminiumdesign wie sein kabelloses Gegenstück, die Tastatur. Dies erlaubt das optimale Zusammenwirken von Tippen und Gesten.

    • Lasst uns jedoch nicht die Hauptattraktionen wie z.B. die Dicke, die nur 0,5 mm beträgt, die kapazitive Touchfunktion und die abnutzungsarme Glasoberfläche, vergessen.

    • Das hört sich alles gut an, aber was liegt im Inneren des Gerätes?

  3. haRDIhncK3oj51ac
    haRDIhncK3oj51ac
    juaTluhcfiGCYsbV
    3AXLkooTM4aSS5GH
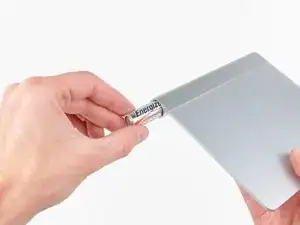
    • Der Ausbau der Batterien ist ziemlich selbsterklärend. Drehe die Batteriefachabdeckung und die beiden AA-Akkus rutschen direkt heraus.

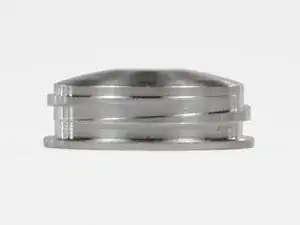
    • Schaue dir dieses Gewindeprofil an! Während diese Art der Gewinde die höchste mechanische Effizienz besitzt, kommt diese Art von Gewinde für die meisten Zwecke nicht zum Einsatz, weil die Herstellung sehr aufwändig ist.

    • Respekt, Apple, wegen der Details.

    The Apple Bluetooth keyboard also uses this same Square thread. So it makes sense for them to reuse the same technique they have already invested in. It's these details that makes being an Apple user so fun. Who ever gushes over a screw on a Dell?

    thecreative -

    the top can not be removed to get the batteries out, i think they leaked, because i see some white ... but can't removed it...

    robert -

    The square thread is not very practical for screwing back and finding the right alignment. Also the very thin border of the cap has not very much surface to be hold safely for screwing in.

    For undoing a corroded battery you might drill a tiny hole in the bottom and use a screw for wood like a corkscrew. If the second cell is also stuck then you may get hold on a longer drill and longer screw or use a sort of extension. My grandfather has brazed a drill into a piece of tube for such application.

    Newton2k1 -

  4. KA2CBSt1Pf1CfAfO
    KA2CBSt1Pf1CfAfO
    ONr4jSWBjikMalZG
    SUEESlFogCQGoH2h
    • Zeit, unsere Finger dreckig zu machen!

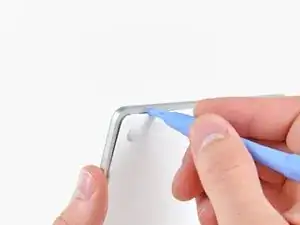
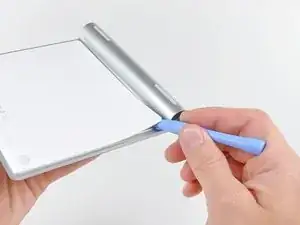
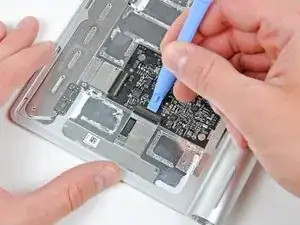
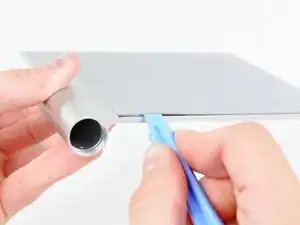
    • Benutze einen Öffnungswerkzeug aus Kunststoff, um die untere Abdeckung mit dem Klebstoff abzuhebeln. Der Klebstoff sichert die Abdeckung an der linken, rechten und oberen Kante.

    • Hebele nicht an der unteren Kante entlang. Hier liegen viele Befestigungsclips.

    • Nachdem du den Klebstoff getrennt hast, lässt sich die untere Abdeckung direkt abheben.

    Unlike the big photo of someone jamming a tool along the bottom edge, follow the written word and do not pry along the bottom edge.

    Mitchell -

    This step came in very handy when one of the little rubber mouse buttons slipped out of my trackpad. I pried up the back and slipped it right back in... Good as new!

    Doug -

    Watch out! By accident I managed to break my trackpad "glass" on the top. Do not try to bend the trackpad

    Hu Debniczek -

    Orientation is a funny thing. One persons ‘bottom’ is another person’s ‘top’ and - as in this case - can be confused more so after an item is lifted or picked up, like in the photos. Please be more specific in your descriptions, such as ‘the edge alongside the battery housing’ etc. Thanks!

    Jeremy -

    the best way I have found to remove back cover was to use a sucker.

    Fabio -

    This tool does it too. Though be prudent as it is an alloy and not the spudger thing. Link: https://www.harborfreight.com/home/hobby...

    Tech Nam -

  5. veMQepRFOnIWLSUs
    veMQepRFOnIWLSUs
    wGVltl1DCbxtqEtY
    A2pkmqALNvKAIGlg
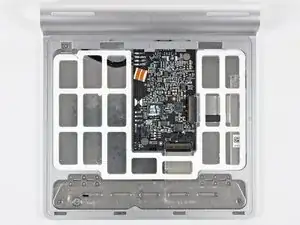
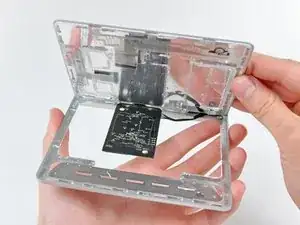
    • Und hier ist.. nicht wirklich viel zu sehen.

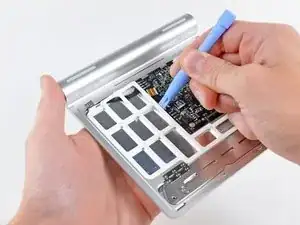
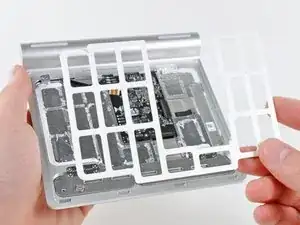
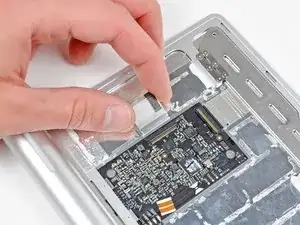
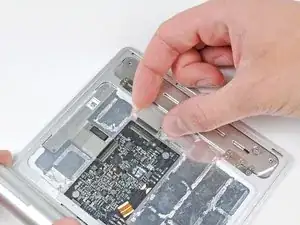
    • Nach viel vorsichtigem Hebeln kann der innere Abstandhalter vom Trackpad entfernt werden.

    • Dieser Abstandhalter schützt das Gerät vor dem höchst unwahrscheinlichen Fall, dass die untere Abdeckung so fest gegen die Hauptplatine gedrückt wird, dass die Hauptplatine Schaden nimmt.

  6. cam2WEnbm1JI6xuC
    cam2WEnbm1JI6xuC
    xUd2PayACCqGSAYR
    sXeoRamxrBVDxYlN
    • Trenne dann die beiden Flachkabel, die das kapazitive Touchpad mit der Hauptplatine verbinden, ab.

    • Diese Teile sind lächerlich dünn und kleben auf der Unterseite des Touch Pads fest. Wenn du sie entfernen willst, tue das mit Vorsicht.

  7. j2kyrAOMZgdZmQl2
    j2kyrAOMZgdZmQl2
    RGrST1ZNNM55BXKq
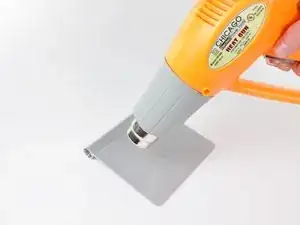
    • Wir haben an Apples neueren Produkten einen Trend entdeckt: Dünn und schön = nicht selbst reparierbar. Das Magic Trackpad ist hier keine Ausnahme.

    • Nachdem wir die Heißluftpistole verwendet haben, um den Klebstoff aufzuweichen, kann das Touch Pad vorsichtig vom Aluminiumgehäuse abgehebelt werden.

    • Das ist nichts für zart Besaitete. Viel Hitze, Plektren und Öffnungswerkzeuge aus Kunststoff waren notwendig, um dieses Gerät zu öffnen.

    Hi! I was wondering if you had a temperature scale to give us.

    There is lot of plastic on these pretty things, I'd prefer not to deform any part of it with too many heat.

    Maxime Gratiot -

  8. djlUAxiPD6KnpJtO
    djlUAxiPD6KnpJtO
    q3sjSFLxFBNBXvpn
    • Nachdem wir das Touch Pad vom Klebstoff, der es mit dem Chassis verbunden hat, befreit haben, konnte es einfach entfernt werden.

    • Das Magic Trackpad verwendet zur Auslösung des Mausklicks einen einzigartigen Mechanismus. Während du die obere Oberfläche des Trackpads nach unten drückst werden die zwei Gummistandfüße an der vorderen Kante nach oben auf die aufgehängte Platte und dort vorhandene Schraube (hier in Orange markiert), die am Gehäuse befestigt sind, gedrückt.

    • So wird der mechanische Maustaster (hier in Rot markiert) betätigt, woraufhin der charakteristische "Klick" entsteht.

    The buttons in my Magic Trackpad have an annoying tendency to stop clicking. I have to physically lift up the Magic Trackpad off the desk, place it on the desk again, and suddenly the buttons will click again. It is as if both buttons are physically stuck. But it seems odd that both buttons continually get physically stuck simultaneously.

    Brian Watrous -

  9. IoNZGkITXVX2F3aM
    IoNZGkITXVX2F3aM
    M1ZuPAMHtIiDUCCd
    • Um die Hauptplatine komplett zu entfernen musst du zunächst die vier Kabel entlöten, die zur Akkukonnektor/Status-LED führen.

    • Nachdem du zwei Kreuzschlitzschrauben entfernt hast kann die Hauptplatine vom Gehäuse getrennt werden.

    It looks like there are 4 more contact points, possibly for serial data transmission. Maybe they use these during debugging? They're labeled GND, UPRX, UPTX, and PP1V8. I have no idea what that last one is for...

    Maybe you guys should try hooking up something to them and post your results!

    WillyDavidK -

    I wonder if the power, GND, UPRX, UPTX points could be used to turn one of these into a wired USB trackpad...

    Jonathan Hendry -

    Jonathan Hendry! I have the same question and am trying to find out if we can skip the bluetooth process altogether. Do you know any more about these four pins?

    raymond klucik -

    I am also pretty interested in such a mod. I got a nonfuntional trackpad with a broken button and a lot of leaked battery fluid. I teared it apart, cleaned it and found the GND, UPRX, UPTX, and PP1V8 contact points. Since the electronics seem to be physically ok, i’d love to get it working again. sadly soldering the battery to the battery connection pins on the pcb wasn’t effective.

    Marius Rohne -

    I must change the wires that connect the board to power/LED status button , and i dont know what kind of wire to use

    And how can i dismantle the power/LED status button ?(it's already out of the battery tube)

    Hadi Motamedi -

  10. KRCORLvIsTe2Z41q
    KRCORLvIsTe2Z41q
    4NVrPGIFatVK1tH4
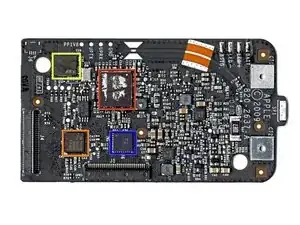
    • Im Herzen des Magic Trackpads gibts einen Broadcom BCM2042 für die Bluetoothverbindung.

    • Das ist derselbe Chip, der von der Magic Mouse für die Datenübertragung verwendet wird.

    • Wir haben einen Broadcom BCM5974 Touch Screen Controller Chip gefunden, der für die Multitouch-Funktionalität zuständig ist.

    • Das ist derselbe Chip, den du auch im iPhone, iPod Touch und im MacBook Air findest.

    • Ein SST 25WF020 bietet 2 Mbit seriellen Flashspeicher.

    • Das scheint ein TI CD3238 zu sein. Er wurde von Hearst identifiziert und scheint ein RS232 Leitungstreiber/Empfänger zu sein. Dieser war auch im originalen iPhone mit einem BCM5973A verbaut.

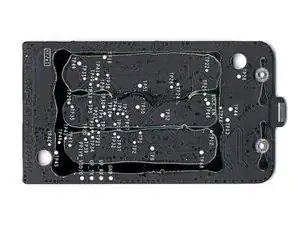
    • Auf der Rückseite der Hauptplatine befindet sich, außer Schwärze und Klebstoff, nichts.

    Is it possible to buy this piece only ?

    Pierre -

    If we paint the trackpad surface (I mean those pad that we touch all the time), does it affects the performance/sensitivity?

    Nur Fajar Rizki Suseno -

  11. AFh4Ww4viDQHH1Ow
    • Und hier liegt es: Das Trackpad mit den neun schwierig auseinanderzubauenden Einzelteilen.

    • Schaue regelmäßig auf die Teardown Seite, um die neuesten Gadgets von innen zu sehen.

Walter Galan

702835 Reputation

23 Kommentare

A great tear down. One question: Where is the bluetooth antenna? Is it just etched into the circuit board?

Doug -

Good question. It looks like the curved traces along the top of the board seen on step 10 could be the antenna, and they lead to a small metal pressure contact that mates into the aluminum chassis. My guess is that the chassis of the trackpad and/or those curved traces serve as the antenna.

Andrew Bookholt -

Step 3c, I was expecting to see an Apple-branded battery instead of a bunny-battery. When you get the Apple batteries, is there any reason to tear one of those apart to see if Apple is merely re-labeling someone else's battery or if they actually are building AA batteries?

plink53 -

Apple does not produce batteries, as much as they don’t produce LCD panels or SoC chips - at best, they design them or define specs, but mostly just source it from suppliers, such as Samsung (and SDI), LG and Desay. It makes no financial sense to be a one stop shop - and that’s why Trump’s Nevo-mercantilism is a sure fail. Sorry about the politics - it’s a *charged* topic lolz ;)

Idan -

Step 10, "2Mbit of serial flash memory" This means this device might be capable of storing/receiving data from the attached computer. It will be something we get to investigate to see what type of data it holds to see how it has to be treated in a government setting.

plink53 -

One of the things stored is the device name. When you rename the Magic Trackpad (System Preferences > Bluetooth), that name is saved on the trackpad. It comes up with the same name if you pair it with a different computer: a nice touch!

hoylen -

This is a cool post! I think that the Magic Trackpad is worth owning, and it makes it a pleasure to use the Mac. Unfortunately, it can bug out sometimes. Usually, this is because the battery is running low. It starts to happen after a few hours of continuous use, when the battery life approaches 50%. I wrote up a how-to guide on my site, Appledystopia, for troubleshooting and fixing it. There are some neat tips, like adding it as a Bluetooth Favorite, so if it loses the connection or you toggle the power, it will connect much faster.

Apple Dystopia -

I have just destroyed my trackpad by opening it as described. The top of the Bluetooth chip (Broadcom BCM2042) was firmly glued to the plastic cover and when I took the cover off, the chip was ripped off the logic board. Time to buy a new one.. :-(

apollinairemoreno -

My batteries leaked inside and to remove them I had to open the screw cap on the battery compartment and sharply hit the trackpad edge on the edge of a table (Preferably wood) with the compartment facing down. The batteries eventually came out and to clean ouit the residue, acid, white crud, I used the handyman's secret weapon, WD40. It works great now !

capone99 -

yes the chip is firmly mastic to the rear panel nice one apple !!!!! probably to stop you repairing it !!

Paul Harrison -

Beware. apple have seriously glued the back of the chip to the rear panel. Nice one apple. Destroyed my pad removing rear panel. But i guess thats what they wanted to achieve.

Paul Harrison -

how much current do these things draw?

michaelcasselli -

Is there a way to fix the button on the track pad if it fell and was scraped and jammed the button

Paul Hirschmugl -

I was given one with batteries, which had leaked. I followed ths guide closely, without damaging anything, but I was unable to detect 3v on the PCB. The power switch may have a small daughter board, which isn’t mentioned here. How do you remove the switch assy?

Mr McK -

Great presentation. Thank you. Mine also had very severe battery corrosion and I had to drill the 2 batteries out! Very messy but eventually successful. Then I was faced with fixing the switch. Please can you advise how you are supposed to remove the switch/LED pcb assembly without breaking it. Thanks

colbox -

Hello and Thanks for all Your tutorials ! I have a magic trackpad but it has fallen down and the glass up is broken. Is it possible to repair this part of the device? If it’s possible, where can I buy that parts of the item please? Thanks

couteau carole -

My trackpad has stopped responding to mouse clicks - what would you think is the most likely needed to replace to fix that?

Abel Iskim -

To remove the On-Off-Pushbutton on the Side you must remove the Rubber-Foot on the Pushbutton-Side, then with a Little Allen-Key (Imbusschlüssel 0,05) remove the little Ground-Screw, then with the same Allen-Key loosen the Grub-Screw (Madenschraube) under the Ground-Screw (These are the Grond-Connection for the Push-Button)

Next remove the lower Panel like in Step 4. and desolder the 4 Wires (Step 9) from the Logic Board.

Now you can press out the Push-Button with a Long Stick from the Batteries Side and repair.

Norbert

Norbert Back -

Very good info, thanks ! This should be added to the teardown which IMHO lack this last step ;-)

Col -

thanks for this instruction! I could repair my touchpad. (i.m.o. a very irritating thing I seldom use. I hate it)

R. Bruce -

Amazing teardown , plus I love how detailed it is, though a question I have is how then would I make my own wireless touchpad With a salvaged A315-53-50k5 laptop touchpad🤔

Tshegofatso Makhoba -

I thought mine died, but apparently it connected to my (sleeping) MacBook instead of the desktop. So I tapped on Forget device on the MacBook and it instantly connected to my desktop Mac. HTH.

Harry Solter -

this step by step tutorial works just fine. Improvisation, with a knurled watch repair tool does it! It contains a pointed ball tip and forked tip are another option for those who may want to save time, money and energy ordering the product in the guide above. Though, there may be some slight marking given most watch repair tools are steel or an alloy. There are always pros and cons to different tool types. Link: https://www.harborfreight.com/home/hobby...

Thanks!

Tech Nam -