Einleitung
-
-
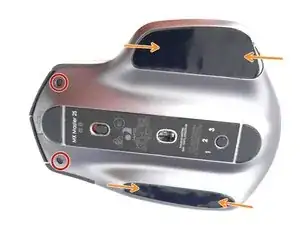
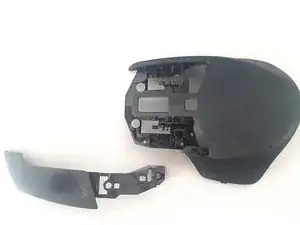
Stelle sicher, dass die Maus ausgeschaltet ist. Dann drehe sie um, um die sechs Schrauben auf der Unterseite zu erreichen.
-
Entferne die zwei T5-Schrauben an der Vorderseite.
-
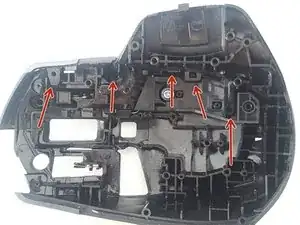
Und die vier Kreuzschlitzschrauben unter den Stickern, zwei auf jeder Seite.
-
-
-
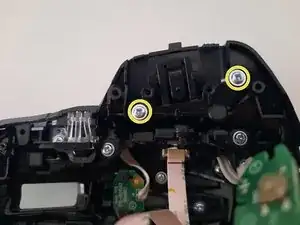
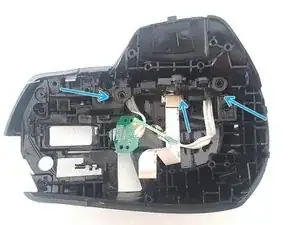
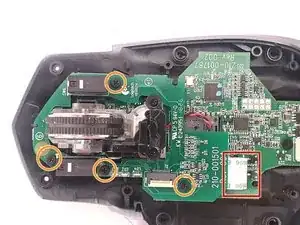
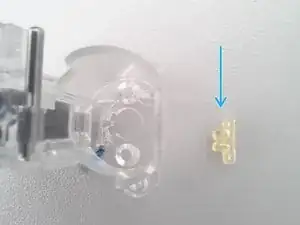
Entferne die schwarzen Schrauben von der Knopfplatte.
-
Löse zusätzlich die Schraube, die das obere Gehäuse und die Seitenabdeckung hält.
-
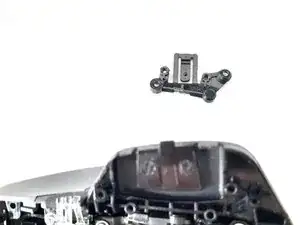
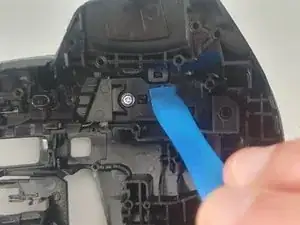
Entferne den Knopfmechanismus.
-
-
-
Löse die beiden Schrauben, die die Taste halten.
-
Beim Entfernen der Schrauben die Taste vorsichtig nach vorne ziehen.
-
-
-
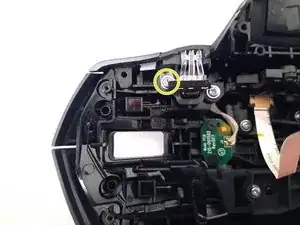
Entferne die schwarzen Schrauben von der Knopfplatte.
-
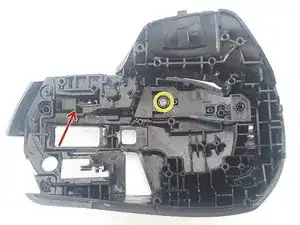
Entferne die Schraube, die den Knopf hält.
-
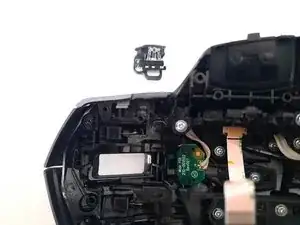
Entferne den Kunststoffknopf vorsichtig.
-
-
-
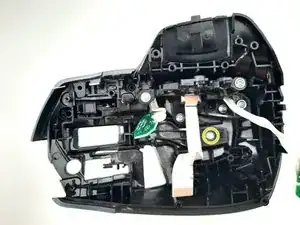
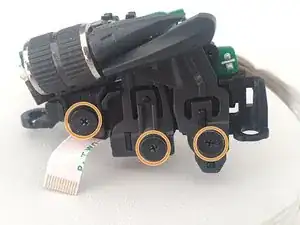
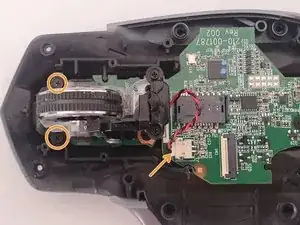
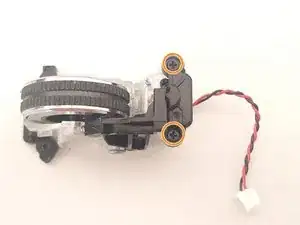
Entferne die Schrauben, die den Scrollmechanismus und zwei Seitentasten halten. Wir haben außerdem die meisten Schrauben der Rechtsklick-Taste entfernt.
-
Drücke vorsichtig von außen auf das Mausrad und hebe das Teil von innen hoch. Hierfür kannst du einen Plastikhebel verwenden, zwingend nötig ist das nicht. Lass dir Zeit und gib Acht, dass du die Kabel und den Mechanismus nicht beschädigst.
-
-
-
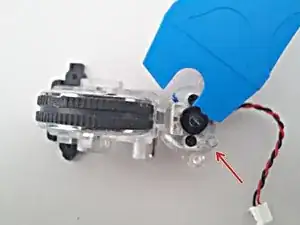
Entferne die Schrauben, die die Tasten und das Mausrad halten.
-
Mithilfe eines Hebels oder Plastikkeils kannst du das Mausrad weiter auseinanderbauen.
-
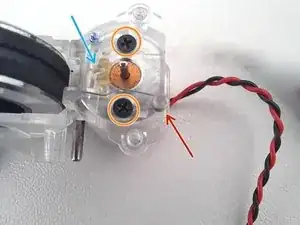
Entferne dann die Schraube, die die Leiterplatte hält.
-
-
-
Entferne die Schraube die die Taste hält.
-
Drücke vorsichtig den Knopf nach vorne, wenn du die Schraube entfernst.
-
-
-
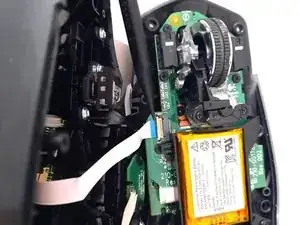
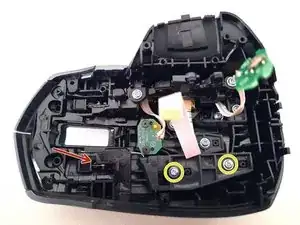
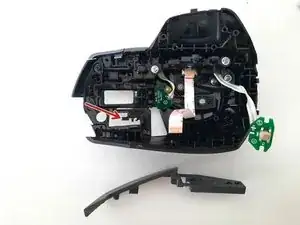
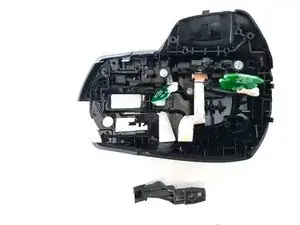
Löse die drei Schrauben des Akkuhalters und zieh den Stecker vom Motherboard.
-
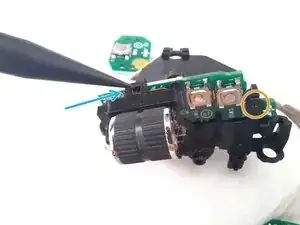
Entferne die Schrauben von einer der beiden Leiterplatten.
-
-
-
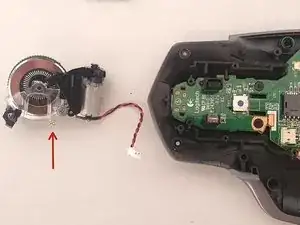
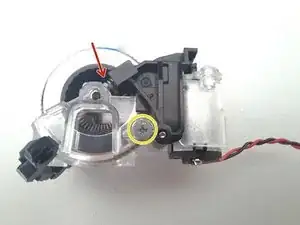
Entferne die zwei Schrauben, mit denen die Motorabdeckung befestigt ist, und entferne dann vorsichtig die Abdeckung.
-
Entferne die Schraube, die das Kunststoffteil hält. Hierfür musst du vorsichtig die kleine Feder entfernen, die es mit dem durchsichtigen Teil verbindet, auf dem das Mausrad sitzt.
-
Zerlege den Rotor- oder Motorkopf durch vorsichtiges Aufhebeln mit dem iFixit Öffnungswerkzeug oder einem anderen Gerät. Achte auf die genaue Stelle, an der er montiert war, denn er passt nur an dieser einen Position.
-
-
-
Entferne die beiden Schrauben, mit denen der Motor befestigt ist, er ist nun komplett lose.
-
-
-
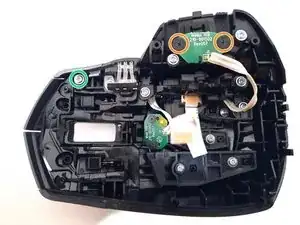
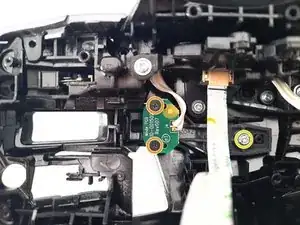
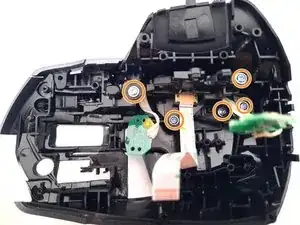
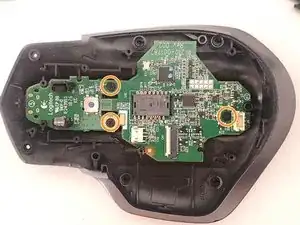
Löse die drei Schrauben, mit denen das Motherboard befestigt ist.
-
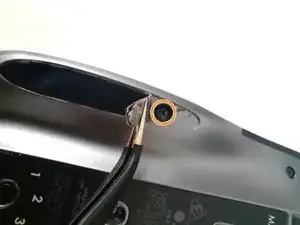
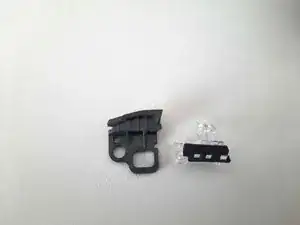
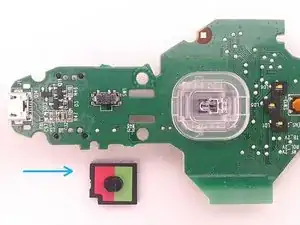
Entnehme die Einschalttaste (Power Button) und merke dir, in welcher Position er war.
-


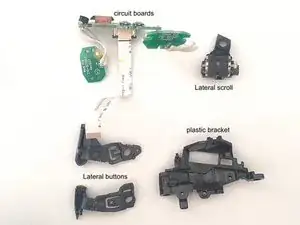


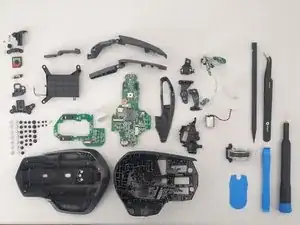
Um das Gerät wieder zusammenzubauen, folge den Anweisungen einfach in umgekehrter Reihenfolge.
39 Kommentare
I’m not sure I see any reason why anyone would to this and risk it being ruined. In other words, what are the potential benefits? Cleaning?
Yup cleaning that scroll wheel, and maybe even the switches if your really dirty. 15 min made my mouse new again
Hello!! It is a spectacular product, with its mistakes (nothing is perfect ;)). The fundamental objective of this guide is simply to answer the question How does it work, what is inside? It can serve as a guide to clean it (either both scrolls or the button contacts), change the battery, etc. Everything that can contribute to extend its useful life much more.
Read the name of the site
There is a very clear example of why one would need to do this. Certain 2s's, including my own, have a fundamental flaw. At some point, the pressing of the thumb-button, the one located below where the thumb is positioned, gradually results in the button getting stuck. For some reason, this results in the mouse movement not registering.
To resolve this issue, you can loosen a screw located button, but this can only be done when the mouse is disassembled, as it is contained within the mouse itself.
Yize H. -
My mouse was out of warranty, and had a manufacturing defect (bad soldering) which could be easily fixed. It gave the mouse a new chance.
Used this guide to clean my scroll wheel, took me 15 min, super easy. Didn’t need to remove anything, just opened it up and disconnected the 1 ribbon cable from the top half.
I used some clear tap folded on itself and ran it through the scroll wheel a few times. Only a bit of dust came out but the difference is crazy, its totally free spinning now.
Stop convincing yourself your scroll wheel is fine, open it up, clean it out and its even better.
Thanks iFixit
It’s actually a REALLY good mouse
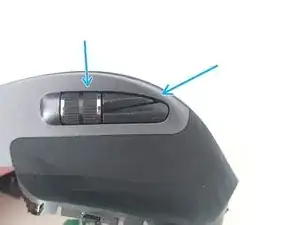
if the problem is that the scroll wheel spins freely, the button next to it controls that.
Rob Miller -
The stickers have two layers. To avoid de-laminating them, stick a sharp, flat object underneath the edge of the sticker and try to carefully pry up all of the material at once.
Maddison Hellstrom -
Yes, this is a great comment. I accidentally separated the two layers and I had to glue them back together on one side. You want to peel up both layers at once and not separate them, ideally.
David Richardson -