Einleitung

Diese Anleitung wurde von iFixit-Mitarbeiter:innen verfasst und ist keine offizielle Reparaturanleitung von Google. Hier erfährst du mehr über unsere Qualitätsstandards.

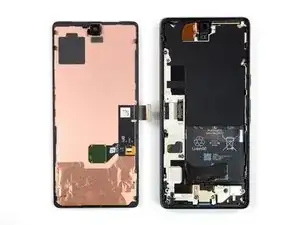
In dieser Anleitung wird gezeigt, wie du eine Google Pixel 7 Display Reparatur selbst durchführen kannst.

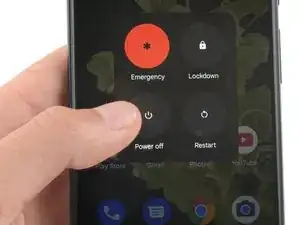
Bevor du dein Handy auseinanderbaust, achte darauf, dass der Akku auf unter 25 % entladen ist. Das verringert das Risiko, dass sich der Akku entzündet oder sogar explodiert, falls er während der Reparation versehentlich beschädigt wird. Wenn dein Akku aufgebläht ist, musst du entsprechende Vorsichtsmaßnahmen treffen.

Achtung: Das Pixel 7 enthält Laser der Klasse 1. Wenn du es auseinandernimmst, könntest du unsichtbarer Infrarotstrahlung ausgesetzt sein.

Dein Ersatzdisplay sollte mit einem neuen Fingerabdrucksensor ausgestattet sein. Wenn er nicht vorhanden ist, musst du den bisherigen Fingerabdrucksensor auf das neue Display übertragen und ihn danach neu kalibrieren, sonst funktioniert er nicht richtig.

Ob dein Pixel 7 nach der Reparatur noch wasserdicht ist, hängt davon ab, wie gut du es beim Zusammenbau versiegelst. Die IP-Zertifizierung wirst du jedoch verlieren.

Um die Reparatur abzuschließen, wirst du Ersatzklebestreifen benötigen.

  1. RH1hNR5DYvEMTNGX
    RH1hNR5DYvEMTNGX
    kUNSpM2wM3aEGX23
    • Entlade den Akku vor Beginn der Reparatur auf unter 25%. Ein geladener Akku kann sich entzünden, falls er beschädigt wird.

    • Schalte das Smartphone vollständig aus und entferne jegliche Kabel.

    i replaced my pixel 7 screen, I noticed that my proximity sensor is no longer working, I have tried to calibrate it using 3rd part apps and it ddisnt work,i tried using developer settings to switch the proximity sensor and i also updated my android version...all these didnt work

    Ian -

    If you can't power down your device because the screen is cracked (in my case, the AMOLED didn't light up at all anymore) and the touch is broken, you can also press power, volume up, and volume down all at the same time for 20-30 seconds. This will actually power off the phone, and not restart it (for that, you would hold the power button and volume up for a while).

    Max -

  2. uWsCCoGWV5JIrUns
    uWsCCoGWV5JIrUns
    qBuyTnEhoZIp4ycS
    rCPFaRmEDnGc6YSe
    • Das Display des Google Pixel 7 ist mit einem Sicherheitsrahmen verklebt und mit Rasten befestigt.

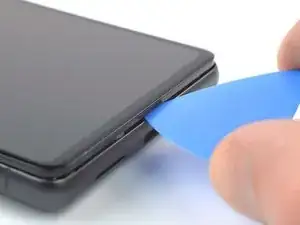
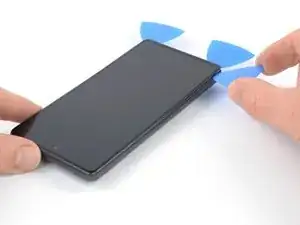
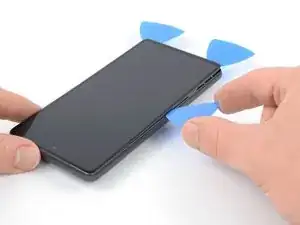
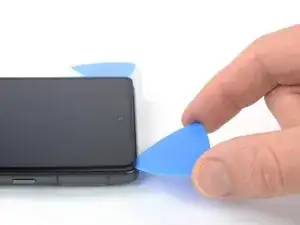
    • Achte darauf, dass du die Plektren unter den Sicherheitsmaßnahmen einsetzt, damit sich das Display nicht vom Schutzrahmen ablöst.

    • Setze die Spitze des Plektrums nicht tiefer als etwa 3,5 mm ein, damit die Bauteile im Inneren und die Rasten nicht beschädigt werden.

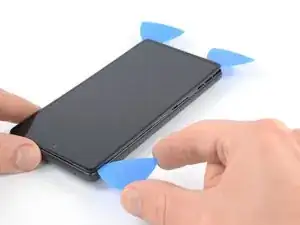
    • Rund um das Display gibt es verschiedene Rasten. Wenn dein Plektrum während des Displayausbaus stecken bleibt, hast du es wahrscheinlich zu tief in das Display eingeschoben.

    I accidentally removed the screen from the safety frame. Thankfully, this wasn't a big issue since my screen was broken anyway. In that case, you can still easily pop up the frame, and carefully remove the remaining glue with some pliers afterward.

    Max -

    "During the removal procedure, make sure to insert your opening picks in the right position"

    But then don't share what that position is, or even how to start.

    Great way to start the guide. Fills me with so much confidence in doing a $150 repair.

    Off tonyoutube to find someone who did q better job at a guide.

    HA Halleman -

    Hi there! I apologize that the instructions were not clear. I have updated the guide to clarify where the right place to insert the opening picks.

    Alex Diaz-Kokaisl -

  3. uNWQn4O2iyarfTwP
    uNWQn4O2iyarfTwP
    X4Mot1WmVF3dl5H6
    hwdBtFR1G1bs6cUM
    • Die nächsten drei Schritte beschreiben die Anti-Clamp, ein Tool, das das Öffnen von Geräten erleichtert. Wenn du dieses Werkzeug nicht verwendest, gehe drei Schritte nach unten für eine Alternativmethode.

    • Eine vollständige Anleitung zur Benutzung der Anti-Clamp findest du hier.

    • Falls das Display beschädigt ist, kannst du es mit einer Schicht durchsichtigem Klebeband ankleben, damit der Saugheber besser haftet.

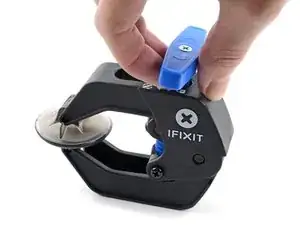
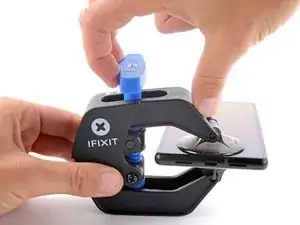
    • Ziehe den blauen Griff nach hinten, um die Arme der Anti-Clamp zu öffnen.

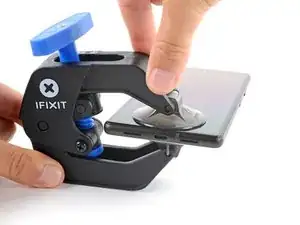
    • Schiebe die Arme entweder über die linke oder rechte Kante deines Smartphones.

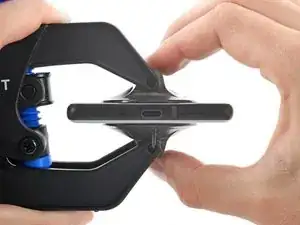
    • Positioniere die Saugheber nahe der unteren Kante deines Handys, einen auf der Vorderseite, den anderen auf der Rückseite.

    • Drücke die Saugheber zusammen, um sie auf dem Display zu befestigen.

    • Falls die Oberfläche des Handys für die Saugheber zu rutschig ist, um gut zu haften, kannst du zuvor eine Klebeband-Schicht anbringen, um eine griffigere Oberfläche zu erzeugen.

  4. C5UOdfJGyBNrPmud
    C5UOdfJGyBNrPmud
    NT1pkIvVebv5WAbQ
    5q3uaImPG2XtyBUP
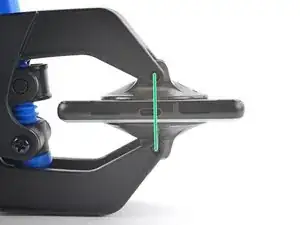
    • Drücke den blauen Hebel nach vorne, um die Arme zu arretieren.

    • Drehe den Hebel im Uhrzeigersinn um 360 Grad oder so weit, bis die Saugheber anfangen sich zu dehnen.

    • Stelle sicher, dass die Saugheber weiterhin korrekt zueinander ausgerichtet sind. Falls sie zu rutschen beginnen, löse sie leicht ab und richte sie wieder korrekt aus.

  5. iu5TEcPWZeWgMueB
    iu5TEcPWZeWgMueB
    iklY4LILrc5nWFlx
    mI2NZfhUYJ3QJbYH
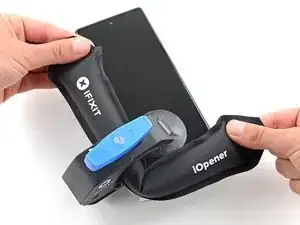
    • Erhitze einen iOpener und schiebe ihn durch die Arme der Anti-Clamp.

    • Hierzu kannst du auch einen Haartrockner oder eine Heissluftpistole verwenden - jedoch kann starke Hitze das Display und/oder den Akku beschädigen, daher empfiehlt es sich, mit Vorsicht vorzugehen.

    • Falte den iOpener, sodass er auf der unteren Kante des Smartphones liegt.

    • Warte eine Minute, sodass sich der Kleber durch die Hitze aufweichen kann, und sich eine kleine Lücke bildet.

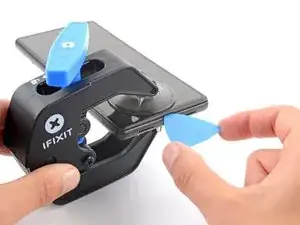
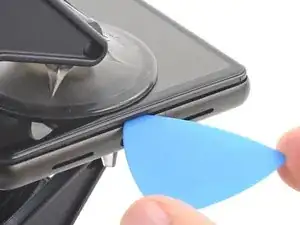
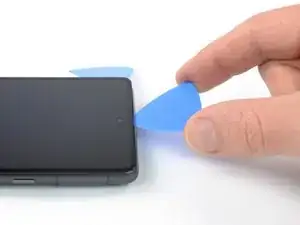
    • Schiebe ein Plektrum unter den Displayrahmen, sobald die Anti-Clamp eine ausreichend große Lücke erzeugt hat.

    • Falls die Anti-Clamp keine ausreichend große Lücke erzeugt, erhitze das Display weiterhin und drehe den Hebel noch einmal eine halbe Umdrehung im Uhrzeigersinn.

    • Drehe den Hebel jeweils nicht mehr als eine halbe Umdrehung (180 Grad) auf einmal, und warte anschliessend eine Minute, bevor du weitermachst. Gib der Anti-Clamp ausreichend Zeit, ihre Arbeit zu erledigen.

    • Überspringe die nächsten zwei Schritte.

  6. 6cKgLNhBJSeuArNm
    • Lege einen erwärmten iOpener zum Lösen des Klebers mindestens drei Minuten lang auf das Display.

    • Du kannst auch einen Haartrockner, ein Heißluftgebläse oder eine Heizplatte verwenden, achte aber darauf, dass du das Gerät nicht zu stark erwärmst. Die Kante sollte so heiß sein, dass du sie grade nicht mehr anfassen kannst.

    This guide is a bit all over the place. Most of the previous pictures show the iOpener being placed on the left side first (with the device having the camera facing upwards)

    However this pictures shows placing the iOpener on the right side. Does it matter? Is there a best practice side to pry first?

    Zachary (Zach) -

    I left my iOpener on the phone for a out 5 or more minutes, but the bag should have been hotter I think (I put it in the microwave about 35 seconds, 30 is recommended starting amount). I highly suggest making sure the phone is well heated before taking the screen off because I think that is the only way to make the adhesive easier to get off. I spent probably 30-45 minutes just scraping off adhesive with the tweezers.

    Samuel Y -

  7. CexARCSAqGYQbmha
    CexARCSAqGYQbmha
    4gF4DCWXWHNS2aGI
    gfaVVfZV1RGTbMLx
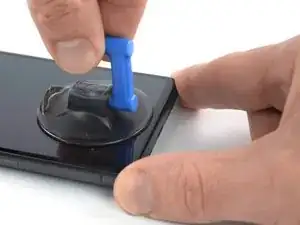
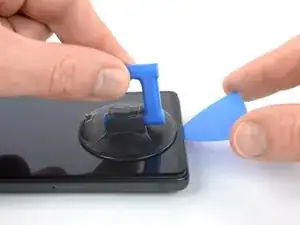
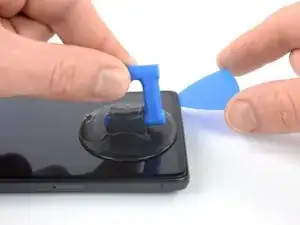
    • Wenn sich das Display warm anfühlt, dann bringe einen Saugheber am unteren Displayrand an.

    • Wenn das Displayglas stark zerbrochen ist, dann sorgt eine Schicht von durchsichtigem Klebeband dafür, dass der Saugheber besser haftet. Du kannst auch sehr starkes Paketband anstelle des Saughebers verwenden. Wenn gar nichts davon geht, dann kannst du den Saugheber mit Sekundenkleber festkleben.

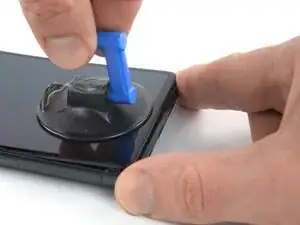
    • Hebe das Display zusammen mit dem Schutzrahmen mithilfe des Saughebers hoch, bis ein kleiner Spalt zwischen dem Display und dem restlichen Smartphone entstanden ist.

    • Je nach Alter deines Smartphones kann dies etwas schwer gehen. Wenn das so ist, dann erwärme die Unterkante nochmals und probiere es erneut.

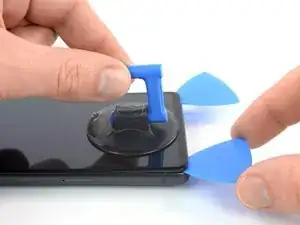
    • Setze ein Plektrum in den Spalt ein.

    If you're having trouble getting the first pick in, try a different hand position than what is shown. Grip the suction cup's handle with your index finger, and keep your thumb and middle finger on either side of the screen. Choose a forgiving surface underneath in case you slip. Then hold firmly and keep it stable (no need to really push down). Just be prying it open deliberately and evenly. Then take your pick and use gentle prodding, experimenting with your angle and pressure, feel around. That should be all you need to get in.

    Orin Zebest -

  8. IBUeZvgemYHWImZc
    IBUeZvgemYHWImZc
    2SO1E2gi6C2FiaZI
    • Damit dein Handy nicht beschädigt wird, darfst du das Plektrum höchstens 2,5 mm weit einführen, wenn du den Displaykleber durchtrennst. Sei besonders vorsichtig in den folgenden Bereichen:

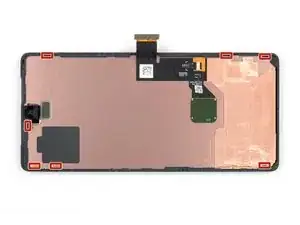
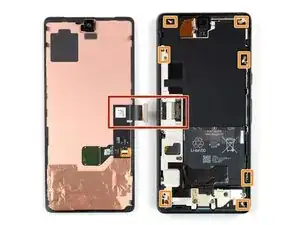
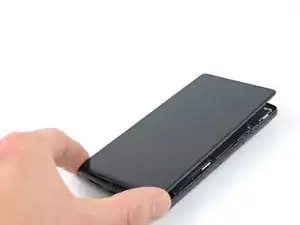
    • Das Displaykabel befindet sich etwa auf halber Höhe (ein wenig darunter) an der linken Kante des Handys. Achte darauf, das Kabel nicht zu zerreißen.

    • Rund um die Einfassung des Handys gibt es mehrere Federkontakte. Achte darauf, dass du sie nicht verbiegst.

  9. wtdv5UrUMow2CECH
    wtdv5UrUMow2CECH
    djiNoNgaVURRqAnE
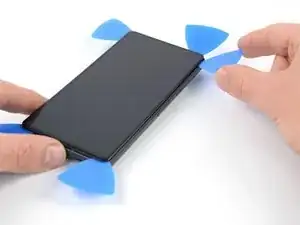
    • Schiebe das Plektrum zum Auftrennen des Klebers zur unteren rechten Displayecke hin.

    • Lasse das Plektrum stecken, damit sich der Kleber nicht wieder verbinden kann.

  10. BvVyMHlKdFsfT4jJ
    BvVyMHlKdFsfT4jJ
    STqP6jEultQQM41x
    • Setze ein zweites Plektrum an der Unterkante ein und schiebe es zum Auftrennen des Klebers zur unteren linken Displayecke hin.

    • Lasse das Plektrum stecken, damit sich der Kleber nicht wieder verbinden kann.

  11. 3TahkFe4ry6RCiY4
    3TahkFe4ry6RCiY4
    3JU6OqcJvHWxqoST
    6ZPHWVqkfEhNxfpF
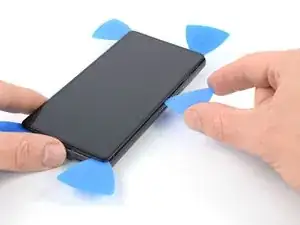
    • Setze ein drittes Plektrum unter die linke untere Displayecke ein.

    • Schiebe das Plektrum zum Auftrennen des Klebers und Lösen der Rasten an der linken Displaykante entlang .

    • Lasse das Plektrum in der linken oberen Displayecke stecken, damit sich der Kleber nicht wieder verbinden kann.

  12. RAqKHAsrl3xCRUU1
    RAqKHAsrl3xCRUU1
    snvx1NYmrDPfUDaX
    cnPPFVoxMmq3nELB
    • Wenn der Kleber zu zäh zum Aufschneiden geworden ist, dann ist er wahrscheinlich zu sehr abgekühlt. Erwärme ihn 1 - 2 Minuten lang mit einem iOpener oder einem Heißluftgebläse.

    • In der Nähe der Frontkamera darfst du das Plektrum nur mit der Spitze (2 - 3 mm tief) zum Aufschneiden verwenden, damit die Kamera nicht beschädigt oder verunreinigt wird.

    • Setze ein viertes Plektrum in die obere linke Ecke des Displays ein.

    • Schiebe das Plektrum zum Auftrennen des Klebers an der Oberkante entlang.

    • Lasse das Plektrum in der oberen rechten Ecke stecken, damit sich der Kleber nicht wieder verbinden kann.

    This is the only slice that makes me nervous. Never had a problem, but yeah... extra care because of the camera.

    Orin Zebest -

  13. PnfIw3f25Eqr1XHF
    PnfIw3f25Eqr1XHF
    KenvqZiSWYaywVKu
    TZuqyojhZfgKo23H
    • Setze ein fünftes Plektrum in die rechte Displaykante ein. Schiebe es unter der rechten Kante zum Auftrennen des restlichen Klebers und Lösen der Rasten an der rechten Kante entlang.

    • Entferne das Display noch nicht ganz, es ist immer noch über ein Flachbandkabel am Gerät angeschlossen.

  14. rhQqo5C35FvoYK3U
    rhQqo5C35FvoYK3U
    IrVMIJexBS6bDSeP
    jLlFZYjxMwL21C2X
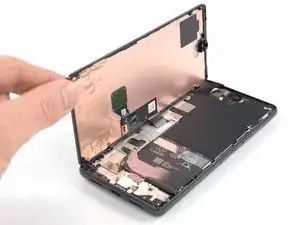
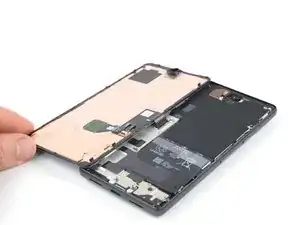
    • Klappe das Smartphone behutsam wie ein Buch von der rechten Displayseite her auf.

    • Verdrehe das Display nicht und bewege es nicht zu weit vom Rahmen weg, damit die Kabel nicht beschädigt oder zu sehr belastet werden.

    • Lege das Display mit dem Bildschirm nach unten parallel zum Rahmen ab, bevor du fortfährst.

    The adhesive still sticking to the screen might trip you up... don't let it pull the screen in weird ways. Just pick that stuff off and the screen sits perfectly next to the phone, as pictured.

    Orin Zebest -

  15. PSmtyE4SOWOdAwOu
    PSmtyE4SOWOdAwOu
    EP6lSfkEvCqupEtr
    • Die Displaykabelhalterung sitzt sehr fest. Es braucht etwas Kraft, um sie zu lösen.

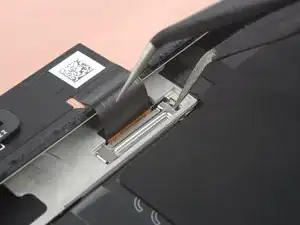
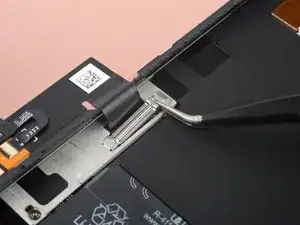
    • Setze eine Pinzette mit einer Spitze in die Öffnung am oberen Ende der Displaykabelhalterung ein.

    • Drücke die Pinzette nach innen, heble nach oben und löse die Halterung ab.

    The way this piece is wedged in there can be a difficult to imagine, so you may need to apply force at a different angle than you expect. I bent mine a few times, but just bent it back into shape with no issue.

    Orin Zebest -

    This was a pain to get out! Felt like I was going to rip the whole cable out. But it popped out eventually.

    Alex Thengvall -

    I found this much easier to remove than put it back.

    If you insert the tweezers exactly as in the picture and push like suggested, it will come out.

    Andrea Caltroni -

  16. WKPNiJHhVHnhCorC
    WKPNiJHhVHnhCorC
    LhAcZy62xFSngm3n
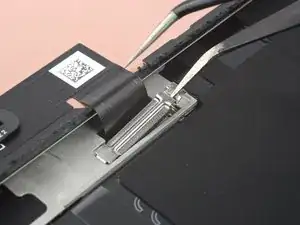
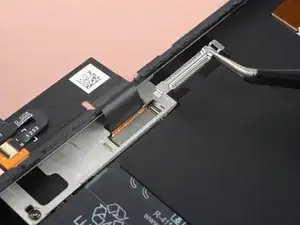
    • Ziehe die Displaykabelhalterung mit einer Pinzette unter dem Mittelrahmen heraus in Richtung der Kameras und entferne sie.

    I forgot to replace this the first time. It's not a dealbreaker (phone works fine without it), but if you ever open your phone again you must be super-extra careful -- nothing is securing the connection.

    Orin Zebest -

    I bent the top of the bracket backwards by accident, but it released easier this way. Then I just bent the bracket back before putting it back.

    Also, make sure you add the adhesive before plugging the new screen in.

    Samuel Y -

  17. jRnnMxxSKtAwg2aW
    jRnnMxxSKtAwg2aW
    HaPX5khLMl4bDRNB
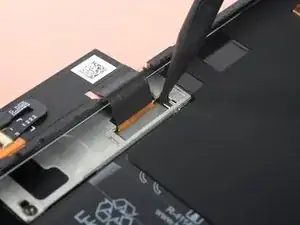
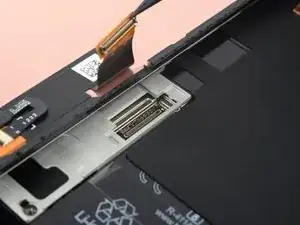
    • Heble den Displaykabelstecker mit einem Spudger senkrecht nach oben aus seinem Anschluss heraus und löse ihn ab.

    • Um Steckverbinder wie diesen wieder anzubringen, bringe ihn in die richtige Position und drücke dann vorsichtig auf eine Seite, bis er dort einrastet. Wiederhole das auf der anderen Seite. Drücke dabei nicht auf die Mitte. Wenn der Steckverbinder nicht in der richtigen Position ist, können die Pins verbogen werden, was zu irreparablen Schäden führt.

    Getting the press connector aligned properly is a very fiddly task and impossible without a light touch and several tries. My only advice is to take a break if you get frustrated. There's no 'click' or anything to help you notice that you've got it right. But when you do, it'll just... fit. And you'll probably think, "wait I did it? oh, not as hard as it sounded. just took awhile."

    Orin Zebest -

    Beware! I tried using the forceps instead of my finger and I ended up tearing into the ribbon cable. So be careful and use your finger if possible. I wouldn't use a sharp tool like I did. There are a couple Youtube videos that probably can help if you search "pixel 7 screen replacement". Sadly I didn't do that first.

    Alex Thengvall -

    Be careful not to hit any circuitry or jumpers in the process. They are so tiny that I did and now sound doesn't work on my bottom speaker. There's a YouTube video on this topic. Take your time!

    Louie Popov -

    Very easy to pull out but tricky to put back in place because it's difficult to align it with the socket that you barely see.

    Use the iFixit Opening Tool and press gently on one side (left worked for me) until you don't see it moving anymore. There is no clear click when it's in place.

    Andrea Caltroni -

    As others mentioned, reattaching the connector is fiddly! For me, it was the most difficult part of the entire battery replacement project. Take your time and use a magnifying glass if necessary.

    Sparky1991 -

    The blue pick worked better than the tweezers & the bracket came out easy after watching a video, way more easier. SMH

    Stephen -

    The blue pick worked better than the tweezers & the bracket & the flex cable with the spudger; I watched a video & it saved me from buying a new screen or bracket, edited*

    Stephen -

  18. YK4OACsKc5awwAm5
    • Die Display-Rückseite des Pixels ist sehr empfindlich. Ein kleiner Kratzer oder eine Delle reichen aus, um das Display zu beschädigen.

    • Folgendermaßen kannst du Schäden an deinem Display oder dem Ersatz-Display vermeiden:

    • Fasse das Display nur an den Kanten an.

    • Wenn du das Display auf deine Arbeitsfläche ablegst, achte darauf, dass nichts den unteren Bereich des Displays berührt. Lege das Display auf ein weiches, fusselfreies Tuch ab.

  19. XYNCjJjvlRE5kfxZ
    XYNCjJjvlRE5kfxZ
    q5ECwAhlHHcqfV4W
    KGZuYMRThRxLxNJs
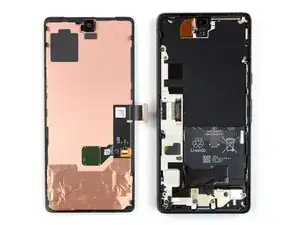
    • Entferne das Display.

    • Beim Zusammenbau:

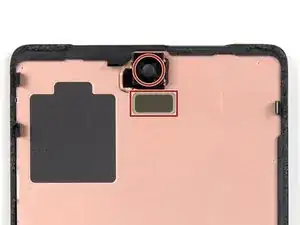
    • Wenn du das Display ausgetauscht hast, dann kontrolliere die Öffnung für die Frontkamera und den Ausschnitt für den Sensor. Entferne alle noch vorhandenen Schutzfolien.

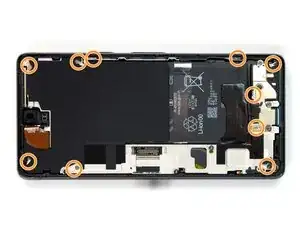
    • Kontrolliere den Rahmen auf verformte, nach oben ragende Erdungsfedern. Diese Erdungsfedern dürfen nur in einem flachen Winkel nach oben stehen, anderenfalls kann das Display beschädigt werden. Biege eventuell verformten Federn behutsam mit den Fingern zurück.

    • Vergiss nicht die Halterung des Displaykabels zu befestigen.

    • Jetzt ist eine gute Gelegenheit, um das Smartphone ausgiebig zu testen, bevor du es wieder zuklebst. Schließe das Display zeitweise an, schalte das Gerät ein und überprüfe, ob alles funktioniert. Bevor du weiterarbeitest, musst du das Smartphone wieder ausschalten und das Display abtrennen.

    • Wenn du beim Zusammenbau fertig zugeschnittene Klebestreifen verwendest, dann folge dieser Anleitung. Wenn du beim Zusammenbau vorgestanzte Klebefolien verwendest, dann folge dieser Anleitung.

    • Wenn du ein neues Display eingebaut hast, führe eine Kalibrierung deines Fingerabdrucksensors durch.

    It was much easier to remove the adhesive after the phone cooled down completely.

    Lacey E -

    That's super strange. There's certainly a middle ground of not being too hot, but I've done this job 3 times now, I can really tell if it needs a little more warmth.

    Orin Zebest -

    IMO this really needs some kind of jig to align the new adhesive. It is nigh on impossible IMO to align properly, and you'll end up with bunched-up sections of stretched adhesive all over the place. It is beyond frustrating, after taking ones time and being so careful.

    It seems that it should be possible to cut the plastic backing that the new adhesive comes on into a shape that would fit in the phone, and index it on some of the existing pins by making accurate holes. That might at least make it possible to get all of the new adhesive in a useful place.

    Otherwise pretty good. Thank you to the people who have taken the time to put this together.

    David B -

    How to unlock the fingerprint sensor ?

    Why is there no adhesive with the display.

    It's not very consumer friendly if you need to buy everything seperate

    paul E -

    Was there a solution to unlocking the fingerprint sensor? I have the same issue.

    Marian -

    Before putting the new screen, remove the black and not so visible black plastic frame under the surrounding scotch. Otherwise you cannot put the new screen, this black and surrounding plastic is also on the new screen with it's claws.

    Ratinox -

    I would have liked to know I had to put the adhesive card before connecting the new screen (which took me 15mn just to connect the wire to the motherboard) because the flat cable makes it very hard to do so...

    Otherwise, tutorial is good, although it misses the fingerprint sensor recalibration as said in other comments

    Gael Rottier -

    I agree, i wish there was an adhesive tutorial, I messed mine up and lost half the adhesive :(

    William Best -

    When testing the new screen, it DID work previously. Now it does not. What could be wrong? Did I break a pin? How can I troubleshoot further?

    David Gannaway -

    That display cable was tricky wish I had a guide I found a dependable way in the end by moving the screen to the right of the port. but wow that was frustrating. Also wish I had realized I didn't remove the digitizer and only removed the adhesive before wasting the only adhesive I ordered for the new screen.

    Simon B -

Abschluss

Vergleiche das Ersatzteil mit dem Originalteil. Eventuell musst du fehlende Teile übertragen oder Schutzfolien vom Neuteil abziehen, bevor du es einbauen kannst.

Um dein Gerät wieder zusammenzubauen, folge den Schritten dieser Anleitung in umgekehrter Reihenfolge.

Das Gerät ist mit einem eingebauten Diagnosetest ausgestattet. Hier siehst du, wie du das Pixel Diagnostic Tool starten kannst.

Entsorge deinen Elektromüll sachgerecht.

Hat die Reparatur nicht ganz geklappt? Versuche es mit ein paar grundständigen Lösungen, ansonsten findest du in unserem Forum Hilfe bei der Fehlersuche.

Dominik Schnabelrauch

Mitglied seit: 23/11/16

235812 Reputation

50 Kommentare

This guide was excellent. And the most tedious bit of the repair was removing the remaining adhesive before installing the new screen. Very easy repair for anyone with some patience.

If the fingerprint unlock does not work after this, you may get a message on the lock screen indicating that you need to go to a google website to fix it.

What you actually need to do is:

o Install the Google USB driver for Windows from here: https://developer.android.com/studio/run...

o Put your phone in fast-boot (turn off, then turn on while holding volume down)

o Connect the Pixel to your PC

o Using chrome, visit this site, which will reset the fingerprint reader: https://pixelrepair.withgoogle.com/udfps

I had to reboot twice after this to actually get it to work, but it's all good now.

bradappel -

Thank you for this. Since the message on the phone is unhelpfull, this info should really be added to the manual.

Vincent van Leijden -

Thank you! No driver needed on a Mac (as it says at the first link.) Just go to the withgoogle pixelrepair page and follow the instructions. Worked on the first restart for me.

Chris K. -

Ohhh thank you so much for this, I was about to give up on the fingerprint reader ha

Joshua Chandler -

The above instructions are not complete. These are the full instructions that work for me:

1.Before you turn your phone off, go to the developer options and enable USB debugging.

Go to: Settings, About phone then tap Build number 7 times.

2. Go here Get the Google USB Driver | Android Developers and download the google USB zip file (this is for windows BTW)

3. Unzip however you want it

4. Open the folder usb_Driver and rightclick "android_winusb" and install

5. To make sure it installed, connect your pixel (with USB debugging still enabled) to your PC and open "device manager". You should see "Android Devices > Android Composite ADB Interface".

6. Disconnect pixel from PC

7. Go here Google Fingerprint Calibration website and follow the instructions.

https://pixelrepair.withgoogle.com/udfps

Filip Lou -

Thank you so much. This has worked for me :)

Robot Dog -

Thank you for the extra help. Bradapple pointed me in the right direction and you guided me in for the landing... so to speak. 😏

Already Sanchez -

I did all that but when connecting my computer the monitor shows "Unsupported device

To use this tool, your device must be a Pixel 3, 3 XL, 3a, 3a XL, 4, 4 XL, 4a, 4a (5G), 5, 5a, 6, 6 Pro, 6a, 7, 7 Pro, 7a, Tablet." That is very confusing because I have the Google Pixel 7.

Cedric Willi -

OMG thank you so much for this information, i've spent such a long time on various forums and threads, i even talked to google support they said factory reset would work.. no one mentioned the developer options and enabling USB debugging. Thanks again this finally worked!

Mitchell Rogers -

thanks so much. I think these steps should have been included in the guide. it doesn't seem like the system lets you do a straight swap without it (which makes sense given it is an important security feature)

Jesse Kohn -

Can I use a used screen and still have fingerprint scanning work or can it only be calibrated once?

Joseph Miller -

I found attaching the press cable the most difficult, it eventually went in after a few hours trying on and off, but I couldn't tell you why. Once that was done everything was easy

Sam Rutland -

Yes i agree, this was fiddly and I was very worried about breaking pins.. though for me it was 10mins, not hours :(

Jesse Kohn -

I actually cut the old one off the damaged screen to see how it fits mechanically (i.e. does is 'click' inot position or is the connection only secured when the retainer clip is reinserted. It turns out that a little 'click' inot position is needed. David G

David Griffiths -

Really good guide. Had some trouble with the removal of the display cable branket and the adhesive, but after an hour in the end, the screen turnee on. Also had to reinstall the fingerscanner….

Steffan Juel Højgaard Jensen -

guys my screen turn on but the touchscreen doesnt work, can anyone tell what do wrong?

ewdor gutierrez -

I have the same problem, did you solve it somehow?

Борис Міндер -

How to order the parts if im outside of shipping region, im in indonesia

Kristian Harjanto Abarja -

Great quality kit. I underestimated how fiddly cleaning off the old adhesive would be but otherwise this was straightforward and there were some really good pointers for things to watch out along the way. Glad I took the time to do this as now my screen is perfectly readable again. A couple of lessons learnt from me: 1/ impressed at how quickly the microwave heat pack gets super hot. one application was enough for me to get the screen off. 2/ The clips along the outside edges are very fragile.. be very careful when cleaning out the adhesive. 3/ Speaking of adhesive cleaning/removal.. I understimated this step. It took a looong time. Take breaks if getting tired/frustrated. Probably spent over an hour just on this step. Maybe more heat would have helped, but I was worried about damaging components 3/ As others have mentioned there are issues with the fingerprint sensor post install, the instructions above worked perfectly for me re/ windows driver, developer mode, google software update tool.

Jesse Kohn -

I followed this guide to open the phone and try to fix my broken glass: not screen, glass only. I decided to post here some advices.

Resources:
- This guide
- Video on how to open and apply OCA Glass
- Video on how to apply OCA without machines

Where I bought things and what I used?
- IFixIt Pro Tech Toolkit
- Glass replacement with OCA
- Molybdenum string
- Isopropyl alcohol
- Heat Gun / Hairdryer

Advices:
- you need to have something that will hold your screen still. It will move a lot, adhesive is strong as hell
- do not apply too much heat: if it's hot to touch, probably is too much (max 80°C)
- make sure to have A LOT of time, a LOT of patience and a LOT of molybdenum
- do not push on the internal screen and its components: go against glass, not the "LCD"
- screen-frame adhesive cannot be reused, you need a new one

At this point I need to tell you that I failed and ordered a new screen from iFixIt.
I managed to get half of the work done, but then my string started to eat the internal screen :(

Marcin Pabich -

Should I remove the thin blue backing off(has what look like serial number stickers on it) the new screen before install? Thanks

Chris Vann -

When installing a replacement screen be sure to remove the black plastic cover that obscures the selfie camera hole, otherwise you won't be able to take selfies!

Josh -

I didn't notice this cover when closing it up, so it didn't want to close at the top edge. Still doesn't close snugly, and the front camera doesn't work now, but idk if it's worth trying to get the screen off again and risk breaking the new display. T_T It would have been helpful to have some information on what to remove from the new screen in the article.

Hitch -

Update, a few minutes later: I was able to fix it! The adhesive was fresh enough that a little heat was enough for me to get just the top edge open enough to slip in a pair of tweezers and remove the covering. Camera is now functioning.

Hitch -

Thank you Hitch!

I encountered the same situation and could solve it just as you did.

mikg -

how important is it to put the display cable bracket back on?? I forgot then sealed up

Kyle Walker -

Hi Kyle,

The display cable bracket with the piece of foam holds the connector in place. Without it, the connector just holds with a little friction and is likely to come off by vibration or shock. Your mileage may vary. At least you know how to fix it, should it come off. Keep the bracket in a safe place.

What I do not know is, if there is a possibility for electrical damage on the screen or the mainboard, should the connector not come off completely, leaving just some contacts connected. But given the low currents, damage seems not very likely. At least in my experience, these things are relatively robust.

mikg -

Hello! Does anyone know if it is possible not to change the whole screen of the phone but somehow to reattach the upper glass only? My problem is that the screen itself is fine but the glass goes off a bit in the left upper corner and now there's a several mm whole in between the glass and the screen. Is it possible somehow to fix it without changing the whole screen? Thanks a lot for your replies!

Lily -

The replacement screen isn't sitting flush with the phone. What have I missed?

Thanks

Jon Smith -

Hi Jon,

If it is on the top, you likely didn't remove the cover that obscures the selfie camera, which will prevent you from taking selfies too (see comments above). Happened to me and solved it, like Hitch described.

Other possibilities include incomplete cleaning of the old adhesive, torn application of the new adhesive or having some other 'body' lodged between frame and screen.

Best of luck!

mikg -

le tuto est genial tout fonctionne merciiiiiiii

Moi Tusauraspas -

Having issues with the proximity sensor after replacing display. Screen no longer turns off when against face on calls, nor does flip to shh work. I checked for all protective films, nothing present (looked just like the original display and even just like what's pictured above). What do I need to do?!

Kyle Walker -

I have used iFixit guides to repair phones/tablets numerous times over the years, and this is yet another thorough, well put together guide that led to another successful repair.

One thing to pay attention to is the additional hyperlinks/steps needed to reinstall the fingerprint sensor and follow them carefully. For anyone who hasn't messed around with installing custom ROMs on phones/tablets, this might seem a bit daunting, but it's just a matter of following the steps carefully and you should be able to get it done - make sure that you are using the Chrome browser too - I wasn't able to get this to work with Firefox.

One last note on the Pixel 7 driver installation if you're on Windows and have already downloaded the driver - make sure to extract it somewhere easy to find (like the Downloads folder). In Device Manager, Pixel 7 was located under "Universal Serial Bus devices". Once you're ready to select the file to install, you only need to select the folder - it will install the correct driver file.

Christopher Ingram -

Just did this! I appreciate the guide! If I had to write a caution to anybody below are things I think I could have done better.

-I put the pick in too deep and bent a spring

-I rushed myself to remove the adhesive, hindsight I should have some solvent or brake cleaner and a wooden toothpicks

- I rushed to try and put the adhesive on, it felt like I took my time but I didn't.... #hindshight...

Allan Whitney -

Hi, Im from Ecuador and my Google Pixel 7 has a broken screen. There's no place here that sells the screen and can fix it. Do you really recommend that I buy the screen or buy another phone?

Dome Niama -

Just replaced the screen. All was good, including the fingerprint sensor (for that you have to go through the steps outlined in many other comments, and use a good USB cable) but what's missing from this guide is the part on how fix the adhesive, which is quite critical and delicate. I recommend this video, also from iFixit (even if it's for the Pro version the steps are the same): https://www.youtube.com/watch?v=Uag55fu5...

Sergio Nalin -

Moin, ich versuche bei euch mein Glück.

Ich suche ein defektes aber noch funktionierendes Display für ein Goggle Pixel 7. Es wird nur zur Datenrettung benötigt, weil meins komplett schwarz ist nach einem Wasserschaden. So das ich den Datenmodus aktivieren kann.

Vielleicht habt ihr noch nicht alle entsorgt.

MfG R. Gierth

ragie@freenet.de

Ralf Gierth -

This mainly worked and i was able to extract the data from the phone. However after glueing in the new screen it is not seamless woth the housing and standing out like almost 1mm. It looks like the screen did not fit into the inner clamps and is now only attached by the glue. Any ideas?

Patrick -

Moin zusammen,

mein Google Pixel 7 hat einen Wasserschaden erlitten und funktionierte danach nicht mehr. Ich habe es zur Reparatur gegeben, aber es wurde nur gereinigt und unrepariert zurückgegeben.

Ich habe dann herausgefunden, dass offenbar nur das Display defekt ist – alles andere scheint zu funktionieren. Ich habe eine Maus und Tastatur per USB angeschlossen und mich über die Microsoft Smartphone-Link-App mit Screenshots behelfen können. Mit TalkBack konnte ich die Eingaben besser verstehen und bin zu dem Schluss gekommen, dass bis auf das Display alles funktioniert (es gibt nur kleinere Darstellungsfehler, wahrscheinlich durch das defekte Display).

Jetzt überlege ich, ob es sich lohnt, das Display selbst zu tauschen. Hat jemand Erfahrungen damit oder würdet ihr eher empfehlen, sich ein neues Gerät zu kaufen?

Vielen Dank schon mal für eure Hilfe!
Jakob

Jakob Ströhlein -

I took off the old screen and replaced it with my new screen, yet it still doesn't display. It has life (vibrates and can do things I think). This was the same issue with the old screen, and I thought replacing screens would work. Any suggestions?

Matthew -

Great guide! The most annoying part was removing the old screen adhesive, so make sure to have some isopropyl alcohol on hand for a repair – only a sad little wipe is provided in iFixit's kit. Other than that, everything else went as intended.

Marat Ismailov -

I was apprehensive to begin with but the kit is really helpful. Some patience, common sense and work is all that is needed. Just like other posts, scraping off the old adhesive was the most time consuming step. And fingerprint calibration is super easy - just takes a couple minutes and it is done.

One more thing I want to add is that it is easy to miss the adhesive fixing steps in this tutorial - there is a small link which takes you to a different page. I kind of missed it and ripped out the entire adhesive before applying on the phone. It is clearly shown in the video tutorial though.

Rakesh S -

Thanks to this guide and ifixit in general, I do not need to purchase a new phone! I was worried when my phone had signs of water damage/screen failure; but took the screen off and had a more knowladgeable friend take a look and say the internals were fine.

The money spent on the fixit kit was reasonable but a bit nervewracking because there was no guarantee the phone would work, but ifixit does accept returns and I do value repairability so I decided to go for it.

This guide was excellent and helped with being able to safely take the screen off without puncturing anything. The trickiest part was removing and adding the adhesive. I do wish the guide went into a bit more depth as far as re-assembly; specifically tips on applying the adhesive. But the linked guide was good at giving general directions and the included strip was well designed.

10/10 would recommend.

I do not currently have the fingerprint reader working; I have a modified version of android flashed on my phone so am not sure how to proceed there.

projectproxy -

Worked like a charm, it even made my fingerprint reader work better after having to calibrate it twice. My only gripe is that the inserting of the screen is almost impossible, I spent a good hour at least just trying to press this connector in. After looking on YouTube for a bit to see how others do it I attempted to kind of approach it from the side and let the connector "roll" onto the other connector. After which I was able to press it in.

Tijmen -

Just wanted to post this in case anyone had trouble with the fingerprint sensor calibration. Specifically ending up in a rescue mode boot loop after a failed attempt to connect to the phone in fastboot mode.

I'm not sure what happened but when using the pixelrepair tool it would detect the phone but kept coming back with an error "unable to connect". It was late on a weeknight so I decided I'd try again the following day and just use a PIN for a day. After rebooting, the phone booted into rescue mode, I did a force reboot (pwr+vol_up) and the same happened again. Did another force reboot but then pressed vol_down to enter fastboot, selected "start" and it went back to rescue mode again. Tried everything to get the phone to reboot into the OS to no avail. I couldnt even access the Android recovery menu. I ended up having to connect it to my computer again and use the "ADB reboot" command to get it to boot the OS.

After this the pixelrepair tool compleated the fingerprint sensor calibration properly.

Curtis Murphy -

Hi - Since following the instructions and replacing the screen, the finger scanner is not working. Any solution? David G

David Griffiths -

Please read the comments. They list the steps needed to re-calibrate the fingerprint sensor.

Jason D -

I actually cut the old one off the damaged screen to see how it fits mechanically (i.e. does is 'click' inot position or is the connection only secured when the retainer clip is reinserted. It turns out that a little 'click' inot position is needed. David G

David Griffiths -

Thanks to all the warnings about the adhesive. The longest part was removing every last bit of old adhesive. I cut the new adhesive into small manageable pieces and left the top sheet on until I was done connecting the screen ribbon (use your finger!) and ready to fully push the screen completely in. There were two layers on the top of the adhesive, 1 piece the size of the phone and 1 as thin as the adhesive itself, only seen after removing the first larger sheet. I had to use tweezers to remove it. The fingerprint calibration has way less steps on a Mac than on PC. Solid kit. Thank you iFixit!

Jason D -

I am planning to replace my screen due to water damage. However, the power button on my phone has also been damaged and i do not plan to replace this. Is there a way to go i to fast boot mode for fingerprint reader calibration without a functional power button?

Saurabh Subramanian -