Einleitung

Diese Anleitung zeigt, wie du den Joystickdrift am PlayStation Dual Sense V1 Kontroller reparieren kannst. Joystickdrift bedeutet, dass die Spielfigur oder -objekt sich unbeabsichtigt bewegt, obwohl du die Joysticks garnicht berührst. Das führt zum Spielabbruch und Frustration.

Mehr Informationen dazu findest du in diesem Artikel (Englisch).

Beachte, dass die Anleitung nur für den PlayStation Dual Sense V1 Kontroller für die PlayStation 5 gilt, nicht für Dualshock 4 Controller der PlayStation 4.

Schalte vor Reparaturbeginn den Kontroller ganz aus.

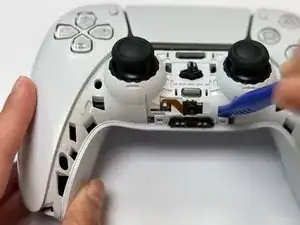
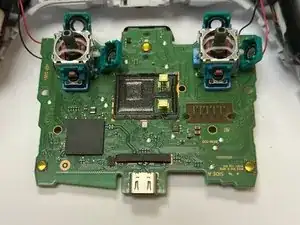
In der Anleitung wird gezeigt, wie du ins Innere des Kontrollers und an die Joysticks gelangst, um dort den Schmutz mit hochkonzentriertem Isopropylalkohol zu beseitigen.

In der Anleitung erfährst du nicht, wie andere Probleme beseitigt werden, die diesen Drift auch verursachen können. Das kann einfach ein kaputter Joystick sein oder andere Defekte. Weitere Hinweise zur Reparatur des Dual Sense V1 Kontrollers für die PlayStation 5 findest du hier:DualSense Controller V1 Reparatur und DualSense Joystick tauschen.

  1. 6AGjlQlMrKhLdEYG
    6AGjlQlMrKhLdEYG
    G1JYAROMtqAIUVC5
    kG5k2IbrSdW1DYaC
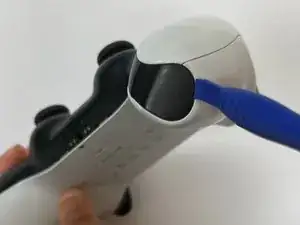
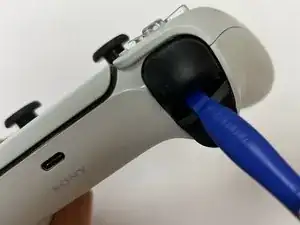
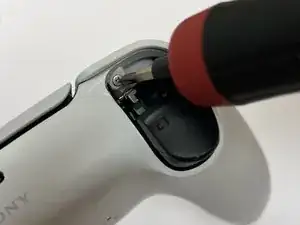
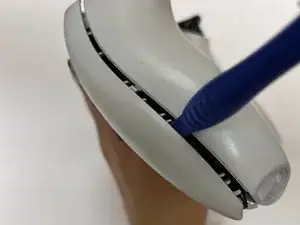
    • Setze ein Öffnungswerkzeug in die untere rechte Ecke des Kontrollers ein.

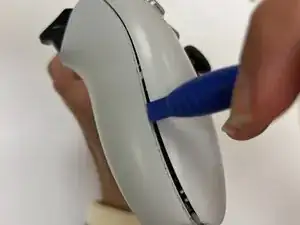
    • Heble mit dem Öffnungswerkzeug hoch.

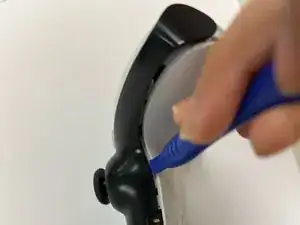
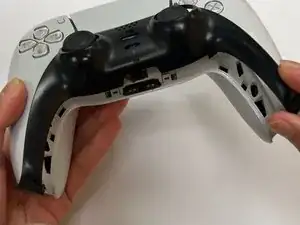
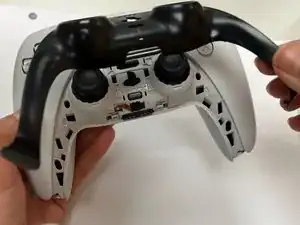
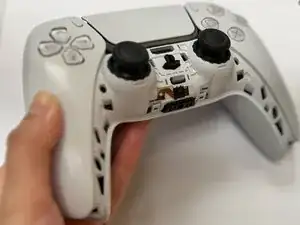
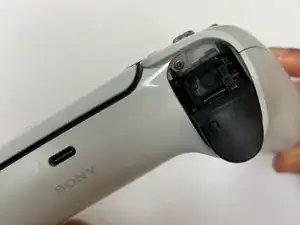
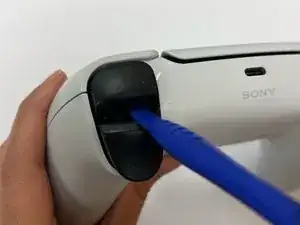
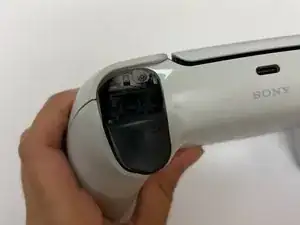
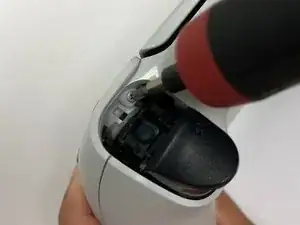
    • Heble die schwarze Blende mit dem Öffnungswerkzeug weiter auf.

    • Wiederhole an der anderen Seite.

  2. IUZWqnKRWrt3EyAb
    IUZWqnKRWrt3EyAb
    jScJx4Oqekw1MuxD
    RfFHRVP2mij6B6wS
    • Hebe die schwarze Abdeckung hoch und entferne sie.

    When reassembling, pull both joysticks downward, to get the 2 top prongs in first.

    Brandon Ward -

  3. 4v6FW1yS4F5Taaac
    4v6FW1yS4F5Taaac
    4MnsW53uTEOMV6FO
    • Setze das Öffnungswerkzeug unterhalb der L1-Taste ein und heble die Taste vom Kontroller ab.

  4. SiNhmVYNGRMCwrGf
    SiNhmVYNGRMCwrGf
    cOqaYO6xZPSVMZQu
    • Setze das Öffnungswerkzeug unterhalb der R1-Taste ein und heble die Taste vom Kontroller ab.

  5. XOQysw54fVeXNXtZ
    XOQysw54fVeXNXtZ
    GFcAk2YLKa2YDPcY
    • Löse die beiden Rasten in der Mitte mit deinen Fingern oder einem Öffnungswerkzeug.

    These are "snitches" - meant to be damaged by the ham-fisted to deny warranties. A note to recheck these halfway through Step 8 would be good

    Brandon Ward -

  6. DrxygS6AtQWAandw
    DrxygS6AtQWAandw
    lTJuebyjNWIAncZx
    • Entferne die beiden 6,4 mm langen Kreuzschlitzschrauben #00 oben links und rechts.

  7. jdDNFfNSMbGKZUqS
    jdDNFfNSMbGKZUqS
    x14MOsYvcpRNAdTQ
    • Entferne die beiden 6,4 mm langen Kreuzschlitzschrauben #00 unten links und rechts.

  8. lXQlxvE3ZFFe1S5H
    lXQlxvE3ZFFe1S5H
    cYWVuCRKHHnTfP6g
    • Setze das Öffnungswerkzeug zwischen die beiden Gehäuseteile ein und öffne das Gehäuse.

    2 more "snitches" at the top of the first photo. Tiny little snaps 1/4" down from the L1/R1 buttons. There must be a VERY specific way to pry these without breaking them, opening like a clam as shown in Step 9 definitely breaks them.

    Brandon Ward -

    They're useless, and won't affect anything but your warranty.

    Brandon Ward -

    Exactly, it's difficult to locate the strong ones. I was trying from diffrent angles eventually it let go

    Olek Osikowicz -

    This tool is one that did the trick for me, double ended metal pryer. Kit is the Jorest Cleaning Repair Kit off Amazon.

    Dougie Robertson -

  9. CJiTfmGZJuGoAeiW
    CJiTfmGZJuGoAeiW
    WOYTYGdCpEaWGVZl
    • Entferne das untere weiße Gehäuseteil mit den Händen.

  10. 1o4SqKEbeu3ZL1HX
    1o4SqKEbeu3ZL1HX
    HhEKnhVs32djJ5uV
    RHp6sBTQR4tcligd
    • Trenne den Akku mit einer Pinzette oder deinen Fingern von der Hauptplatine ab.

    Word of caution, using tweezers like the one similar in the picture and one that I own from iFixit with the metal tips and ESD safe printed on it. I was using the tweezers to disconnect the battery, and I saw a spark quickly appear and disappear when I was attempting to disconnect it.

    Needless to say, when I assembled it back together, it didn't turn on because the battery short circuit. I bought a similar replacement battery online and it worked once again.

    My recommendation would be to use a type of all plastic tweezers to remove the battery portion, so you don't short circuit the battery.

    Dave -

  11. PykajZ3kTPBFHeX2
    PykajZ3kTPBFHeX2
    6IIulMhIQXAQA2XC
    EZnEwbPbhrRFbWHx
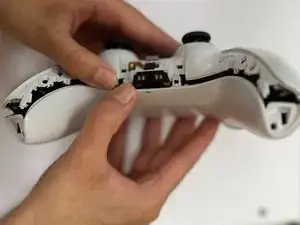
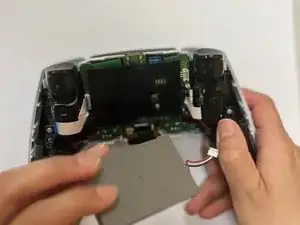
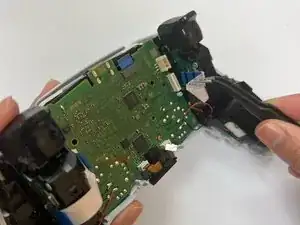
    • Ziehe das orangene Flachbandkabel mit den Fingern oder einer Pinzette ab.

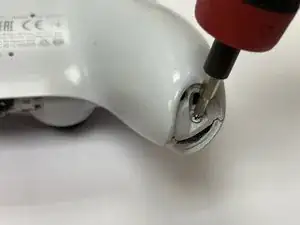
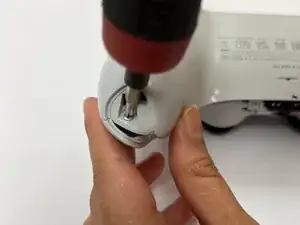
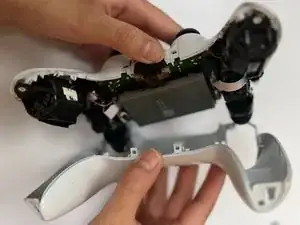
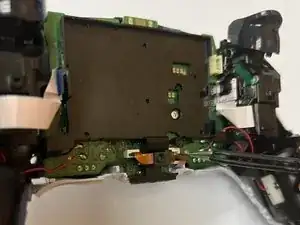
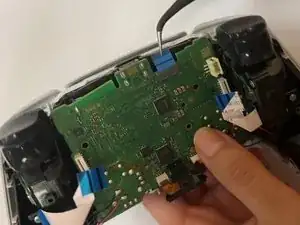
    • Entferne die 6,4 mm lange Kreuzschlitzschraube #00.

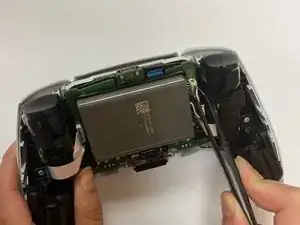
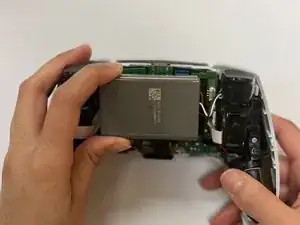
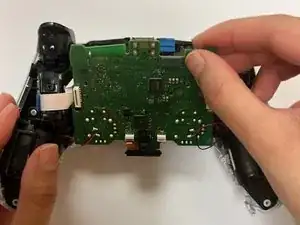
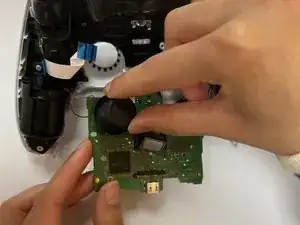
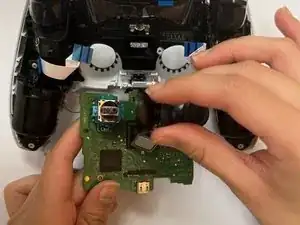
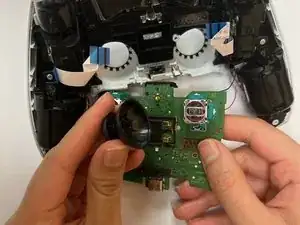
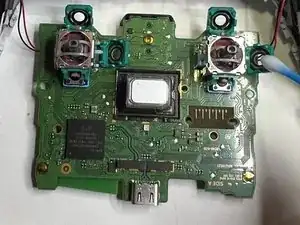
    • Hebe den Akkuhalter hoch.

    The ribbon to the left center front of the battery tray is the one to remove. The one on the right center front will be removed in the next step.

    Retired Tech -

  12. OmhuX3FOb2qKFeSe
    OmhuX3FOb2qKFeSe
    VsPL4pKXMTEVRXQh
    Wn33BbAOK4TwgkrG
    • Trenne die vier Flachbandkabel von der Hauptplatine ab.

    Be ultra careful with this. The pins underneath the the right connect are extremely thin, like hairs. It is all too easy to completely demolish them with just a modest amount of pressure.

    Giorgio -

  13. TQvUavKQN66LOwKu
    TQvUavKQN66LOwKu
    LP21tEmrcQHf4cTV
    • Führe die Joysticks durch das vordere Gehäuseteil und hebe die Hauptplatine hoch.

    There are two plastic clips near the triggers, holding down the motherboard.

    Quinten.exe -

  14. CmvhvsAUM51nVBTG
    CmvhvsAUM51nVBTG
    tsxqJB21OQkiewBA
    XNw5Agh43LG5Po5l
    • Ziehe die Abdeckungen über den Joysticks gerade nach oben und entferne sie.

  15. 2nLyRX4HO1YOnGaX
    2nLyRX4HO1YOnGaX
    3p1tPgACQARICljp
    w6dUKtKCAJY2gDqn
    • Nimm das Öffnungswerkzeug und löse die grünen Laschen ab.

    Metal pry knife is better for this step, once you've done one with the plastic pry, and see/feel how it works. The green "tabs" aren't on hinges, you're bending the tabs soldered to the mobo.

    Be ready for the first wiper disc to go flying.

    Brandon Ward -

  16. h4kyaOIvgkTdlBKT
    h4kyaOIvgkTdlBKT
    hiXfdhbWWkXcJkMb
    raISIeT5ukREbgR5
    • Entferne die weißen Scheiben mit einer Pinzette.

  17. fbpNAZEiQVWtsZYK
    fbpNAZEiQVWtsZYK
    3r1iBRCIJUWFvPJB
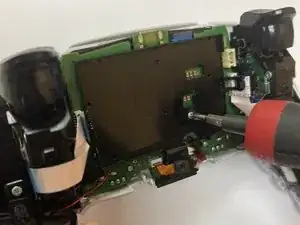
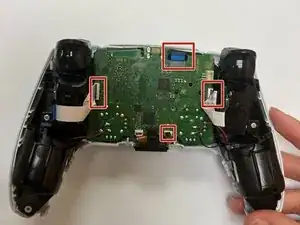
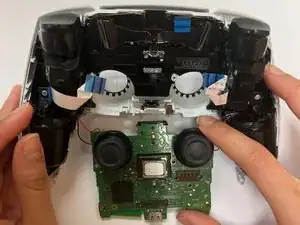
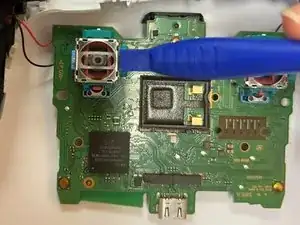
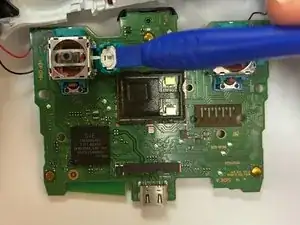
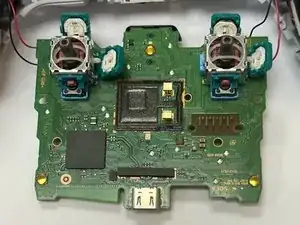
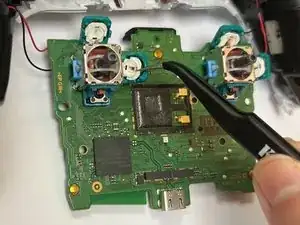
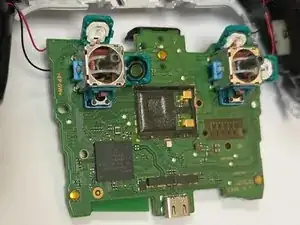
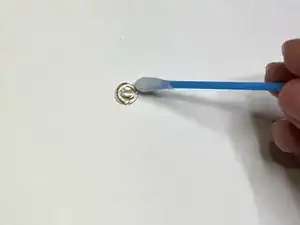
    • Reinige die Rillen in den grünen Laschen und die Scheiben mit einem Wattestäbchen und hochkonzentriertem Isopropylalkohol (mindestens 90%ig).

    Whats thats small gray piece in the middle

    Einstein jr -

    I imagine its linked to the touchpad functionality...

    Ed Greenwood -

Abschluss

Um dein Gerät wieder zusammenzubauen, folge den Schritten in umgekehrter Reihenfolge.

Yadsari

Mitglied seit: 01/11/23

1554 Reputation

13 Kommentare

Just cleaning the carbon track on the potentiometer is not really a long term fix for stick drift. Better fixes would be to either replace the photometers or to replace the complete stick with a hall-effect joy stick.

David Fear -

Do you have a link?

Nora -

I did it, sadly cleaning wasn't enough. So I guess I'll have to replace something.

Riedweg Guillaume -

There is now a real fix for this, hall effect mod by Jun Zheng. About $25 per pair of mods. Check out the guys YouTube, link to his AliExpress store in his video description. Just use the guide here for disassembly. https://youtube.com/@junZeng-520?si=UYbf...

Alex Lao -

Upon reassembly I get the three orange blinks error. Research says there’s a ribbon connection error, is that right? I went through steps again and checked all connections, but no change. Have I short circuited something? Would replacing the potentiometer even fix it at this point? Have I damaged a ribbon? (There is no visible damage).

joe lewis -

Hi!

Did you fixed the issue? I have the same problem.

Voyteck -

Hi im also having this issue and ive replaced both sticks. Weird think is on the pc test everything is fine. Just when connected to a playstation

Michael Douglas -

I would be super careful when trying this I did it and ended up making the stick drift way worse. I'm almost certain it's my own stupidity but regardless I would look towards different options than to take apart the joystick.

MiniStab311 -

Worked for me :)

Max Luchterhand -

Worked for me as well!

Vincent Claes -

I did it it worked thank you!

Some tips:

- watchout for two microphones (looks like small round lego piece with orange ribbon) when assembing back together almost lost it

- Be gentle when redoing step 8 (closing the cover) both halfs have to fit perfectly on top of each other before pressinng.

Olek Osikowicz -

Come si rimette

Lina Boughendja -

Worked for my Dualsense V1 as well as my Xbox Series X controllers. All three have been working fantastic since following this repair. Thanks!

Cameron Kiryluik-Gavin -