Einleitung
Diese Anleitung wurde von iFixit-Mitarbeitern erstellt und nicht von Google unterstützt. Erfahre hier mehr zu unseren Reparaturanleitungen.
Dies ist nur eine grundständige Anleitung! Sie ist nicht zum alleinigen Gebrauch gedacht.
-
-
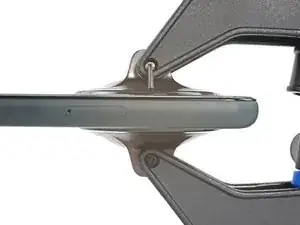
Displaynaht: diese Naht trennt das Display vom restlichen Smartphone. In dieser Naht darfst du nicht hebeln.
-
Blendennaht: Das ist die Naht zwischen der Blende, die als Schutz um das Display verläuft, und dem Rahmen. Die Blende ist durch Kunststoffrasten befestigt. Hier kannst du mit deinem Werkzeug hebeln.
-
-
-
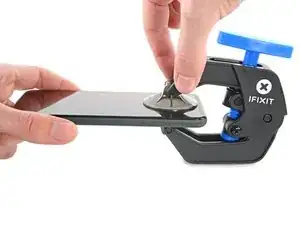
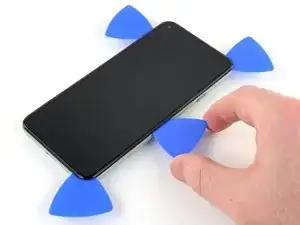
Drücke den blauen Griff zum Scharnier hin, um den Öffnungsmodus auszustellen.
-
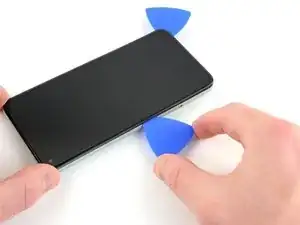
Bringe die Saugheber nahe an der Unterkante des Displays an, einen auf der Vorderseite, den anderen auf der Rückseite.
-
Drücke die Saugheber auf den Oberflächen fest.
-
-
-
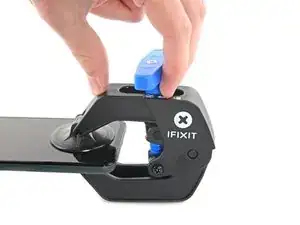
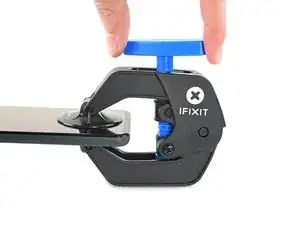
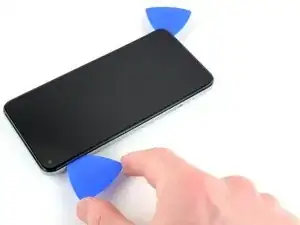
Drücke den blauen Griff vom Scharnier weg in die Stellung für den Öffnungsmodus.
-
Drehe den Griff im Uhrzeigersinn, bis du merkst, dass sich die Saugheber dehnen.
-
Warte eine Minute, damit sich der Kleber allmählich ablösen kann und ein Spalt entsteht.
-
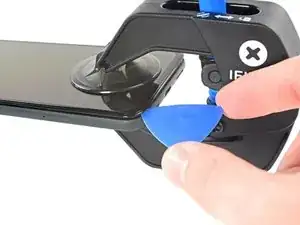
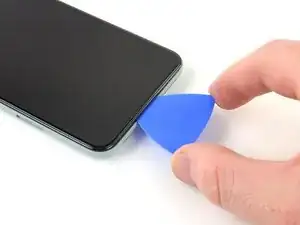
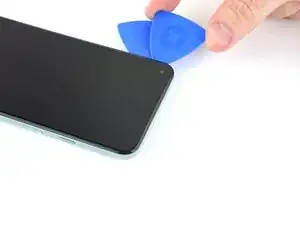
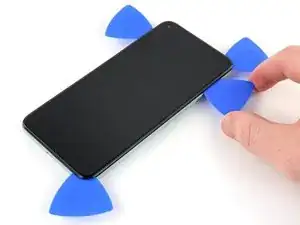
Wenn der Spalt groß genug ist, dann setze ein Plektrum unter das Display und seine Schutzblende ein.
-
Überspringe den nächsten Schritt.
-
-
-
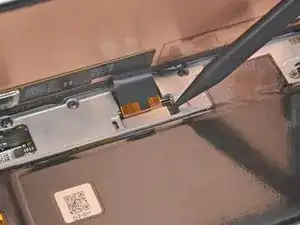
Bringe einen Saugheber so nahe wie möglich an der erhitzten Kante an.
-
Ziehe fest und gleichmäßig am Saugheber, bis ein Spalt entstanden ist.
-
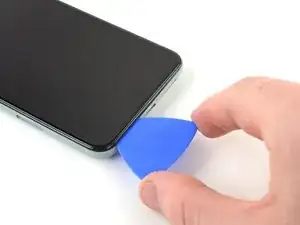
Setze ein Plektrum in den Spalt ein.
-
-
-
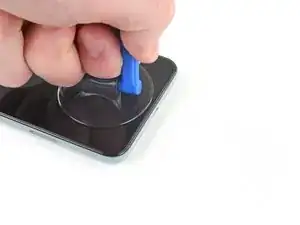
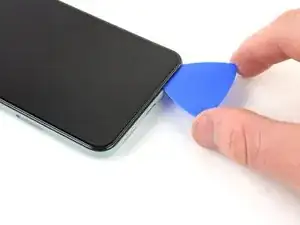
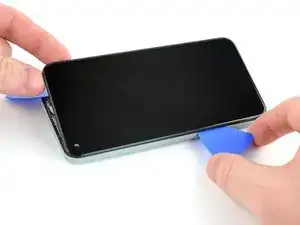
Schiebe das Plektrum an der Unterkante vor und zurück, um den Kleber am Display aufzutrennen.
-
Lasse das Plektrum in der unteren rechten Ecke stecken, damit sich der Kleber nicht wieder verbinden kann.
-
-
-
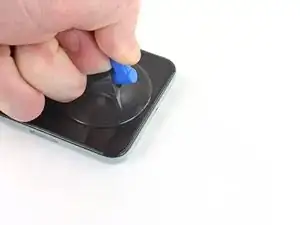
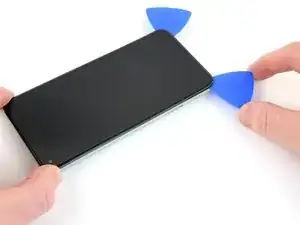
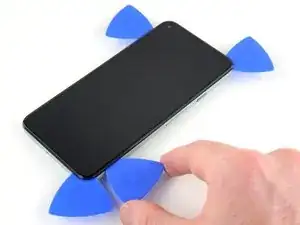
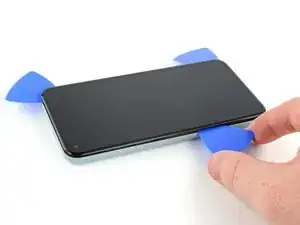
Setze ein weiteres Plektrum in die untere linke Ecke des Displays ein.
-
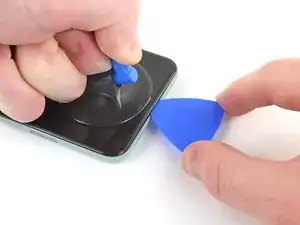
Schiebe das Plektrum um die untere linke Ecke herum.
-
Schiebe das Plektrum weiter in Richtung Frontkamera, um den Kleber an der linken Kante aufzuschneiden.
-
Lasse das Plektrum stecken, damit sich der Kleber nicht wieder verbinden kann.
-
-
-
Setze ein weiteres Plektrum in die obere linke Ecke des Displays ein.
-
Schiebe das Plektrum um die Frontkamera herum und an der Oberkante des Smartphones entlang.
-
Schiebe das Plektrum zur oberen rechten Ecke hin und lasse es stecken.
-
-
-
Setze ein Plektrum in die untere rechte Ecke des Displays ein.
-
Schiebe das Plektrum an der rechten Kante entlang nach oben, um den restlichen Kleber aufzuschneiden.
-
-
-
Hebe das Display mit dem Plektrum in der oberen linken Ecke ein paar Millimeter hoch. Dadurch wird verhindert, dass die Rasten wieder am Gehäuse einschnappen.
-
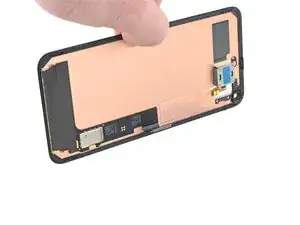
Klappe das Display von der rechten Seite her wie ein Buch auf.
-
-
-
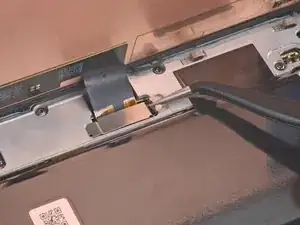
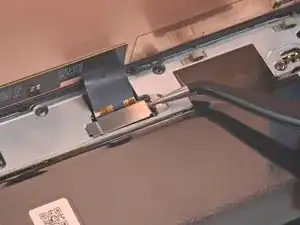
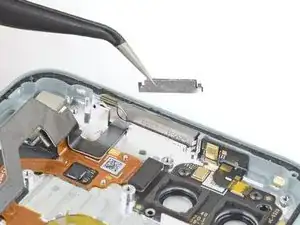
Die Abdeckung am Displaystecker sichert das Flachbandkabel zum Display. Fasse sie mit einer Pinzette an.
-
Schiebe die Raste zum Entsichern in Richtung des Steckers.
-
-
-
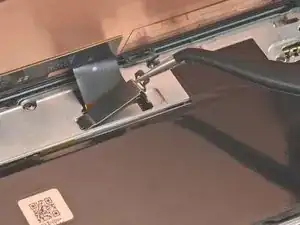
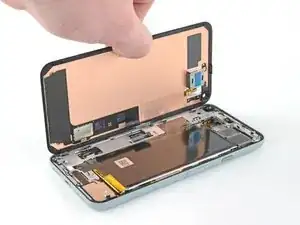
Fasse das Display nur an den Kanten an.
-
Wenn du das Display auf die Arbeitsfläche ablegst, achte darauf, dass kein Fremdkörper die Rückseite berührt. Am besten legst du das Display auf ein sauberes, weiches und fusselfreies Tuch.
-
-
-
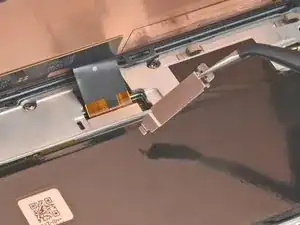
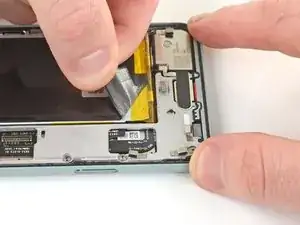
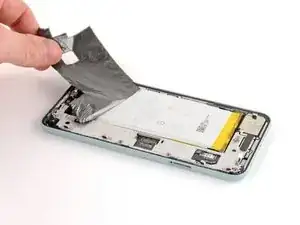
Hebe das Graphitband mit einer Pinzette hoch, bis es du es mit den Fingern greifen kannst.
-
Löse das Graphitband ab.
-
-
-
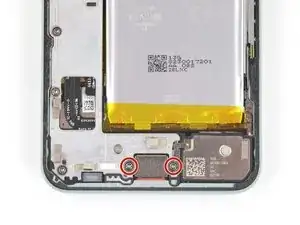
Entferne die beiden 4,6 mm langen Torx T3 Schrauben, mit denen die Abdeckung der Ladeplatte am Mittelrahmen befestigt ist.
-
-
-
Entferne die acht 4,6 mm langen Torx T3 Schrauben, mit denen der Mittelrahmen befestigt ist.
-
-
-
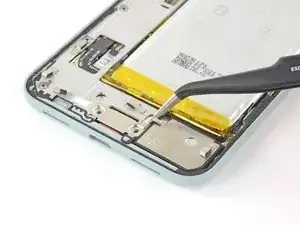
Hebe die rechte Seite des Mittelrahmens mit der Pinzette hoch.
-
Entferne den Mittelrahmen.
-
Der Abstandshalter oben im Smartphone fällt beim Ausbau des Mittelrahmens meistens heraus. Bewahre diesen Abstandshalter gut bis zum Wiederzusammenbau auf. Die Bilder dazu findest du in der Anleitung zum Austausch der Hauptplatine.
-
-
-
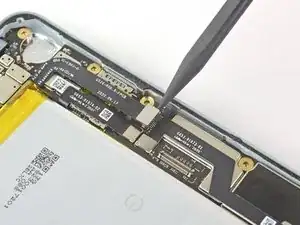
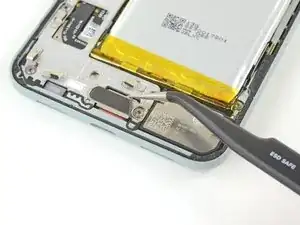
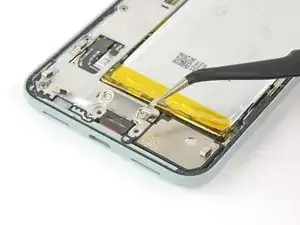
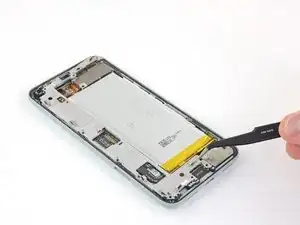
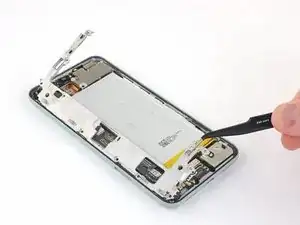
Heble den Akkustecker mit der Spudgerspitze gerade nach oben und löse ihn von der Hauptplatine ab.
-


Um dein Gerät wieder zusammenbauen, folge den Schritten in umgekehrter Reihenfolge.

It would be helpful to know for how long ally the heated pad
Yuri Deglin -
Agreed, my friend from the past.
Albert Einstein -
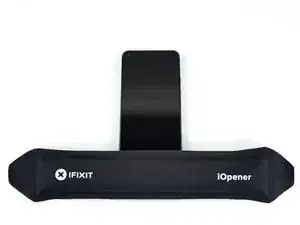
If you click on the "iOpener" link, it tells you to heat it up for 30 seconds, and if you're using a microwave with a carousel, make sure it moves freely.
Azurina Schalk-Smith -
How long do you think it would take with a hair dryer?
Gen L. -
Don't have a microwave, so I boiled the kettle, left the iOpener in for 5 minutes and it was a good temperature to go. Doesn't need to be that hot to be effective
Rick -
i damaged my digitizer using a hair dryer ugh
marco -